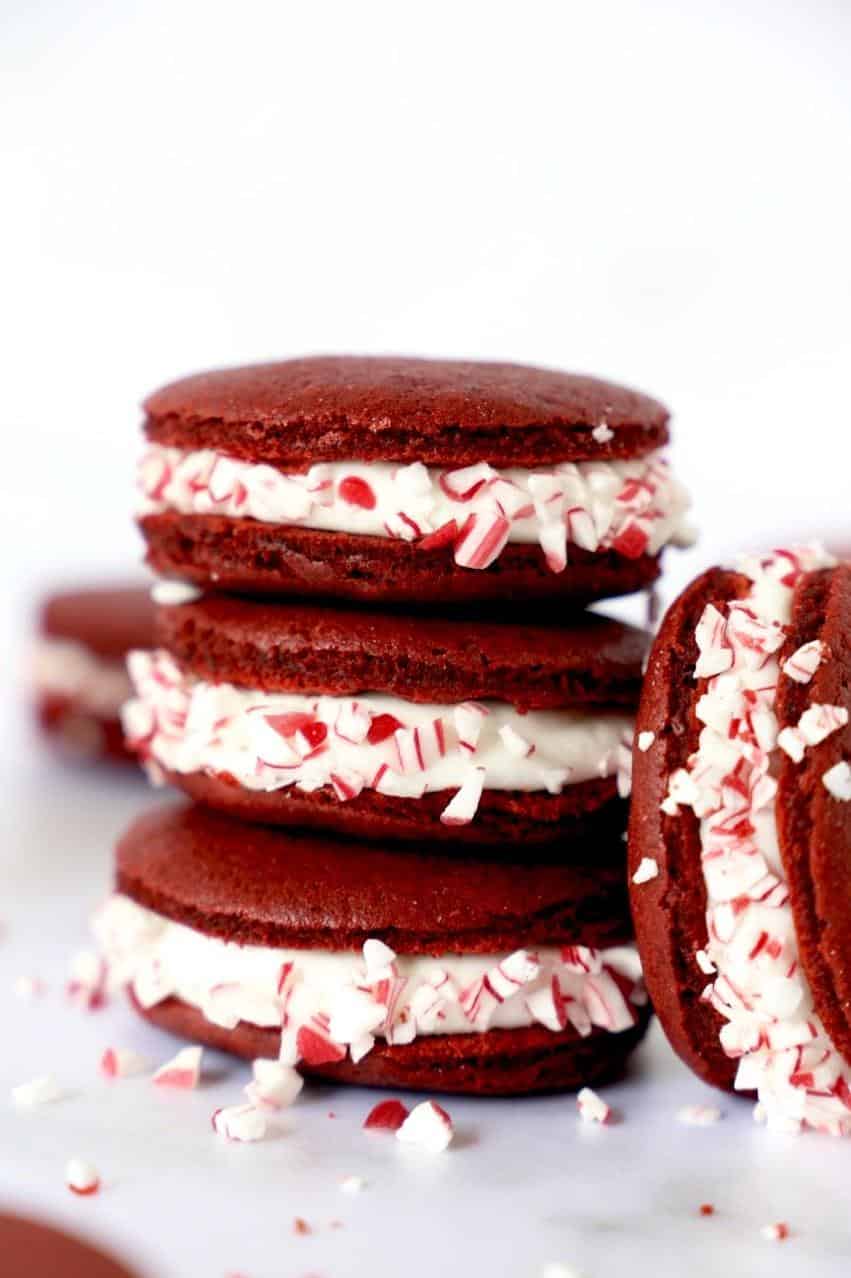
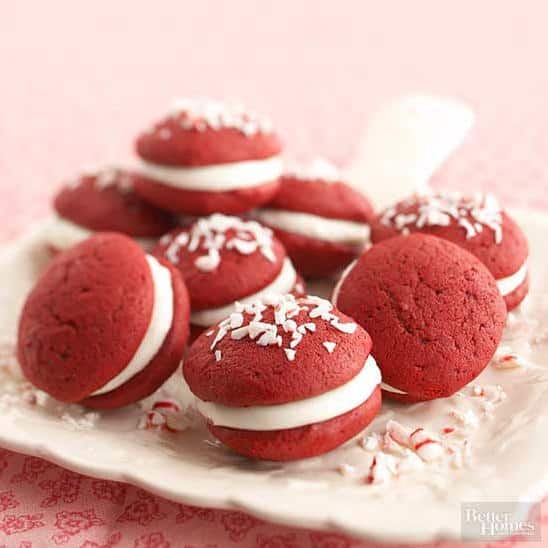
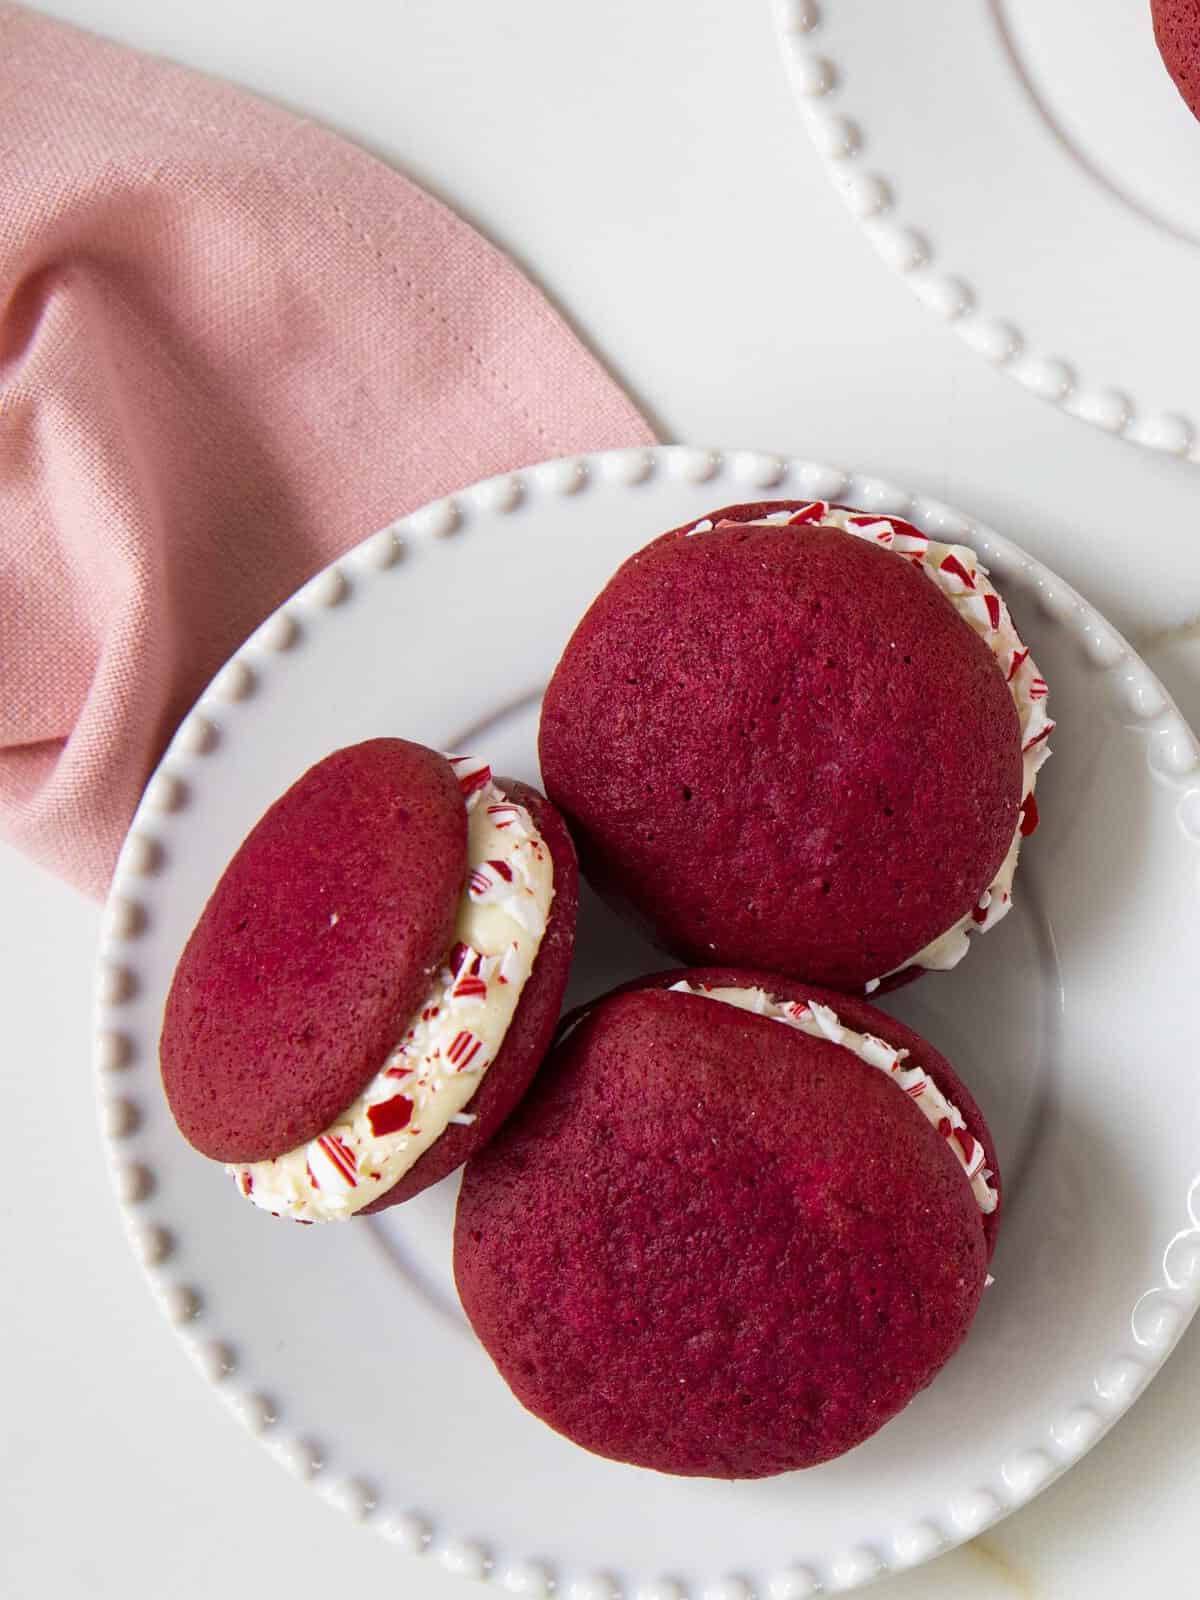
Delicious Peppermint Red Velvet Whoopie Pie Recipe
Greetings fellow baking enthusiasts! I am excited to share with you a delightful recipe that will satisfy your sweet tooth cravings. Introducing the Peppermint Red Velvet Whoopie Pie Recipe, a heavenly treat that will transport you to dessert heaven.
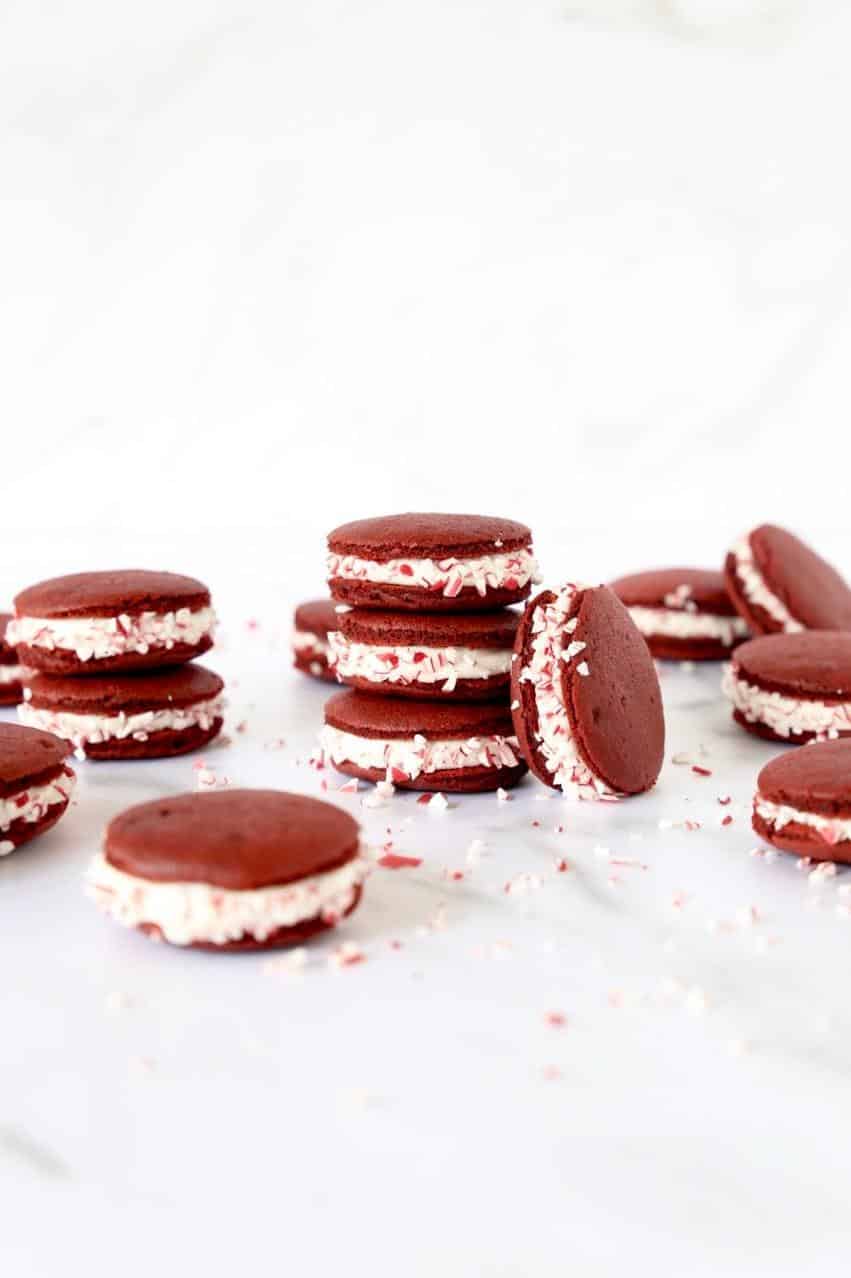
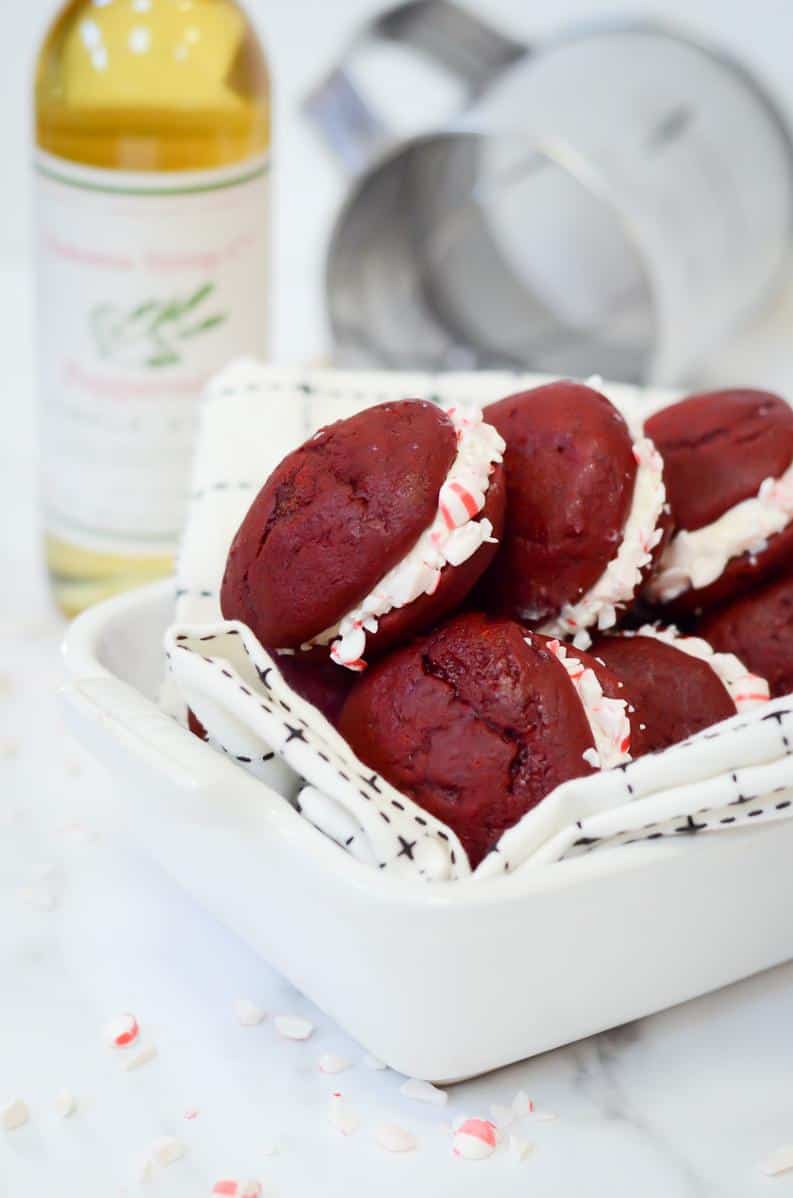
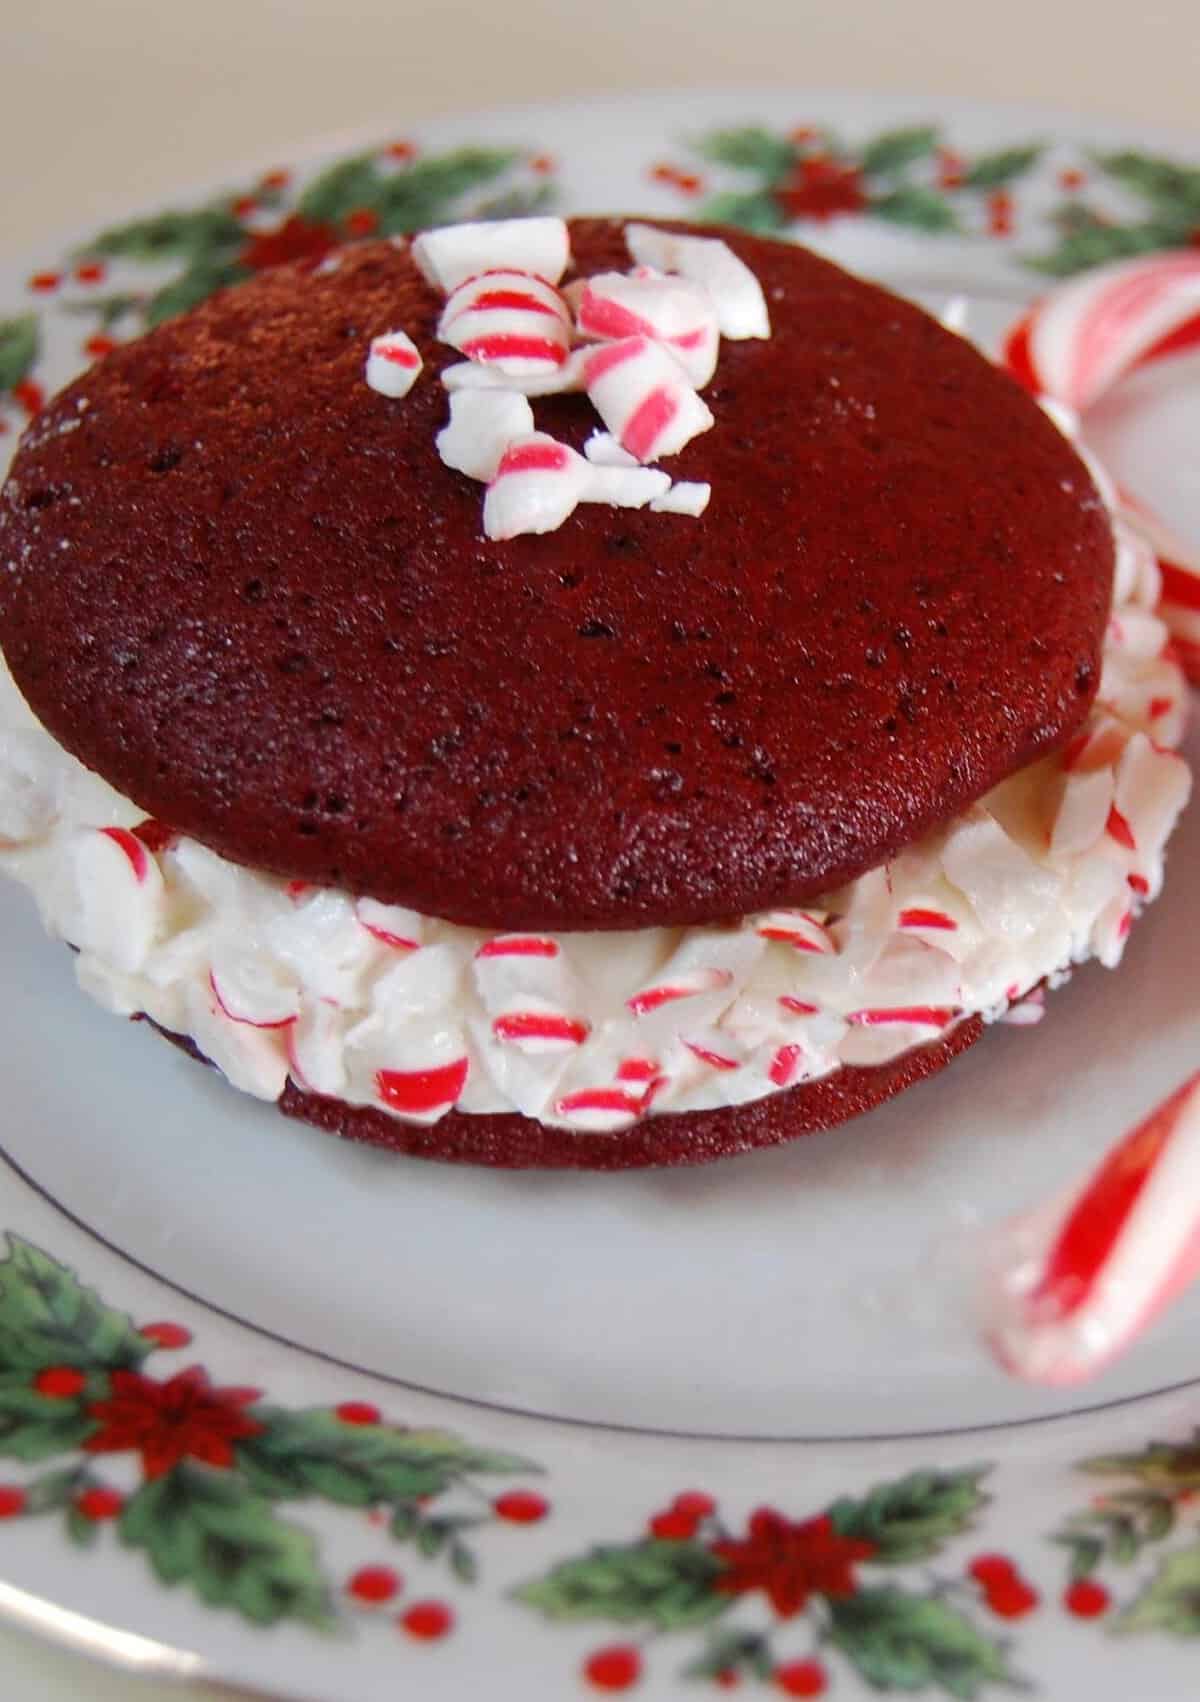
Get ready to indulge in a luscious combination of cake-like cookies filled with creamy peppermint frosting, all wrapped up in the classic red velvet flavor we all adore. Not only does this recipe boast an irresistible taste, but it’s also visually stunning with its vibrant red hue and creamy white filling.
As a passionate baker, I believe in using high-quality ingredients to ensure the most delicious results, and this recipe is no exception. With just a little bit of patience and the right ingredients, you too can create these mouth-watering whoopie pies that are perfect for any occasion, from holiday parties to summer picnics.
So let’s gather our tools and ingredients and get ready to bake! Trust me, once you take a bite of these flawless whoopie pies, you’ll wonder how you ever lived without them.
Why You’ll Love This Recipe
My dear readers, I can’t wait to share with you why this Peppermint Red Velvet Whoopie Pie recipe is absolutely irresistible.
Firstly, let’s talk about the red velvet flavor. If you’re a fan of the classic cake or cupcakes, then you’re going to be head over heels for these whoopie pies. The cake-like texture with hints of cocoa and vanilla extract combined with tangy buttermilk creates a symphony of flavors that will leave you wanting more.
But now, let’s add peppermint to the mix. This isn’t just any ordinary peppermint flavoring – we’re talking about the perfect amount of peppermint extract that gives an extra kick without overpowering the rest of the flavors. And that’s not all – the creamy and refreshing peppermint filling inside makes these whoopie pies the ultimate festive treat.
Lastly, these whoopie pies are not only delicious but also a great option for sharing with loved ones during Christmas time. They’ll be impressed by your baking skills and blown away by how scrumptious they taste. They’re perfect for holiday gatherings or even as a sweet treat on a cozy night in.
In conclusion, this recipe has it all – incredible flavors, stunning presentation, and unbeatable holiday spirit. Trust me when I say you won’t find another dessert quite like this one. So what are you waiting for? Gather your ingredients and get ready to indulge in one of the best holiday treats out there!
Ingredient List
To make the cake, you’ll need sugar, eggs, unsalted butter, kosher salt, baking soda, baking powder, all-purpose flour, cake flour, chocolate pudding mix, buttermilk, red velvet cake mix (I recommend Duncan Hines), white distilled vinegar and canola oil.
For the peppermint cream cheese filling, you will need softened cream cheese, unsalted butter, confectioners’ sugar, peppermint extract and cold water.
Additionally, to add the perfect finishing touch to these velvet peppermint pies you’ll need powdered sugar and milk for a sweet and creamy glaze on top.
The Recipe How-To
Now let’s dive into the most important part: how to make these Peppermint Red Velvet Whoopie Pies!
Ingredients
Before starting the process, make sure you have all the ingredients at hand. Check your pantry and fridge to ensure you’re not missing anything. As a reminder, you’ll need:
- 2 cups of all-purpose flour
- 1/2 cup of cake flour
- 1/2 cup of chocolate pudding mix
- 1 teaspoon of baking soda
- 1/2 teaspoon of baking powder
- 1/2 teaspoon of kosher salt
- 3 eggs
- 1 cup of buttermilk
- 1/4 cup of unsalted butter, softened
- 1/4 cup of vegetable shortening
- 3/4 cup of sugar
- 1 tablespoon of white distilled vinegar
- 1 tablespoon of red food coloring
- 1 teaspoon of vanilla extract
- Candy canes (for an extra festive touch)
Directions
Here are the steps you need to follow to create perfect Peppermint Red Velvet Whoopie Pies.
Step One: Making the Batter
Begin by preheating your oven to 375°F. In a medium mixing bowl, sift together the all-purpose flour, cake flour, chocolate pudding mix, baking soda, baking powder, and kosher salt.
In another mixing bowl, beat together the eggs, buttermilk, unsalted butter, vegetable shortening, and sugar with an electric mixer on low speed for about two minutes until smooth. Next, add in the white distilled vinegar and gradually pour in the dry ingredients mixture while continuing to beat on low speed. Once everything is combined, add in the red food coloring and vanilla extract and beat again until everything operates smoothly.
Step Two: Baking
Using a cookie scoop or spoon, place dollops of batter onto a cookie sheet lined with parchment paper. Bake them for 15 minutes or until they rise and their edges become light brown. Once done, remove them from the oven and cool on wire racks for at least ten minutes.
Step Three: Making the Peppermint Filling
While allowing the whoopie pies to cool down, prepare a yummy peppermint cream cheese filling that will fill in between our cookies using cream cheese, unsalted butter, confectioners’ sugar,peppermint extract and crushed candy canes
(optional). Beat together unsoftened cream cheese__and __unsalted butter with an electric mixer on medium speed until buttery smooth. Gradually add in the powdered sugar and peppermint extract while continuing to mix until reaching fluffy cream-like texture. You can also make this peppermint filling ahead of time and store it in an airtight container in your
Substitutions and Variations
Are you out of a specific ingredient or looking for a way to switch things up? Try out these substitutions and variations for the perfect peppermint red velvet whoopie pie recipe!
– Instead of cream cheese, try using mascarpone cheese for a slightly different twist on the classic cream cheese filling.
– For a lighter version of the recipe, replace half of the butter with vegetable or canola oil. You can also use low-fat buttermilk instead of full-fat buttermilk.
– Not a fan of peppermint? Switch out the peppermint extract for vanilla extract, almond extract or even coconut extract.
– Swap out the red velvet cake mix for chocolate cake mix and add in some crushed candy cane pieces to the cream cheese filling mixture for a delicious chocolate peppermint whoopie pie.
– If you prefer cookies over pies, try making this recipe into cookie form. Scoop tablespoon-sized portions onto a baking sheet instead of forming them into pies and bake for 10-12 minutes until they’re golden brown.
Remember that substitutions and variations can affect the final outcome and taste of your whoopie pie, so don’t be afraid to experiment and find what works best for you.
Serving and Pairing
Once you’ve finished baking these scrumptious peppermint red velvet whoopie pies, it’s time to serve them up and enjoy! These delectable treats are perfect for any time of day and make an excellent dessert or sweet snack. They have the perfect balance of sweet, creamy, and chocolaty flavors that are sure to please your taste buds.
When it comes to serving, presentation is key. I recommend placing the whoopie pies on a simple plate, garnishing with some crushed candy canes, and dusting them with powdered sugar for a touch of elegance. This will not only showcase their appearance but also create an exquisite aroma that will delight your guests.
Pair these delightful treats with a hot cup of coffee, tea, or milk for an extra cozy experience. The contrasting flavors of the creamy peppermint filling and red velvet cookies complement each other perfectly and make for a wonderful combination.
For those who want to elevate their serving game even further, try adding a scoop of vanilla ice cream on top or drizzling some chocolate syrup over the pies. This adds another layer of complexity to the already marvelous dessert.
No matter how you choose to serve these delicious peppermint red velvet whoopie pies, they are sure to satisfy your sweet tooth and impress all who indulge in them!
Make-Ahead, Storing and Reheating
When it comes to making and storing peppermint red velvet whoopie pies, there are a few things you should keep in mind. These red velvet beauties can be made ahead of time, stored for a few days, and even reheated if desired.
If you’re short on time, you can make the cakes one day ahead of time and store them at room temperature in an airtight container. The next day you can make the filling and assemble the pies when ready to serve.
These delectable treats can also be stored for a few days in the fridge. Simply place your whoopie pies in an airtight container and store them in the refrigerator for up to three days. But remember, these cakes are delicate and frosting makes them soft, so handle them with care.
If you want to keep them longer than that, consider freezing them instead. To do this, wrap each cake individually in plastic wrap or aluminum foil and place them into a freezer-safe bag. Label the bag with the date so you can keep track of when they were frozen.
When it comes to reheating your whoopie pies, it’s best to do so by allowing them to come back to room temperature first. This will help prevent hardening from microwaving or overcooking from being placed in the oven without thawing.
In summary, if you’re planning ahead for an event or just want to enjoy these scrumptious treats throughout the week: make-ahead, store appropriately and reheat gradually. That way you’ll ensure the best quality and taste from your peppermint red velvet whoopie pies every time.
Tips for Perfect Results
So you’ve got all of your ingredients ready, and you’re eager to start preparing your peppermint red velvet whoopie pies. Before you begin, however, allow me to offer you some tips to ensure that your end product is nothing short of perfect.
Firstly, make sure the butter for the peppermint cream cheese filling is at room temperature for easy blending. You can leave it out for a few hours or speed things up by heating it in the microwave for about 10 seconds.
When it comes to creating the peppermint cream cheese filling itself, keep beating until it becomes light and fluffy. An electric mixer should make this task easier for you.
Next, add the confectioners’ sugar gradually into your mixture using a sifter or fine-mesh sieve. This will help prevent any lumps in your icing. Also, remember to scrape down the bowl occasionally with a spatula to ensure that everything is fully combined.
If you want a stronger mint flavor in your peppermint cream cheese filling, don’t hesitate to add more peppermint extract. A quarter teaspoon at a time should do the trick without it being too overpowering.
For the red velvet cookie part of the whoopie pies, it’s essential that you use cake flour instead of all-purpose flour. This will give them their signature tender and cake-like texture, which cannot be achieved with other flour types.
I recommend using aluminum-free baking powder when baking, as they release carbon dioxide throughout the whole baking process rather than just during heating. This will result in a lighter and softer bite.
Lastly, handle your chocolate peppermint candies carefully when crushing them for decoration or adding them to filling. The candy canes should be crushed into small bits using a food processor or by hand while wrapped in plastic bags.
Follow these tips closely and prepare yourself for perfect peppermint red velvet whoopie pies every time!
FAQ
Now, it’s time to address some of the most frequently asked questions about this Peppermint Red Velvet Whoopie Pie recipe. Even though the process may seem a bit intimidating, baking these treats takes just a few easy steps. Don’t hesitate to check out the answers to common queries before getting started, as they may help you achieve the perfect result on your first try. Let’s dive into the FAQ section!
What is the filling in whoopie pies made of?
Whoopie pie filling usually consists of two popular options, vanilla buttercream and marshmallow cream. The former is typically created with a mixture of butter, powdered sugar, milk or cream, and vanilla extract. On the other hand, the marshmallow cream filling is commonly made from butter, powdered sugar, Marshmallow Fluff, and vanilla extract. These two alternatives offer distinct flavors that complement the soft, cakey texture of the whoopie pie.
Why do whoopie pies get sticky?
Making whoopie pies requires a unique approach compared to regular cookies. This is because the batter used is similar to that of a cake rather than the usual cookie dough. As a result, the baked cookies have a soft, cake-like texture instead of a crisp one. It’s worth noting that the batter may be a little sticky to work with.
Do homemade whoopie pies need to be refrigerated?
To get the most out of your Whoopie Care creation, it’s important to follow proper storage guidelines. For ultimate delight, allow the Whoopie to reach room temperature before consuming. Remember to store it in an airtight container and refrigerate or freeze it until ready to devour. If kept refrigerated, the Whoopie will maintain its freshness for ten days. Alternatively, you can freeze it for up to two months without compromising its quality.
What is the difference between gobs and whoopie pies?
Gobs and Whoopie Pies may have different names depending on the region, but they are essentially the same delectable treat. There are claims from various states about the origin of the Whoopie Pie, with both Maine and Pennsylvania presenting strong arguments. As a Pennsylvania resident, I am definitely biased towards our claim.
Bottom Line
In conclusion, this Peppermint Red Velvet Whoopie Pie Recipe is an absolute must-try for anyone who loves the combination of chocolate, peppermint and cream cheese. With its moist cake-like cookies and heavenly cream cheese filling, this recipe is sure to become a hit with your family and friends.
But don’t just take our word for it, try it out for yourself! Follow the step-by-step instructions, and feel free to experiment with different substitutions and variations to make it even more delicious.
And with tips for perfect results, make-ahead options, storing and reheating recommendations, this recipe is also incredibly convenient and versatile. You can even pair it with your favorite hot beverage or dessert wine for an extra special treat!
So what are you waiting for? Grab your baking ingredients and get started on this delectable Peppermint Red Velvet Whoopie Pie Recipe today. Trust us, your taste buds will thank you!
Peppermint Red Velvet Whoopie Pie Recipe
Ingredients
Strawberry Cake
- 3 cups cake flour
- 1 tablespoon baking powder
- 1/2 teaspoon kosher salt
- 1 cup milk
- 1/2 cup seedless strawberry jam
- 2 -3 tablespoons red food coloring
- 2 cups sugar
- 1 cup canola oil
- 1 teaspoon vanilla extract
- 1 teaspoon white distilled vinegar
- 3 eggs
Dark Chocolate Cake
- 2 1/2 cups cake flour
- 1/2 cup plus 1/3 cup cocoa
- 2 teaspoons baking soda
- 1/2 teaspoon kosher salt
- 2 cups sugar
- 3/4 cup unsalted butter
- 2 eggs
- 1 teaspoon vanilla extract
- 1 cup buttermilk
- 1/3 cup chocolate pudding mix
Peppermint Vanilla Cake
- 2 1/2 cups cake flour
- 3/4 cup all-purpose flour
- 1 tablespoon baking powder
- 1 teaspoon baking soda
- 3/4 teaspoon kosher salt
- 1/2 cup unsalted butter, softened
- 1/2 cup vegetable shortening
- 1 3/4 cups sugar
- 1 tablespoon peppermint extract
- 1 tablespoon vanilla extract
- 1 large egg
- 1 egg yolk
- 1 1/2 cups ice cold water
- peppermint cream cheese frosting, recipe follows
Peppermint Cream Cheese Icing
- 2 cups unsalted butter
- 1 1/2 lbs cream cheese
- 2 teaspoons vanilla extract
- 1/2 teaspoon peppermint extract
- 2 lbs confectioners' sugar
- 1/4 cup crushed peppermint candy (the soft meringue-like textured mints)
Instructions
- Peppermint Vanilla Cake:
- For the strawberry cake:
- Whisk together the flour, baking powder and salt in a medium bowl and set aside. Whisk together the milk, jam and food coloring in a small bowl and set aside. Beat together the sugar, oil, vanilla, vinegar and eggs in a mixer on medium-high speed until pale and smooth, 2 to 3 minutes. In three additions, alternately add the dry and wet ingredients to the sugar mixture, beginning and ending with the dry. Mix until combined.
- For the dark chocolate cake:
- Whisk together the flour, 1/2 cup cocoa, baking soda and salt and set aside. Cream together the sugar and butter. Add the eggs one at a time, creaming well after each addition. Mix in the vanilla extract. Add the flour mix and buttermilk alternately, beginning and ending with the flour.
- Mix the strawberry and the chocolate cake batters together. Add the remaining 1/3 cup cocoa and the chocolate pudding mix (this is the red velvet).
- For the white cake:
- Whisk the flours, baking powder, baking soda and salt together into a large bowl. Set aside. In a bowl of an electric mixer fitted with the paddle attachment, beat the butter and shortening on medium speed until creamy, 3 to 4 minutes. Add the sugar and extracts and beat on medium speed until fluffy, about 3 minutes. Scrape down the bowl, add the egg and egg yolk and beat until just combined. Turn the mixer to low. Add the flour mixture, alternating with the ice water, in three separate additions, beginning and ending with the flour mixture. Scrape down the bowl, then mix on low speed for a few more seconds.
- To make the whoopie pies: Preheat the oven to 350 degrees F. Line baking sheets with parchment paper.
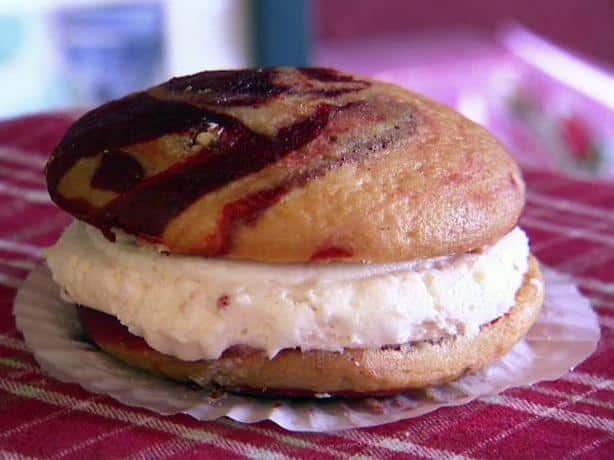
- Take 1 small ice cream scoop of the red velvet batter and place it on parchment paper. Then get a new 1 small ice cream scoop of the peppermint vanilla cake batter and layer it on top of the red velvet. Then using a knife, swirl the batters together by free hand. This creates one half of your whoopie pie.
- Bake until they are cooked through, about 12 minutes. When cool, pipe the Peppermint Cream Cheese Icing on one half and then top with another whoopie pie half.
- This recipe was provided by professional chefs and has been scaled down from a bulk recipe provided by a restaurant. The Food Network Kitchens chefs have not tested this recipe, in the proportions indicated, and therefore, we cannot make any representation as to the results.
- Peppermint Cream Cheese Icing:
- With an electric mixer and paddle attachment, cream the butter until smooth. Next, add the cream cheese and beat until fluffy. Next, add the vanilla (with the mixer on low speed) and peppermint extracts. Then, add the confectioners' sugar in small batches until fully incorporated. Mix until there are no lumps of sugar. Add crushed peppermints to the icing. Place the icing in a piping bag and then pipe onto one half of the whoopie pie and top with the second half.
Your Own Notes
Nutrition
Recommended Recipes Just For You

Steven is a chef by heritage, so it’s no wonder why baking is such a big part of who he is. To share his passion for all things sweet, he created cookiesncrepes.com. It’s the perfect platform to indulge in delicious treats, all with a sprinkle of his signature flare.