Snack Smarter: Homemade Granola Bars Recipe
Welcome to my recipe for Hudson’s Bay Bread, also known as homemade granola bars. If you’re looking for a delicious and convenient snack that satisfies your sweet tooth while providing some nutrition, then you’ve come to the right place! This recipe is perfect for anyone who is always on the go, busy with work or school, or needs a quick pick-me-up between meals.
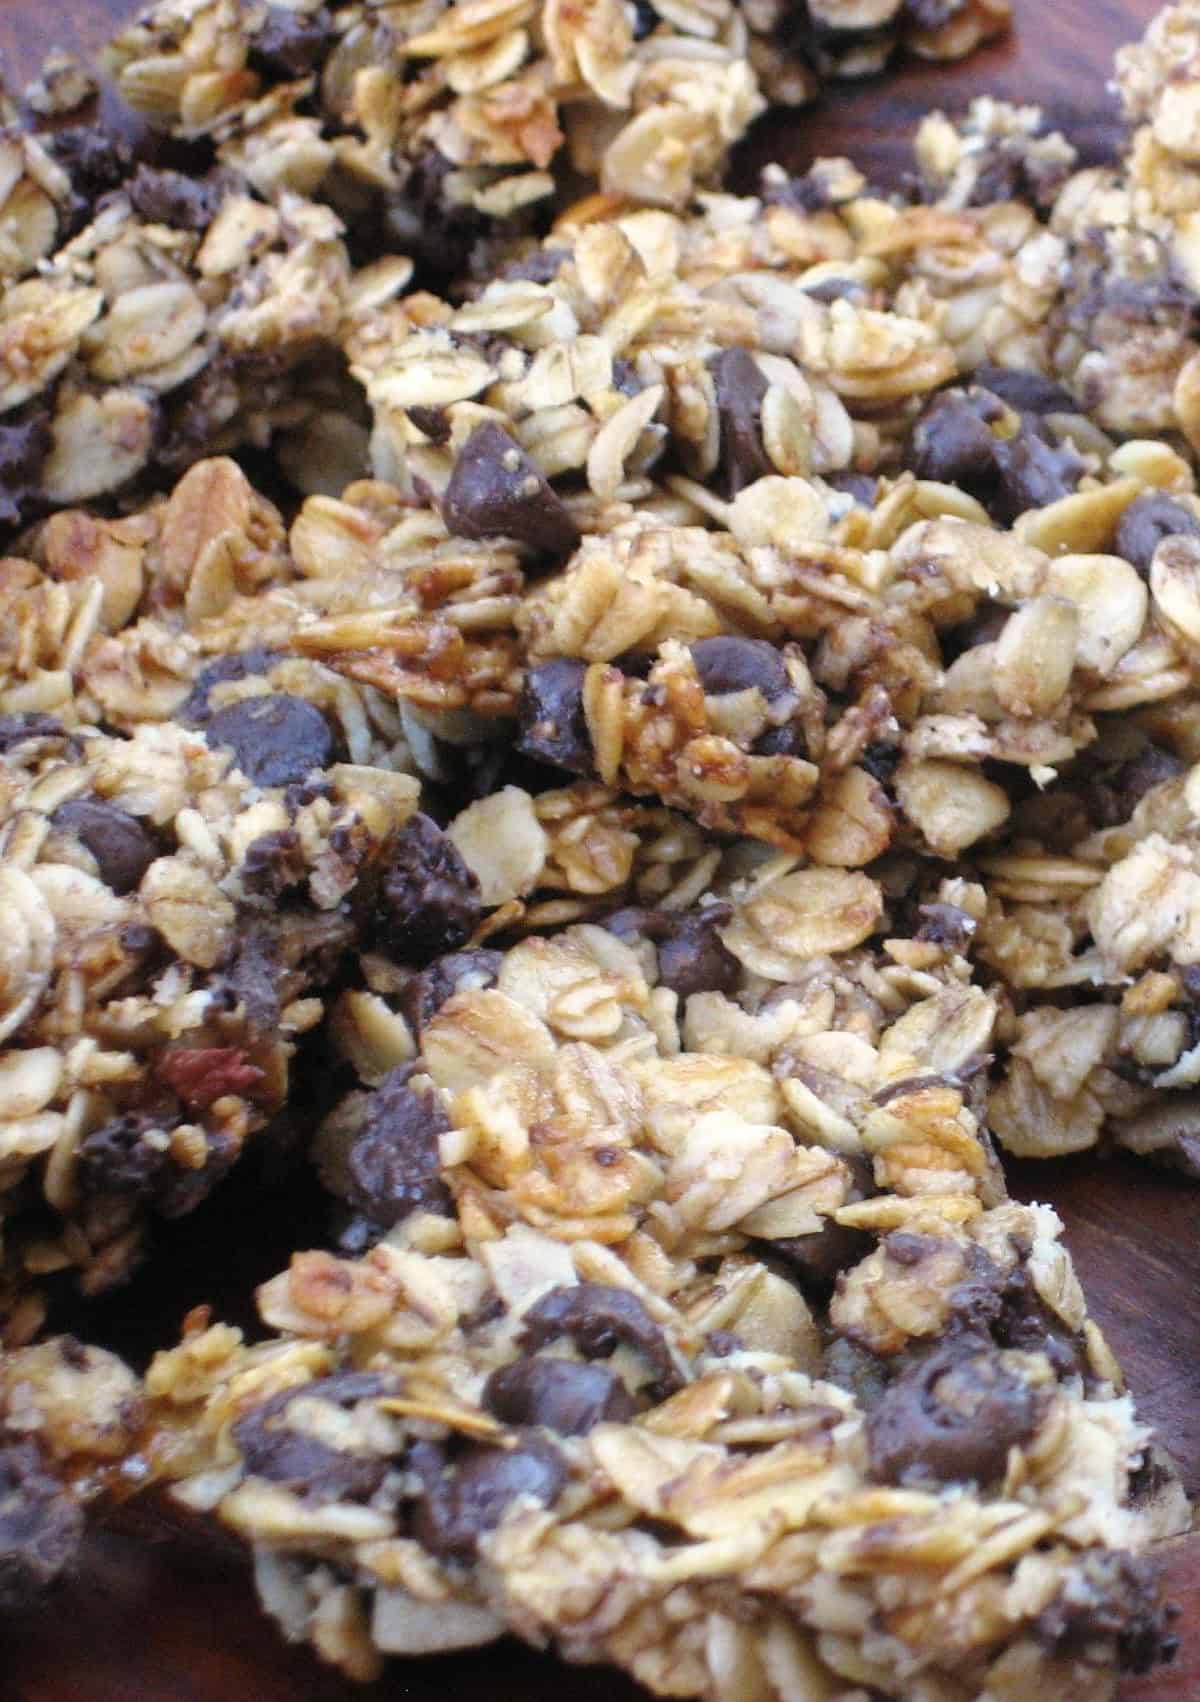
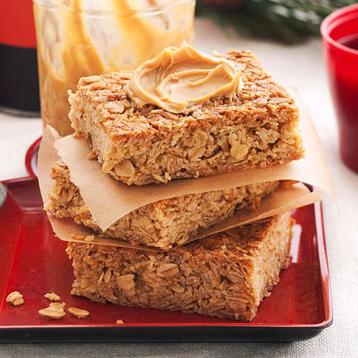
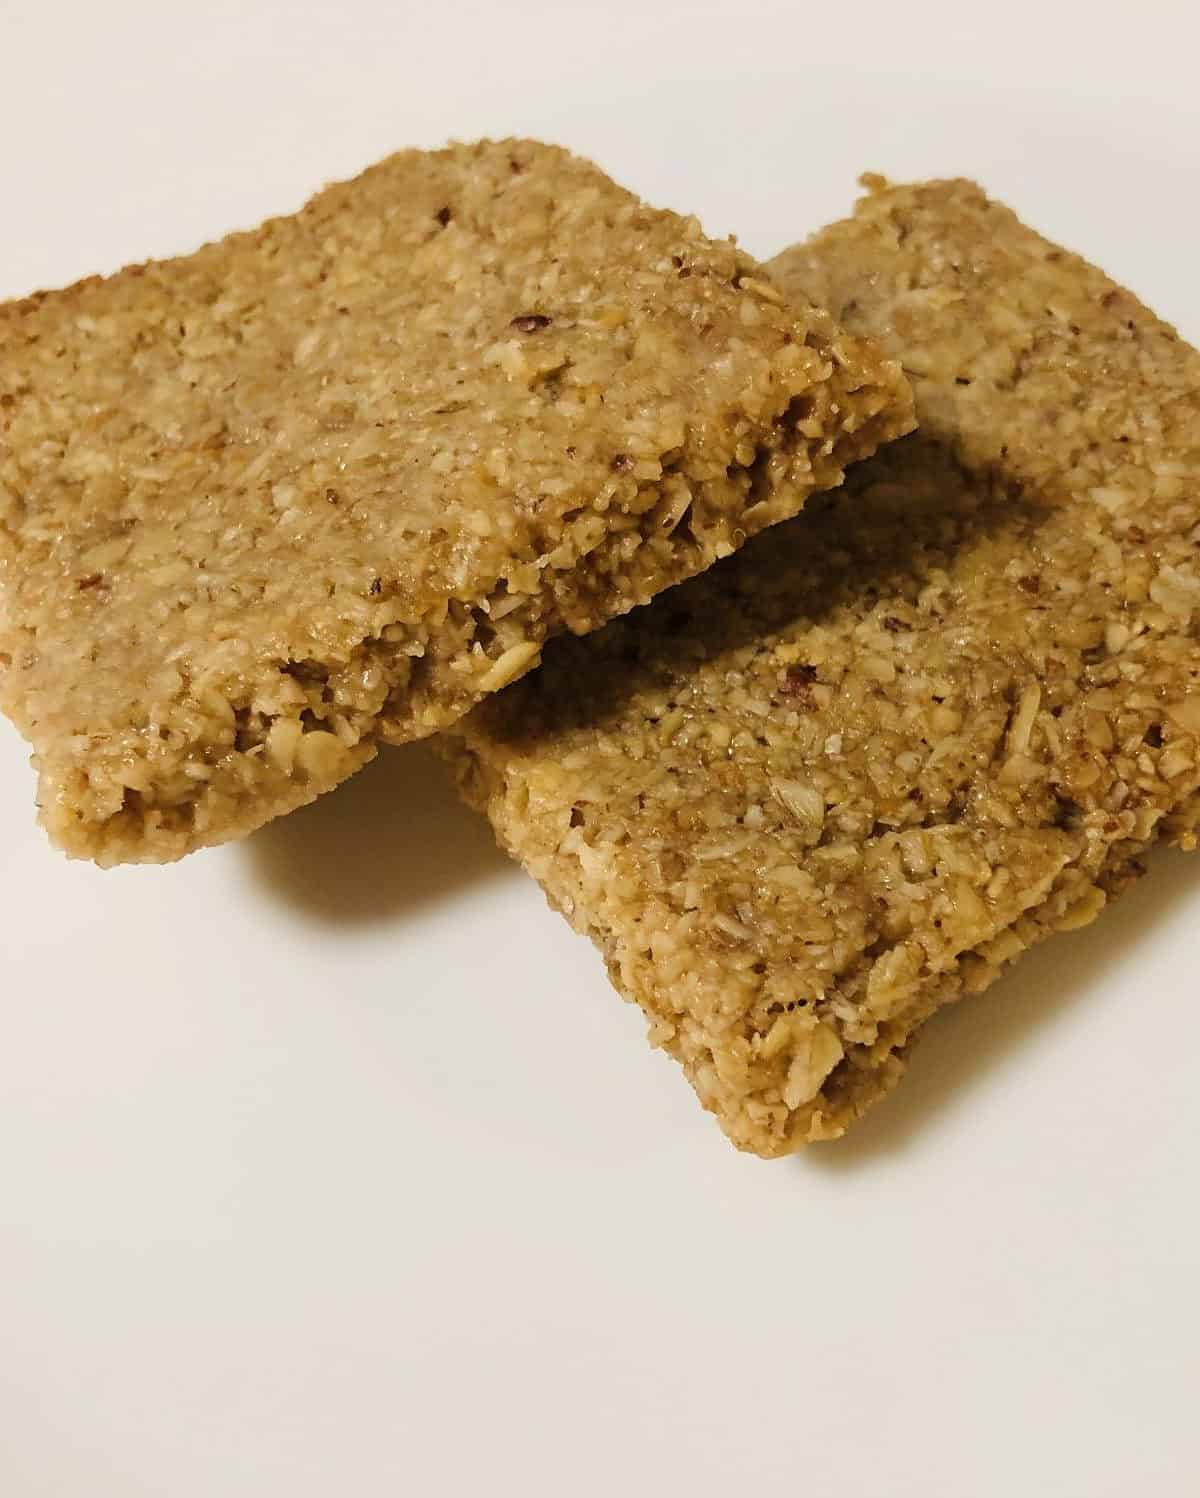
But what exactly is Hudson’s Bay Bread, you may ask? It’s a hearty and chewy bar made from rolled oats, peanuts, and chocolate chips held together with a sticky and sweet mixture of honey, sugar, and light corn syrup. It’s named after the iconic Hudson Bay, which is known for its rugged yet beautiful terrain — much like these homemade granola bars!
One of the best things about this recipe is that it’s incredibly versatile. You can customize it to suit your tastes or dietary needs. Want to make it low-carb or gluten-free? No problem! Simply swap out some of the ingredients according to your preferences.
So whether you’re hiking in the Boundary Waters or just need a midday snack at your desk, these homemade granola bars are sure to hit the spot. Let’s get baking!
Why You’ll Love This Recipe

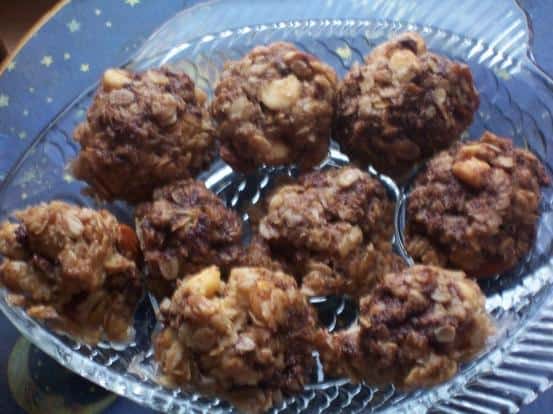
Hudson’s Bay Bread recipe, also known as homemade granola bars, is a must-try for all the snack lovers out there. This recipe is perfect for those who are always on the go and need a quick bite to eat. Whether you’re heading out on a hike or running errands, Hudson’s Bay Bread is the perfect snack to satisfy your cravings.
One of the reasons why you’ll love this recipe is its deliciously sweet taste. With its combination of sugar, honey, and light corn syrup, this granola bar provides just the right amount of sweetness without being overpowering. The addition of peanuts and chocolate chips creates a delightful contrast in textures.
Another reason why you’ll love this recipe is its versatility. You can easily substitute ingredients to make it gluten-free, low-carb or even sugar-free to meet your dietary preferences or requirements. You can also add some coconut flakes or dried fruits to make it even more nutritious.
Moreover, Hudson’s Bay Bread is extremely easy to make. All you need is a sheet pan lined with parchment paper and 30 minutes in the oven at 325 degrees Fahrenheit to enjoy these homemade granola bars fresh out of the oven.
Last but not least, Hudson’s Bay Bread recipe can be stored for up to a month or longer in an airtight container, so you can always have them on hand whenever hunger strikes.
In conclusion, Hudson’s Bay Bread recipe is perfect for anyone who loves a delicious and healthy snack that is simple to make and can be personalized according to your preferences. Give it a try and you won’t be able to resist going back for seconds!
Ingredient List
Here are the ingredients we need for making Hudson’s Bay Bread, a.k.a homemade granola bars:
Dry Ingredients
- 9 cups Old-fashioned rolled oats (not quick oats)
- 3 cups Peanuts
- 4 cups Semisweet chocolate chips
Wet Ingredients
- 2 cups Sugar
- 2 cups Light corn syrup
- 2 cups Margarine, melted (use real butter for better flavor)
- ½ cup Honey
It is recommended to use real butter instead of margarine in this recipe. It gives the granola bars a richer and creamier taste. Note that we use old-fashioned rolled oats instead of quick oats as they retain their shape better when baked, and result in chewy granola bars. Make sure to not use instant oats for this recipe. Honey can be substituted with maple syrup or brown rice syrup for a different flavor profile.
The Recipe How-To
Now that we know all the ingredients necessary to make our Hudson’s Bay Bread (Homemade Granola Bars), let’s start preparing this delicious treat!
Step 1: Preheat the Oven
- Heat your oven to 325 degrees F.
Step 2: Prepare a Sheet Pan
- Place a sheet of parchment paper on top of a 9 x 13 inch sheet pan.
Step 3: Combine Ingredients
In a large mixing bowl, combine:
- 9 cups of oats
- 2 cups of brown sugar
- 3 cups of melted margarine
- 1/2 cup of honey
- 2/3 cup of light corn syrup
- 1/2 tsp of salt
Stir the mixture until all ingredients are combined.
Step 4: Add in Nuts and Chocolate Chips
Stir in:
- 4 cups of chocolate chips
- 4 cups of peanuts
Until they are distributed evenly throughout the mixture.
Step 5: Pack Mixture into Sheet Pan
Press the mixture down into the sheet pan with the back of a large spoon or spatula. Make sure that it is packed down tightly.
Step 6: Bake!
Bake for approximately 25 minutes or until golden brown.
Step 7: Cool and Cut into Bars
Remove from the oven and let cool for at least an hour. Once cooled, cut into bars using a sharp knife.
Congratulations! You’ve just made your very own homemade Hudson’s Bay Bread (Homemade Granola Bars).
Substitutions and Variations

While this homemade granola bars recipe is delicious just as it is, there are plenty of opportunities to tailor it to your preferences or dietary needs. Here are some substitutions and variations to consider:
– Swap out the peanuts for another type of nut or seed, such as almonds, cashews, sunflower, or pumpkin seeds.
– Substitute the chocolate chips with carob chips, raisins, coconut flakes, or dried fruit like cranberries or cherries.
– If you’re looking to cut back on sugar, reduce the amount of sugar, corn syrup, or honey by 1/4 cup each. You could also try replacing some of the sweeteners with a natural alternative like maple syrup, applesauce, mashed banana, or stevia.
– For a gluten-free version of this recipe, make sure to use certified gluten-free oats and double-check all other ingredient labels for potential hidden gluten sources.
– To make these granola bars vegan or dairy-free, swap out the margarine for coconut oil or vegan butter substitute. You can also opt for dairy-free chocolate chips or omit them altogether.
– If you prefer softer granola bars instead of crunchy ones, try using only rolled oats instead of quick-cooking oats. You could also use less peanut butter and more honey or corn syrup to make them chewier.
Regardless of which variations you choose, these homemade granola bars will be a tasty snack to enjoy on-the-go whether you’re out camping in the Boundary Waters or simply need a midday pick-me-up at work.
Serving and Pairing
One of the best things about Hudson Bay Bread, also known as homemade granola bars, is that they are a versatile snack that you can enjoy anytime, anywhere. These chewy and scrumptious treats are perfect for breakfast, lunch, or even as an afternoon snack.
Pairing these hearty granola bars with milk, coffee or tea is a great way to start your day on the right foot. You can also enjoy these tasty treats at work, during a hike or while exploring the great outdoors – they are perfect for packing along on camping trips, road trips or bike rides!
I recommend serving them alongside fresh fruit such as sliced apples, bananas or some dried fruit such as raisins or apricots. You can also pair them with yogurt or ice cream for a delicious dessert. Whatever your pairing preference may be, these will sure be a crowd pleaser.
For those who are health-conscious, Hudson Bay Bread can easily be modified to fit your dietary needs. For instance, if you’re avoiding gluten or trying to cut carbs low-carb in order to maintain a healthy lifestyle,the oatmeal bars make an ideal healthy oatmeal breakfast.. Additionally, you could swap the chocolate chips for nuts or seeds in order to create a keto granola recipe that’s sugar-free and guilt-free!. And if you’re looking for something even more unique,you could try out a muesli slice topped with sourdough bread.
No matter how you choose to serve and pair this heavenly bar recipe variation of granola,pop one in your mouth and savor every delicious bite!
Make-Ahead, Storing and Reheating
One of my favorite things about the Hudson’s Bay Bread recipe is that it can be made ahead and stored for later enjoyment. The granola bars stay fresh for up to two weeks when stored in an airtight container at room temperature. This makes them the perfect snack to have on hand when you need a quick boost of energy or something to satisfy your sweet tooth.
If you want to freeze the homemade granola bars, they will last for up to three months in the freezer. Make sure to wrap each bar individually in plastic wrap before placing them in a freezer-safe container or bag. When you’re ready to eat them, simply remove the bars from the freezer and let them thaw at room temperature for about 30 minutes before enjoying.
One thing to keep in mind is that these granola bars are best enjoyed at room temperature or slightly warmed up. If you prefer the latter, just pop them in the microwave for 10-15 seconds, or place them on a sheet pan and warm them up in the oven at 325 degrees Fahrenheit for a few minutes.
Overall, this recipe is incredibly versatile and can be enjoyed fresh out of the oven, frozen for later consumption or warmed up as needed. This means that you can make a large batch at once and enjoy it throughout the week without worrying about it going stale or losing its flavor. So go ahead and get creative with your storage options – this recipe is perfect for busy individuals who like to meal plan ahead of time!
Tips for Perfect Results
Achieving the perfect Hudson’s Bay Bread requires attention to detail and proper technique. Here are some tips to ensure that your homemade granola bars turn out delicious every time.
Firstly, when mixing the ingredients, make sure that the melted margarine, sugar, corn syrup, and honey are mixed thoroughly before combining with the oats and other dry ingredients. This will help to evenly distribute the wet ingredients throughout the entire mixture.
Secondly, when pressing the mixture into the sheet pan, be sure to use a spatula or your hands to press it firmly and evenly. A compacted mixture helps to create bars that hold together well.
Thirdly, let the bars cool completely before slicing them into individual portions. This will make them much easier to cut and prevent crumbling or falling apart.
Lastly, if you prefer softer granola bars, store them in an airtight container at room temperature. If you prefer a crunchy texture, store them in a covered container in the refrigerator.
By following these tips, you will be able to create delicious Hudson’s Bay Bread every time. Don’t be afraid to experiment with substitutions and variations to make this recipe your own!
Bottom Line
In conclusion, Hudson’s Bay Bread, also known as homemade granola bars, is a simple yet delicious recipe that deserves a spot in your baking repertoire. Whether you’re looking for a healthy snack or a sweet treat, these bars have got you covered.
With its customizable ingredients, substitutions and variations, you can make these bars your own and cater to your taste preferences or dietary restrictions. Additionally, they are versatile, making for an excellent breakfast on-the-go or a midday snack during your work break.
But it’s not just their taste and convenience that makes them worth trying. The history behind the name of the recipe adds an extra layer of depth to the experience. The Hudson’s Bay Company played a significant role in Canadian history, from fur trading and exploration to colonization and cultural exchange. So when you bite into these bars, it’s more than just a tasty treat – it’s a connection to an important part of our past.
So what are you waiting for? Homemade granola bars are easy to make and offer so much versatility that the possibilities of different flavors are endless. Give Hudson’s Bay Bread a try today and enjoy the delicious combination of peanuts, chocolate chips and oats. Whether you’re up in the Northern Tier or in the heartland of America, this recipe will transport you on a culinary journey that roots us all together!
Hudson’s Bay Bread (Homemade Granola Bars) Recipe
Ingredients
- 9 cups oats
- 1/2 cup honey
- 1/3 cup light corn syrup
- 2 cups sugar
- 2 cups margarine, melted
- 1/2 cup peanuts
- 4 cups chocolate chips
Instructions
- preheat oven to 350.
- in a large bowl stir all the ingredients together.
- Press 1/2 inch thick onto a 9x18 inch cookie sheet.
- bake at 350 for about 15 minutes, until the mixture is bubbly,
- Remove from oven and let cool (this is very important, it will become very crumbly if you don't allow it to cool completely)
- Cut into small pieces and enjoy!
Your Own Notes
Nutrition
Recommended Recipes Just For You
None found

Steven is a chef by heritage, so it’s no wonder why baking is such a big part of who he is. To share his passion for all things sweet, he created cookiesncrepes.com. It’s the perfect platform to indulge in delicious treats, all with a sprinkle of his signature flare.