Delicious Cherry Cheese Tarts Recipe for Dessert!
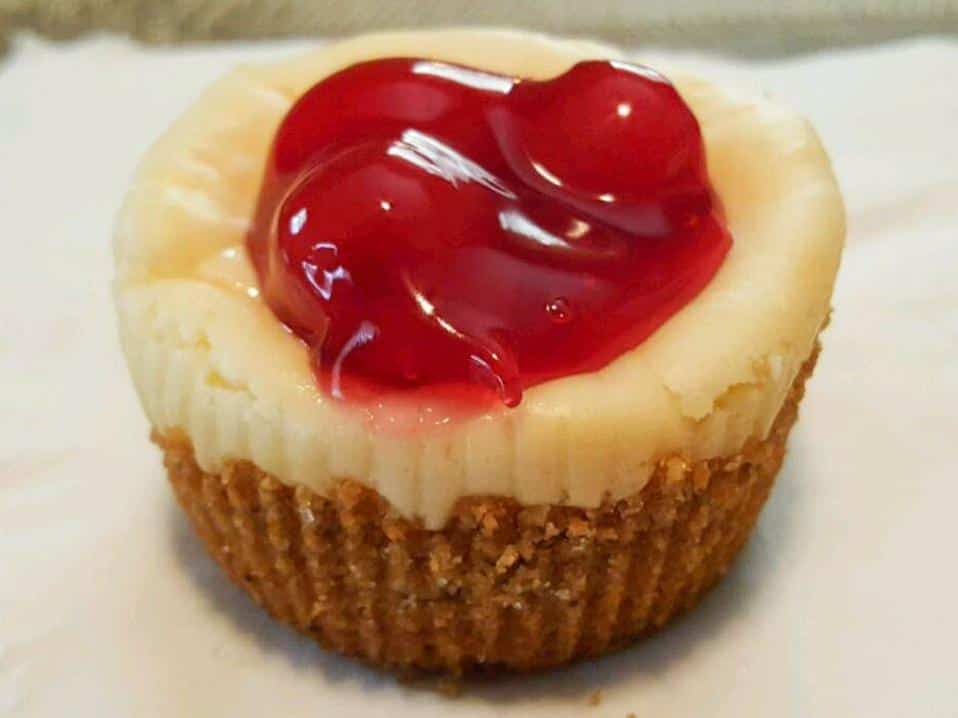
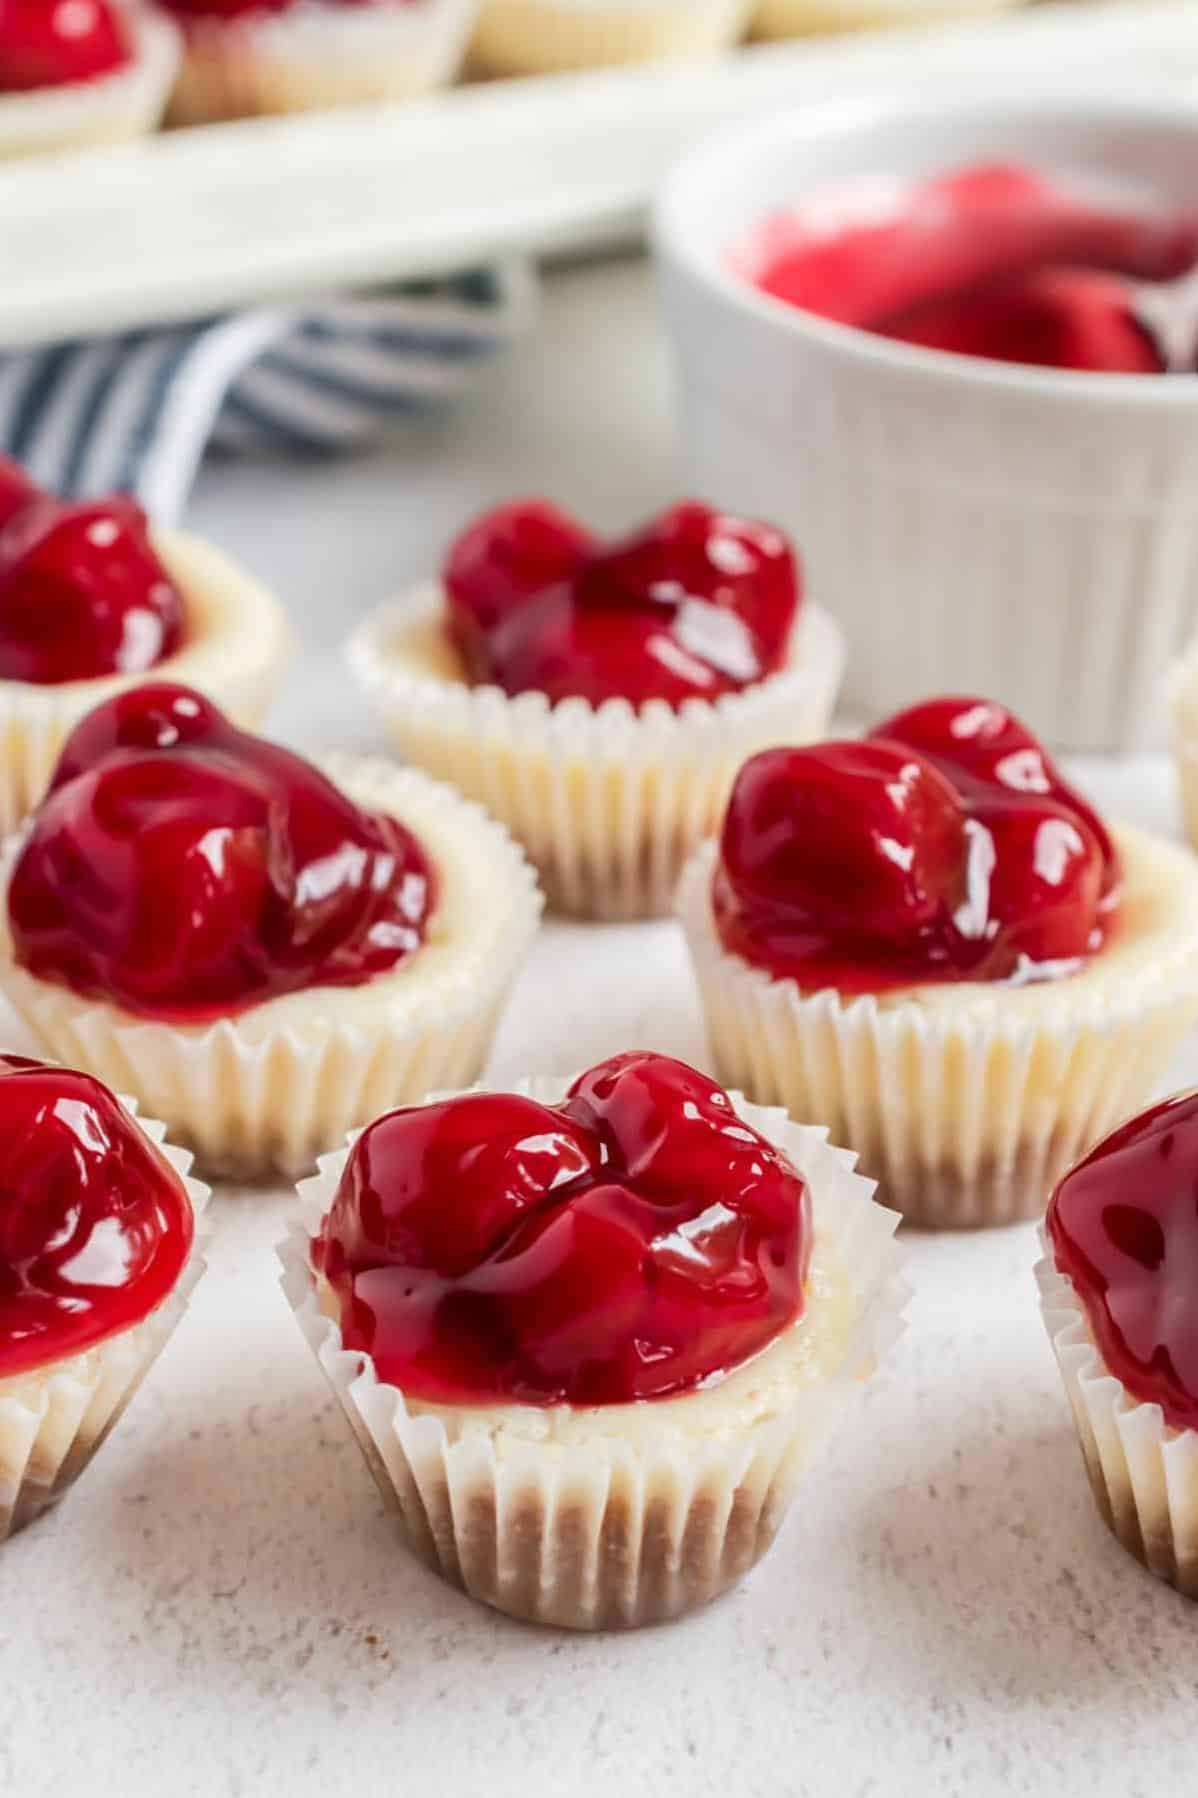
As you step into my bakery, the first thing that catches your eye is the delicious aroma of fresh pastries baking in the oven. And amongst all those treats, the Cherry Cheese Tarts recipe is one that stands out for its heavenly flavor and creamy texture. Each bite of these tarts explodes with a burst of cherry pie filling and a smooth cheesecake filling that will leave you yearning for more.
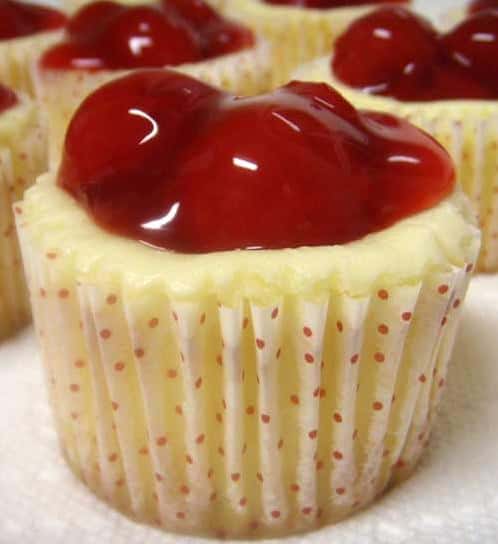
These mini tarts are perfect for any occasion, be it a fancy dinner party or a casual tea time with friends. The best part? These tarts are so easy to whip up, even if you’re not much of a baker! With just a few simple ingredients, you can create an exquisite dessert that will impress even the most discerning taste buds.
So grab a cup of coffee or tea and get ready to savor the scrumptious Cherry Cheese Tarts, which are sure to steal your heart and delight your senses.
Why You’ll Love This Recipe
Have you ever tasted a dessert that makes you feel like you’ve died and gone to heaven? That’s the kind of experience you’ll have with these cherry cheese tarts. I’m not exaggerating, these treats are that good.
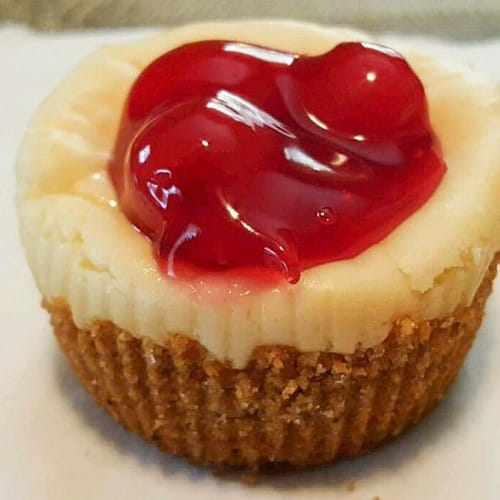
First and foremost, the combination of cherry pie filling and cream cheese is a match made in dessert heaven. The sweet, tangy flavor of the cherry pie filling perfectly complements the smooth, creamy texture of the cream cheese. Just one bite and you’ll understand why cherry cheesecake is such a popular dessert.
But what really sets this recipe apart is the crust. Unlike traditional graham cracker crusts, this recipe calls for a blend of ground nuts and graham cracker crumbs, giving it a unique nutty flavor and crunch. Trust me, this is no ordinary crust.
These mini cheesecake tarts are also incredibly versatile. They’re perfect for any occasion, from birthday parties to family dinners to just indulging in a sweet treat on a lazy Sunday afternoon. Plus, they’re easy to transport and serve, making them an ideal dessert for parties or potlucks.
So why will you love this recipe? Because it’s simply delicious. You won’t be able to resist the sweet and tangy flavors of the cherry cheese tarts or the unique nutty crunch of the crust. And with their versatility and ease of serving, they’re sure to become your go-to dessert for any occasion.
Ingredient List
Before we start the recipe, we need to make sure that we have all the ingredients. Here are the ingredients you will need to make these delicious cherry cheese tarts:
Crust:
- 1 cup of graham cracker crumbs
- 1/4 cup of sugar
- 1/4 cup of ground nuts
- 1/4 cup of melted butter
Filling:
- 2 (8 ounce) packages of cream cheese, softened
- 1/2 cup of sugar
- 2 eggs
- 1 teaspoon of vanilla extract
Topping:
- 1 can of cherry pie filling
Make sure to check that you have all of the ingredients on the list. If you are missing any items, grab them from your local grocery store – you won’t want to miss out on these tasty treats!
The Recipe How-To
Step 1: Preparing the Crust
Ingredients needed:
– 1 1/2 cups of graham cracker crumbs
– 1/4 cup of ground nuts
– 1/4 cup of sugar
– 1/2 cup of butter, melted
First things first, let’s get our crust ready. In a mixing bowl, combine the graham cracker crumbs, ground nuts, and sugar. Mix all dry ingredients thoroughly until everything is evenly distributed.
Next, add the melted butter to the dry ingredients. Mix until well incorporated. The mixture should look like wet sand.
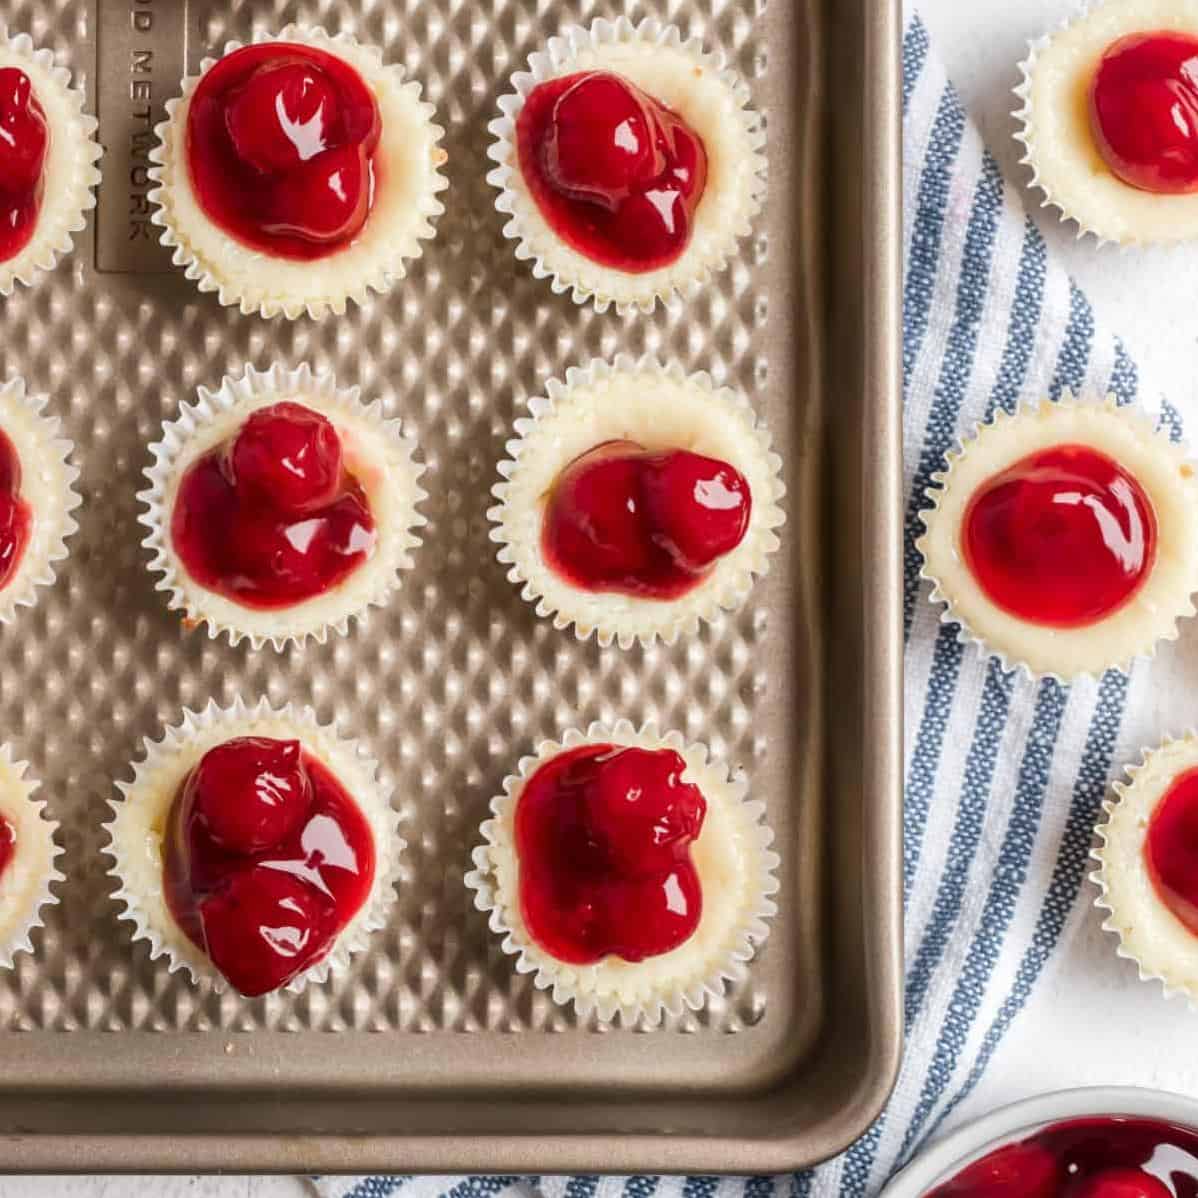
Scoop a heaping tablespoon of the crust mixture into each mini cheesecake tin (Chicago 12-Cup Mini Cheesecake Pan). Use a spoon to flatten and compact the mixture into the bottom of each tin.
Refrigerate your prepared crust for at least ten minutes while you prepare your cheesecake filling.
Step 2: Cherry Cheesecake Filling
Ingredients needed:
– 2 (8 oz) packages of cream cheese, softened
– 3/4 cups of sugar
– 2 eggs
– 1 teaspoon of vanilla extract
– 1 can of cherry pie filling
In another mixing bowl, combine the two packages of softened cream cheese and sugar. Mix at medium speed with an electric mixer until well blended.
Add in the eggs one at a time, then mix in the vanilla extract. Continue to mix until everything is smooth and creamy.
Next, add about a tablespoon of cherry pie filling on top of each crust. Then gently spoon in the cheese egg vanilla mixture over pie filing until about three-quarters full.
Bake in preheated oven for approximately twenty-five minutes at 375-degree Fahrenheit or until centers are set. Once done remove from oven and allow it to cool for about five minutes.
Finally, spoon over more pie filling (a tablespoon or so) on top of each tartlet covered by the cherry cheese tart glaze inside mini cheesecakes.
Serve them or refrigerate for later serving options.
Substitutions and Variations
Are you itching to put your own spin on these Cherry Cheese Tarts? Well, let me tell you, the possibilities are endless.
Instead of using cherry pie filling, try mixing in blueberries or raspberries for a delightful variation. You can also swap the graham cracker crust with a crust made from ground nuts or even chocolate cookies. And if you’re looking for a little extra crunch, sprinkle some chopped pecans or walnuts on top before baking.
For those who want to cut back on sugar, use a sugar substitute such as honey or maple syrup in place of granulated sugar. Or, if you’re feeling daring and want to add a little heat, try adding a touch of cayenne pepper or chili powder to the mixture for a spicy kick.
Looking to make this recipe more kid-friendly? Try swapping out the cherry pie filling for peanut butter cups or sprinkles! Your little ones will love sinking their teeth into these fun variations.
No matter how you decide to mix it up, don’t be afraid to get creative with this recipe. After all, the best recipes are often the ones that are tweaked and perfected over time.
Serving and Pairing

Once your cherry cheese tarts are baked to perfection, it’s time to indulge in their creamy and fruity goodness. You can serve them warm or chilled – either way, they make for a delectable treat!
If you’re feeling adventurous, you can pair these tarts with a scoop of vanilla ice cream topped with a dollop of peanut butter. The contrast of the cold and creamy ice cream with the warm and crunchy tart is simply divine. For a more traditional pairing, top your tarts with some whipped cream and sprinkle some ground nuts on top for added texture.
These cherry cheese tarts are perfect for any occasion – whether it’s a party, a casual get-together, or just a cozy night in. They will surely impress your guests and leave them wanting more.
As for drinks to pair with these tarts, you can’t go wrong with a glass of milk or hot cocoa. However, if you’re looking for something more sophisticated, try serving them alongside a glass of red wine or a cup of coffee. The combination of flavors is truly heavenly.
No matter how you choose to serve or pair them, these cherry cheese tarts are guaranteed to satisfy your sweet tooth cravings and make you crave for more every time!
Make-Ahead, Storing and Reheating
As someone who has spent a lot of time in the kitchen, I know how important it is to have a plan when it comes to storing your baked goods. The Cherry Cheese Tarts recipe is no exception. Luckily, this recipe is quite versatile when it comes to preparing in advance and storing leftovers.
If you want to make these tarts ahead of time, you can bake them according to the recipe instructions and store them in an airtight container in the refrigerator for up to 3 days. When you’re ready to serve them, simply let them come to room temperature before serving.
If you have leftovers or want to keep some tarts for later, you can freeze them by wrapping them tightly in plastic wrap and then placing them in an airtight container or Ziploc bag. They will keep in the freezer for up to 2 months.
When it’s time to reheat your frozen tarts, simply leave them in the refrigerator overnight to thaw. Then warm them up in the oven at 350°F (177°C) for about 10-15 minutes or until they are heated through.
However, I must warn you that reheated tarts may not be as fresh as freshly baked ones. Some components may not hold up as well after being stored or reheated. Therefore, if you want to have that same delicious taste as when they were first made, I suggest making smaller batches that can be consumed quickly or inviting some friends over to share your delightful treats.
Tips for Perfect Results

To help nail the perfect cherry cheese tarts, there are some tips and tricks I’ve learned throughout my time baking that I’d like to share.
Firstly, don’t overwork the dough when making the crust. It may be tempting to keep kneading and rolling it out, but this can cause the dough to become too tough and crumbly.
Secondly, be sure to let your cream cheese soften before adding other ingredients. This will make it easier to mix and will lead to a smoother, creamier filling.
When mixing the filling, beat it until it’s smooth and free of lumps- no one wants a lumpy cheesecake! Adding eggs individually can also help ensure an even distribution of ingredients throughout the mixture.
To prevent any cracks on top of the tarts, bake them in a water bath- just wrap your muffin tin in foil and pour hot water around it while baking. Additionally, avoid opening the oven door while they’re baking as this can cause them to sink or crack.
Lastly, let your tarts fully cool before removing them from the pan- patience is key! And if you’re feeling creative, feel free to experiment with different toppings like chocolate shavings or crushed nuts to add some extra texture and flavor to your cherry cheese tarts!
FAQ
Before wrapping up, let’s answer some commonly asked questions about the cherry cheese tarts recipe. In this section, I’ll address inquiries about ingredient variations, oven temperature recommendations, do-ahead options, and more. By the end of this segment, you should be ready to make cherry cheese tarts like a pro!
How do you get mini cheesecakes out of the pan?
After taking them out of the oven, it is important to let the cheesecakes cool down for at least half an hour, during which time the tops will sink a bit. To remove them from the pan, take a knife and softly detach the sides before carefully flipping them over and pushing the cheesecakes out.
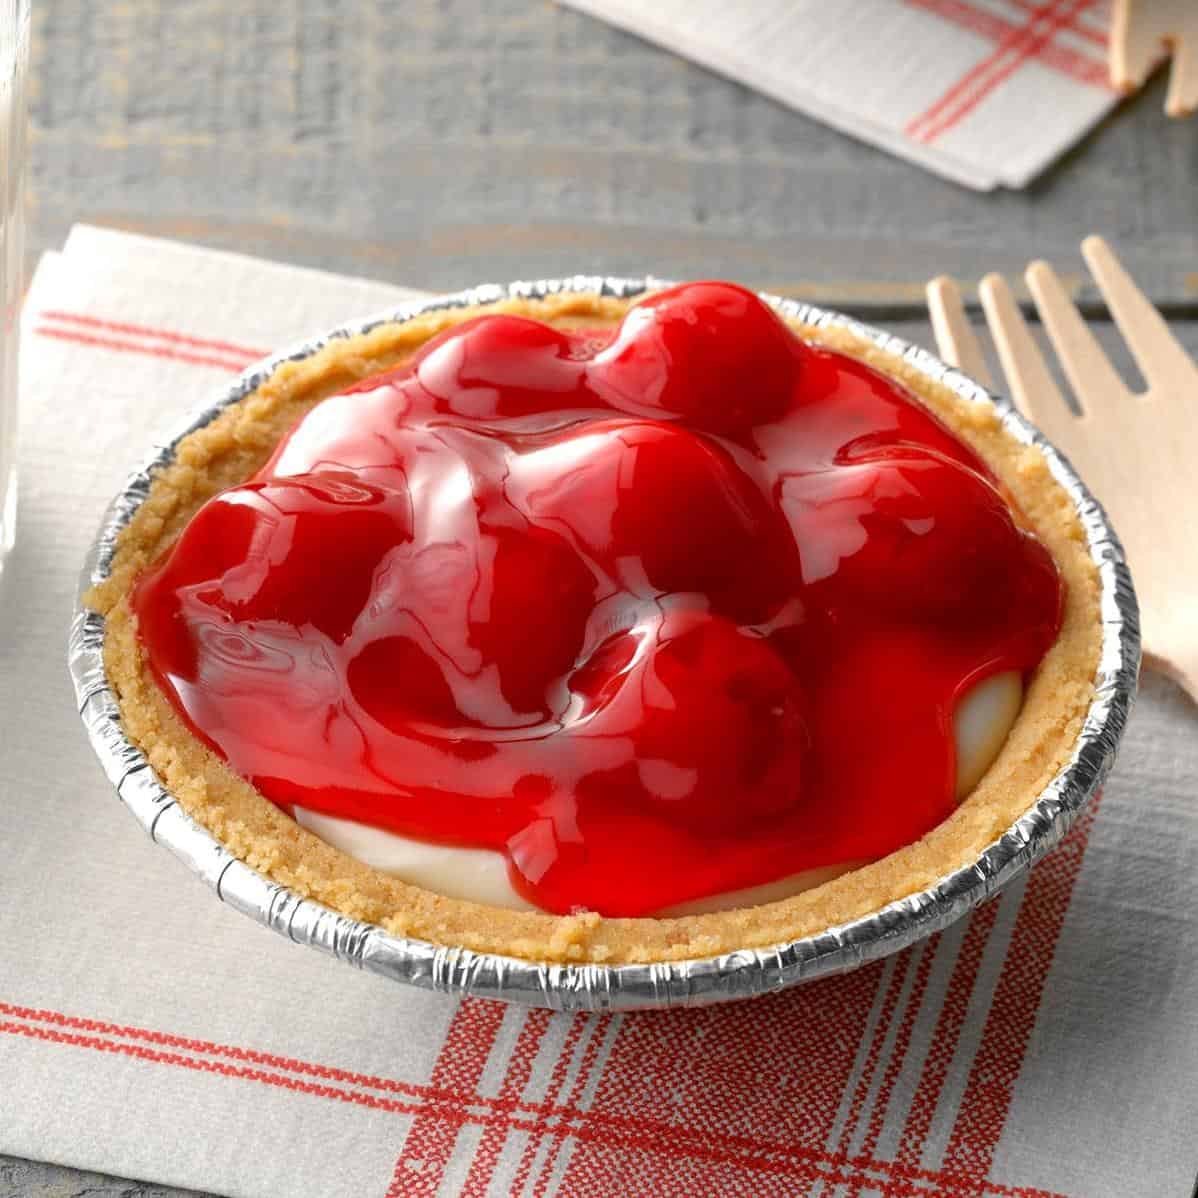
What is cherry cheesecake made of?
Let’s whip up a scrumptious no-bake cherry cheesecake! In a mixing bowl, combine condensed milk, softened cream cheese, tangy lemon juice, and fragrant vanilla extract. Mix until perfectly smooth and velvety. Pour this heavenly mixture into a ready-made pie crust and pop it in the fridge for 5 hours to chill; but remember not to freeze it! Once the cheesecake has set and is firm to touch, crown it with a generous dose of luscious cherry pie filling. Your stunning dessert is now ready to serve and impress your guests! Mark your calendars for August 4, 2022, so you don’t miss this delightful treat!
Bottom Line
In conclusion, these cherry cheese tarts are a delightful dessert that offer both creamy and fruity flavors in every bite. They are easy to make and can be customized to your preference by using different pie fillings or adding toppings like ground nuts or peanut butter.
If you’re a cheesecake lover, you will adore these mini cheesecakes that can be made with the same recipe. The Chicago 12 Cup Mini Cheesecake Pan is the perfect tool for making adorable little desserts that are just the right size for sharing.
Whether you’re looking for an effortless yet impressive dessert to serve at a party or simply craving something sweet, these cherry cheese tarts are perfect for any occasion. So why not indulge in a little decadence and try this recipe out today? I promise you won’t regret it!
Cherry Cheese Tarts- Recipe for Chicago 12 Cup Mini Cheesecake P Recipe
Ingredients
- 8 ounces cream cheese
- 1 egg
- 1 teaspoon vanilla
- 1/4 cup sugar
- 1 cup ground nuts
- 1/4 cup melted butter (38 grams)
- 3 tablespoons sugar
Topping
- cherry pie filling
Instructions
- Preheat oven to 375°F Place one disc in each cup of the cheesecake pan. Lightly grease the pans with butter or use a non-stick spray.
- Blend cream cheese with the egg, vanilla and 1/4 cup sugar. Set aside.
- Mix the ground nuts woth the melted butter and 3 tablespoons of sugar.
- Press the nut crumb into the base of 12 cups. Press the crumbs into the base and about 1/3 ways up the side of each cup.
- Fill evenly with the cheesecake mixture.
- Bake 14 minutes.
- Remove the pan from the oven and place on a rack to cool for 20 minutes.
- The tops will all as they cool.
- Lightly loosen the cheese tarts around the edges and carefully remove the cheesecakes by pushing the handle of a wooden spoon through the hole at the bottom of each cup.
- When cool, take the disc off the bottom of each cheesecake using a butter knife.
- Place 3 or 4 cherries on the top of each tart.
- Refrigerate until ready to serve. Makes 1 dozen cheesecakes.
Your Own Notes
Nutrition
Recommended Recipes Just For You
None found

Steven is a chef by heritage, so it’s no wonder why baking is such a big part of who he is. To share his passion for all things sweet, he created cookiesncrepes.com. It’s the perfect platform to indulge in delicious treats, all with a sprinkle of his signature flare.