Indulge in Decadence: Twix Ice Cream Cake Recipe
Welcome, dear readers, to a recipe that will transport you straight to Twix heaven – a world where flavors of chocolate, caramel, and vanilla blend together in a way that is nothing short of divine. Our recipe for Twix Ice Cream Cake is the ultimate treat for those who love living life sweetly.
Whether you’re planning a birthday party, family gathering, or just looking for a sweet escape from the hustle-bustle of daily life, this cake has your back. With its layers of vanilla ice cream and Twix candy bars, enriched by chocolate chips and drizzles of caramel sauce, each bite will remind you why dessert recipes like these are worth all the calories.
We know that no one can resist the temptation of Twix candy bars – after all, they have been popular since their inception in the 1960s. This cake takes all the key elements of the iconic candy bar and reimagines them for a giant cake to share with others. So, get ready to indulge in an unforgettable experience where sweet dreams become sweet reality.
Join us on this journey as we give you step-by-step instructions on how to make Twix Ice Cream Cake and guide you through some tips and tricks that will ensure perfect results every time you bake it. Get ready to amaze your friends and family with what is sure to become your go-to dessert – grab your apron and let’s get started!
Why You’ll Love This Recipe

Have you ever experienced the perfect blend of creamy vanilla ice cream, smooth caramel sauce, and crunchy Twix candy bars in a single bite? If not, then this Twix Ice Cream Cake Recipe is the one for you!
This recipe offers an ultimate indulgence in every slice. It is the perfect combination of sweet and savory flavors that have been perfectly balanced to make your taste buds dance with joy. This dessert is going to be a hit at every occasion, and it will undoubtedly leave a lasting impression on anyone who tries it.
What makes this cake recipe even more special is how easy it is to prepare. The ingredients are simple and easy to find in any grocery store. You do not require any fancy equipment or baking skills to make this delicious treat. All you need is some vanilla ice cream, Twix candy bars, and a few other ingredients, and you’re good to go.
Also, this recipe offers several variations that will help you personalize your Twix Ice Cream Cake. You can substitute the vanilla ice cream with chocolate or any other flavor of your choice. Additionally, you can add chopped nuts, chocolate chips, or fresh fruits on top to elevate the flavor profile and give it a unique twist.
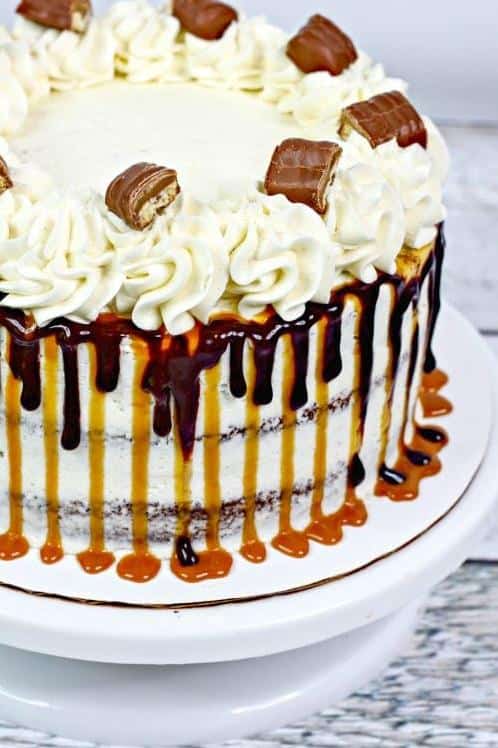
Not only does this twix ice cream cake taste fantastic, but it also looks incredible – making it the perfect dessert for birthday parties or other special occasions. So set aside any reservations you might have about trying out new recipes and get ready for an unforgettable treat that will take your love for desserts to new heights!
Ingredient List

Cake Base
- 1 ½ cups flour
- ½ cup brown sugar
- ½ cup butter, softened
Twix Layer
- 5 Twix bars, chopped
- ¼ cup milk chocolate chips
- 1 16 oz. jar caramel sauce
- [ Ultimate Twix cake recipe food hack tiktok twix chocolate cake sam’s club pound cake ]
Ice Cream Layer
- 1 quart vanilla ice cream, slightly softened
- 5 Twix ice cream bars, chopped
Whipped Cream Layer
- 2 cups heavy cream
- 1 tablespoon sugar
- 1 teaspoon vanilla extract
Garnish
- Chopped Twix bars
- Chocolate chips
- Salted caramel sauce
Tools and Equipment
- Two plastic bottles
- Dixie crystals or sugar twix
- Parchment paper
The Recipe How-To
Now that we have gathered all the ingredients, it’s time to get started with the recipe. Here’s how you can make this delicious Twix Ice Cream Cake Recipe step-by-step:
Step 1: Preheat the Oven
Preheat the oven to 350°F or 180°C.
Step 2: Prepare the Crust
In a bowl, combine 1 1/2 cups flour, 1/2 cup brown sugar, and 3/4 cup butter softened. Mix well until crumbly. Press the mixture into a greased 9×13 inch baking dish.
Bake for 18-20 minutes or until lightly golden. Let it cool completely.
Step 3: First Layer: Vanilla Ice Cream
Remove 1 quart vanilla ice cream from the freezer and let it sit at room temperature for a few minutes to become slightly softened (not melted). Pour the ice cream over the crust and spread it evenly using a spatula. Freeze for about an hour or until completely frozen.
Step 4: Crush the Twix Bars
While waiting for the first layer to freeze, crush 12 Twix candy bars in a bag using a rolling pin or use a food processor. Set aside.
Step 5: Second Layer: Twix Ice Cream
In a bowl, mix together softened 1 quart vanilla ice cream, half of the crushed Twix bars, and 1 jar caramel sauce until combined. Pour this mixture over your first layer of vanilla ice cream, making sure to spread it evenly with your spatula.
Freeze again for another hour or until completely frozen.
Step 6: Final Touch of Caramel Sauce
Drizzle some extra caramel sauce on top of your last layer of Twix ice cream. Add remaining crushed twix bars on top as desired then sprinkle some chopped milk chocolate chips on top.
Return your creation to freezer for at least one hour or until very firm.
To serve, take out of freezer let cake set out at room temperature for ten minutes prior to slicing and enjoy!
Substitutions and Variations
If you want to switch things up a bit, or find yourself without certain ingredients, fear not! There are plenty of substitutions and variations you can make to this Twix ice cream cake recipe.
Firstly, if you don’t have Twix bars on hand, you can easily swap them out for any other candy bars. Snickers, Reese’s, and KitKats would all make great substitutes. Have fun experimenting with different combinations!
For those who are gluten intolerant, you can use gluten-free flour instead of regular flour. And for those who are lactose intolerant, you can use a non-dairy ice cream instead of vanilla ice cream.
Additionally, if you’re looking to add more flavor to the cake or switch things up a bit, you can add chopped nuts like pecans or almonds. Or you could try drizzling some additional chocolate caramel sauce on top for an extra sweet touch.
If you’re feeling adventurous, try making this recipe as a Twix icebox cake or ice cream pie by layering the ingredients in a rectangular baking dish or in a pie crust respectively. You could even add layers of whipped cream and additional toppings like chopped cherries or strawberries.
Don’t be afraid to get creative and make this recipe your own. The possibilities are endless!
Serving and Pairing

Once the Twix Ice Cream Cake is ready, it’s time to serve and enjoy this delectable dessert.
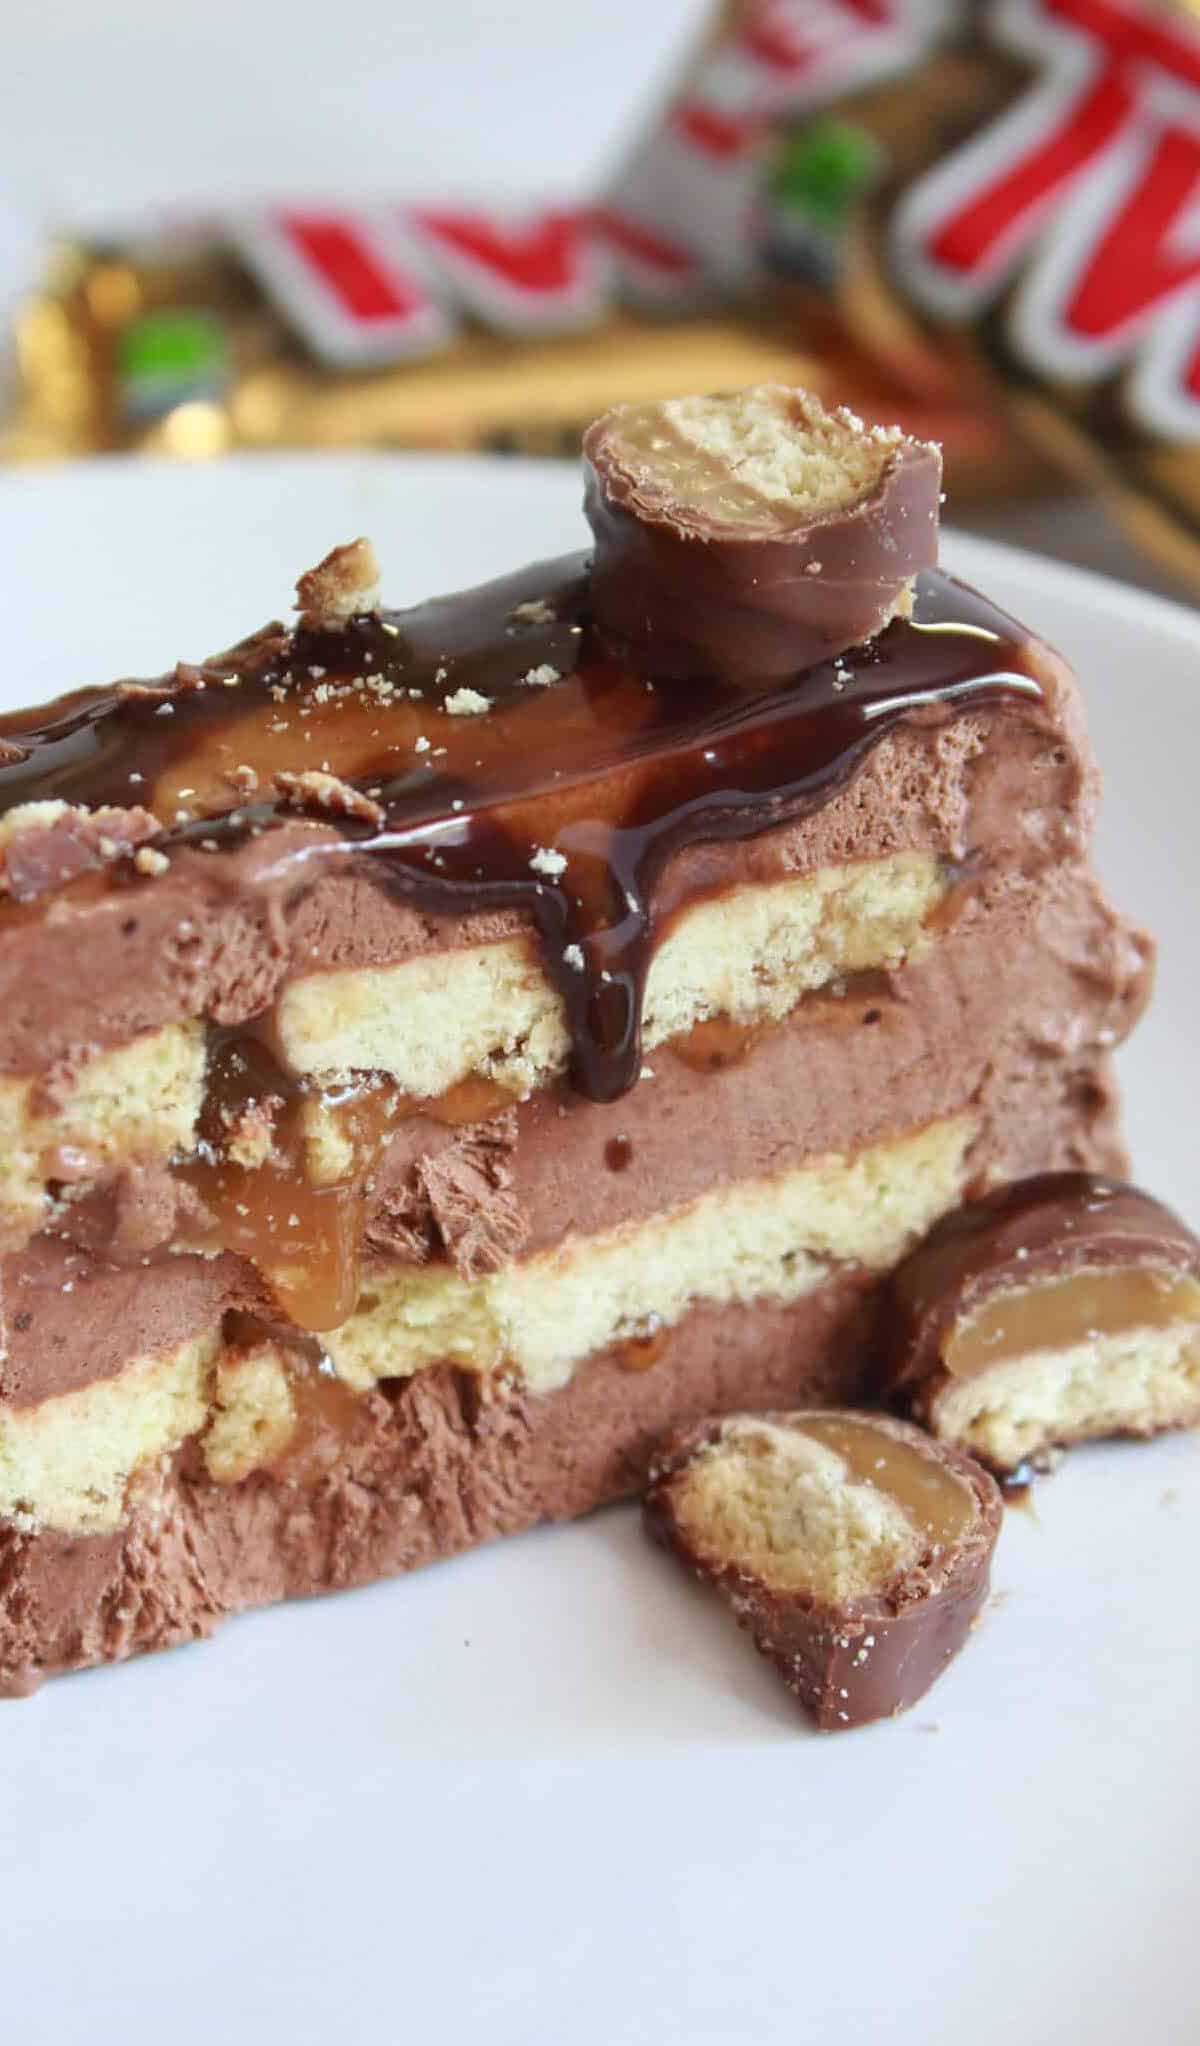
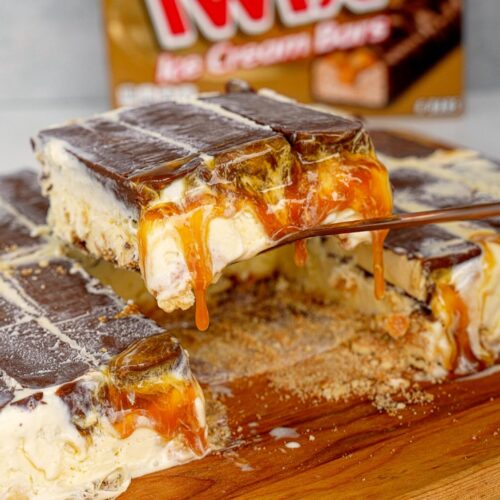
This cake is best served cool, so make sure to freeze it for at least 4 hours or overnight before slicing and serving. Once sliced, the layers of vanilla ice cream, Twix candy bars, and caramel sauce will be visible, making it look as good as it tastes.
You can choose to serve it as is or you can add a drizzle of extra caramel sauce on top of the slices for an added touch of sweetness. Sliced Twix bars can also be added on top of the cake or around each slice for added texture.
This Twix Ice Cream Cake is the ultimate treat for those with a sweet tooth. It pairs well with a cold glass of milk or a scoop of additional vanilla ice cream on the side.
For a more adult pairing, consider serving this dessert with a hot cup of coffee or indulgent cup of hot cocoa. Alternatively, you can pair it with a bold red wine such as a Cabernet Sauvignon or Pinot Noir for a delightful mix of flavors.
Whether you’re serving this at a birthday party or family gathering, your guests are sure to love every bite of this Twix Ice Cream Cake.
Make-Ahead, Storing and Reheating
Preparing a Twix Ice Cream Cake can be time-consuming, but believe me when I say that the end result is worth every minute of it. If you’re planning to serve this cake for a special occasion or event, one of the best things you can do to ease up the pressure is to prepare it in advance.
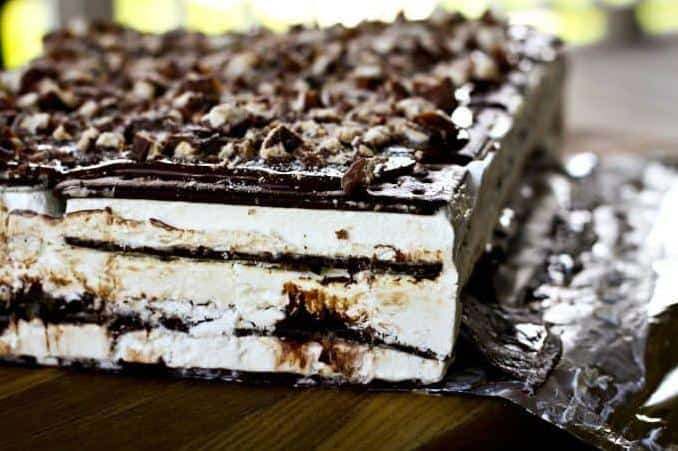
You can make the Twix Ice Cream Cake ahead of time and store it in the freezer for up to a week before serving. Make sure to wrap the cake tightly with plastic wrap and foil to avoid freezer burn. When you’re ready to serve it, simply remove it from the freezer and let it thaw for about 10 to 15 minutes before slicing.
If you have any leftovers, store them in an airtight container in the freezer for up to two weeks. To reheat a slice of cake, simply microwave it on high for 10-15 seconds until softened or put it in the fridge for an hour. Make certain not to leave the cake out at room temperature for more than two hours as melting ice cream will cause bacterial growth.
Another important thing is to keep your Twix Ice Cream Cake away from any strong odors and flavors inside your freezer. A handy tip is to put two plastic bottles filled with water inside your freezer as they will absorb any unwanted odors and keep your cake fresh.
So what’s stopping you from indulging in this scrumptious Twix Ice Cream Cake? Start baking and being prepared right away!
Tips for Perfect Results
When it comes to baking, the smallest details can make all the difference in the world. Here are some tips and tricks to ensure that your Twix Ice Cream Cake Recipe turns out perfectly every time.
1. Soften Ice Cream Properly
Softening the ice cream properly is crucial for this recipe. Leave the ice cream on your kitchen counter for 10-15 minutes to allow it to soften slightly before using it in the recipe. If you over-soften the ice cream, it may melt too quickly, making it difficult to handle.
2. Use High-Quality Ingredients
The quality of ingredients that you use can significantly impact the taste of your Twix Ice Cream Cake Recipe. Therefore, make sure you use high-quality ice cream, chocolate chips, and caramel sauce to create the ultimate Twix flavor.
3. Make Ahead of Time
If you’re planning a party or special occasion, make sure to allow yourself enough time to prepare the Twix Ice Cream Cake ahead of time—preferably one day beforehand. This will give it enough time to set completely in the freezer and make it easier for you to handle when serving.
4. Use Two Plastic Bottles
One of our top tips for creating the perfect-looking Twix Ice Cream Cake is using two plastic bottles to layer the ice creams and sauces evenly between each layer of cake. Cut off the tip of one bottle to create a neat hole at the end and then use this bottle for caramel sauce layering. Use a second bottle without a cut tip for ice cream layering.
5. Keep Extra Chopped Twix Bars
Chop up some extra Twix bars and sprinkle them on top of your Twix Ice Cream Cake as toppings; this will add a great crunch and texture to your dessert. It’s always good to buy extra bars as backup because let’s face it, they’ll become irresistible snacks while waiting for the cake to set.
6. Enjoy with Salted Caramel Sauce Drizzle
Drizzling salted caramel sauce on top of your Twix Ice Cream Cake before serving will give an additional depth of flavor and elevate the dessert entirely another notch.
By following these simple tips, you’ll be able to master this delightful Twix Ice Cream Cake Recipe every time you bake it!
Bottom Line
In conclusion, this Twix Ice Cream Cake recipe is a fantastic dessert option for any occasion. The combination of vanilla ice cream, Twix candy bars, and caramel sauce makes for a delectable and indulgent treat that will have your taste buds dancing. With easy-to-follow instructions and simple ingredients, you don’t need to be a professional baker to create this masterpiece.
Whether it’s for a birthday party, family gathering, or just a sweet treat for yourself, the Twix Ice Cream Cake will be a definite crowd-pleaser. Plus, with the option to make substitutions and variations, you can customize it to your liking and make it your own.
So what are you waiting for? Head to your local grocery store and grab the ingredients to make this ultimate Twix creation. Trust me, once you try it, it will become one of your go-to dessert recipes.
Twix Ice Cream Cake Recipe
Ingredients
- 1 (1 1/2 quart) vanilla ice cream, slightly softened
- 1 (16 ounce) jar caramel sauce
- 1 cup milk chocolate chips
- 1/2 cup butter, softened
- 2 tablespoons sugar
- 1/4 cup brown sugar
- 1 cup flour
- 1/2 teaspoon vanilla extract
Instructions
- In a 9x13 glass dish spread out the ice cream evenly. Cover and place in freezer. Freeze to set for 2 hours.
- While the ice cream is setting start making the cookie topping. Preheat oven to 350 degrees. Cream butter and sugars in a medium bowl. Stir in vanilla and flour until well mixed. Spread dough into a foil-lined 8x8 baking dish. Bake for 15 minutes or slightly golden. Remove from heat and let stand until completely cooled.
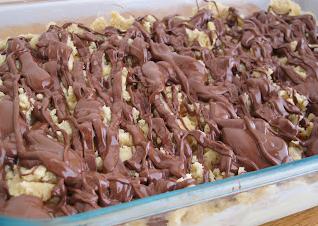
- Once Ice cream is all set and cookie topping is completley cooled, take ice cream out of freezer. Pour the caramel sauce evenly over ice cream. Break apart the cookie topping into big chunks and sprinkle evenly over caramel.
- Melt chocolate chips in a microwavable bowl. Heat at 30 second intervals until melted. Stir and then drizzle over the cookie topping. Re-cover and place back into freezer for 6 hours or overnight to completely re-freeze. Slice into squares and serve.
Your Own Notes
Nutrition
Recommended Recipes Just For You

Steven is a chef by heritage, so it’s no wonder why baking is such a big part of who he is. To share his passion for all things sweet, he created cookiesncrepes.com. It’s the perfect platform to indulge in delicious treats, all with a sprinkle of his signature flare.