Mouth-Watering Cookies: The Ultimate Recipe Guide
Welcome, my fellow baking enthusiasts, to the world of Shining Star Cookies! If you’re looking for a recipe that will shine bright like the stars and satisfy your sweet tooth at the same time, then look no further. These shining stars are out of this world.
When I first stumbled upon this recipe, I was skeptical. I’ve made countless batches of sugar cookies before and quite frankly, I was getting bored with them. But trust me when I say that these cookies are in a galaxy all their own. The combination of allspice and brown sugar creates a warm and inviting aroma while the star shape instantly makes them perfect for any special occasion.
These shining star cookies are the epitome of Christmas cooking. Whether you’re baking up a batch for your kids to share with Santa on Christmas Eve or bringing them along to your office’s holiday potluck, they are sure to impress.
So what are you waiting for? Get out your star cookie cutter and let’s get started on making these deliciously handsome snacks!
Why You’ll Love This Recipe
Are you searching for a delectable and dazzling cookie recipe that will become a shining star at your next family gathering or party? Look no further than this Shining Star Cookies Recipe!
These cookies are not your ordinary cookies – they are stars! And not just any stars, but shining stars that add a touch of magic and sparkle to your dessert table. They are perfect for Christmas, but their alluring glow is also suitable for other occasions throughout the year.
One thing you’ll love about this recipe is its simplicity. With easy-to-find ingredients such as all-purpose flour, butter, and brown sugar, you’ll be able to whip up a batch in no time. Plus, the versatility of this recipe means that you can make sweet or savory variations by using different cookie cutters or adding seasonings like allspice.
But what truly sets these cookies apart is their unique appearance. The star shape is both fun and festive, and the edible glitter on top adds a subtle shimmer that makes them irresistible. The combination of textures and flavors – the soft biscuits made with plain flour and buttery flavor from unsalted butter – also make these cookies truly heavenly.
So whether you want to impress your guests with an array of shooting stars or just crave a snack that’s out-of-this-world good, this Shining Star Cookies Recipe is perfect for you. So why wait? Get out your cookie cutter and let’s get to baking!
Ingredient List
Let’s talk about the stars of our shining star cookies recipe – the ingredients. These sweet treats require some basic pantry staples, with a few unique additions to create a taste that is out of this world.
The Dry Goods:
- 2 cups of all-purpose flour
- 1 tsp. of baking soda
- 1 tsp. of ground allspice
- A pinch of salt
The Wet Ingredients:
- 1 cup (2 sticks) of unsalted butter, at room temperature
- 1 cup of packed brown sugar
- 1 large or small egg, lightly beaten
These ingredients combined will create a heavenly cookie dough that will take you to the stars and beyond.
The Recipe How-To
Now that we’ve covered why you’ll love this shining star cookies recipe, let’s dive into the how-to. This recipe is simple and easy to follow, so get ready to bake up a batch of delicious and festive treats.
Ingredients:
- 2 cups of all-purpose flour
- 1/2 teaspoon of baking soda
- 1/2 teaspoon of salt
- 1/4 teaspoon of allspice
- 1 cup (2 sticks) unsalted butter, at room temperature
- 3/4 cup of brown sugar
- 1 small egg
Instructions:
- Begin by preheating your oven to 350F. Line a cookie sheet with parchment paper, set aside.
- In a medium bowl, whisk together 2 cups of all-purpose flour, 1/2 teaspoon of baking soda, 1/2 teaspoon of salt, and 1/4 teaspoon of allspice until well combined.
- In a separate large bowl, cream together the 1 cup (2 sticks) unsalted butter and 3/4 cup of brown sugar until light and fluffy.
- Add the small egg to the butter mixture and mix until well combined.
- Gradually add the flour mixture to the butter mixture in small increments, mixing well between each addition.
- Once all the flour has been added, turn out the dough onto a lightly floured surface and knead it gently for a few minutes until it comes together into a smooth ball.
- Roll out the dough to about 1/2 an inch thickness with a rolling pin or between two sheets of wax paper.
- Cut out your desired shapes with your favorite cookie cutter (we recommend using a star cookie cutter for this shining star cookies recipe). Repeat until all dough is used up, gathering scraps as needed and re-rolling them to make more cookies.
- Place cookies on a prepared cookie sheet, leaving about an inch between each cookie.
- Bake for 10-12 minutes or until the edges are lightly golden brown.
- Remove from oven and cool for a few minutes on the baking sheet before transferring them to a wire rack to cool completely.
And there you have it – your very own batch of shining stars cookies that are perfect for any occasion!
Substitutions and Variations

Greetings, fellow bakers! So, you’re eager to make some Shining Star Cookies, but you’re not sure if you have all of the ingredients. Don’t worry – I’ve got your back. Here are some substitutions and variations that you can use to adjust the recipe to your liking:
– Gluten-Free: Instead of using regular all-purpose flour, switch it out for a gluten-free version. You may need to also increase the amount of liquid used since gluten-free flours tend to absorb more moisture.
– No Brown Sugar: If you don’t have brown sugar on hand, don’t fret. Replace the brown sugar with granulated white sugar and add a teaspoon of molasses for every cup of sugar used. This will create a similar texture and taste.
– Mixing Up the Spices: If you’re not keen on allspice or want to mix things up a bit in terms of flavorings, consider using cinnamon, nutmeg or cloves instead. Or even mix and match with your preferred spices to create your own unique blend.
– Vegan Option: Want a vegan-friendly version? You can substitute butter for margarine or coconut oil and œ small beaten banana or applesauce in place of eggs in this recipe.
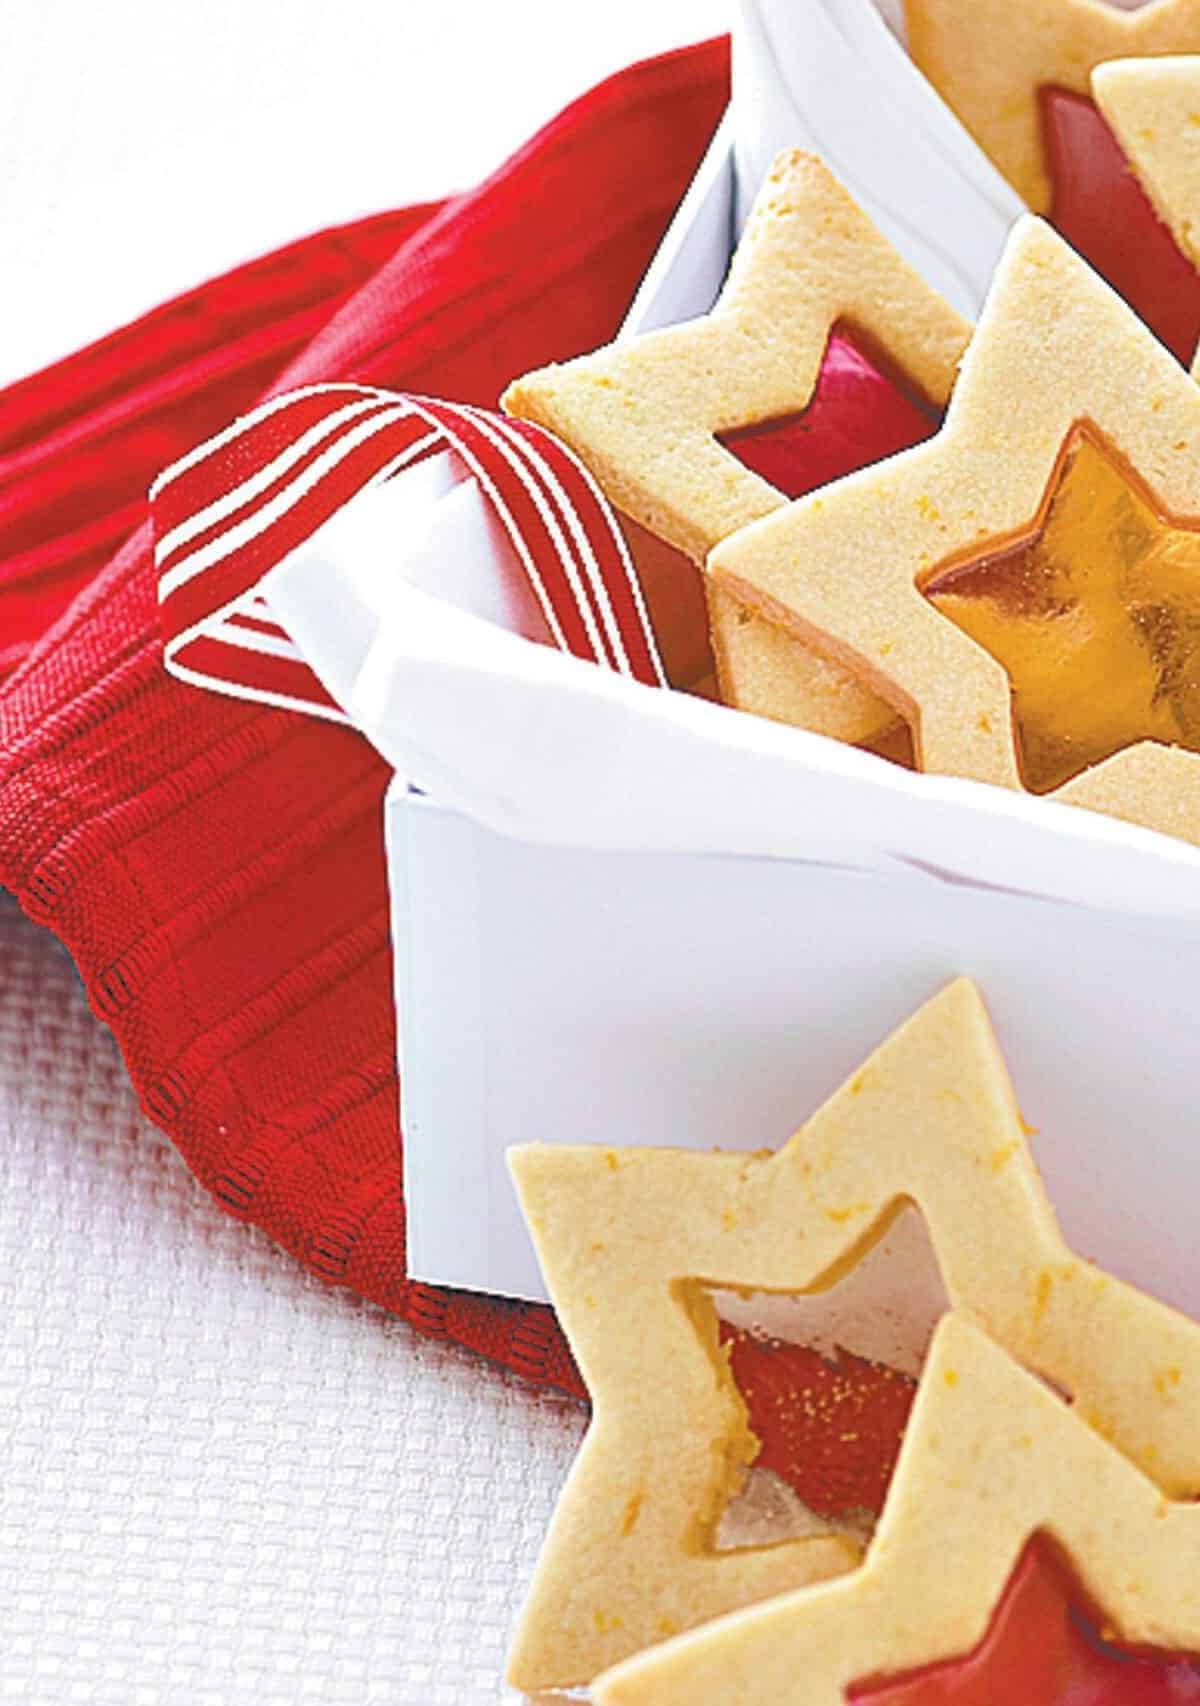
– Jammy Star Cookies: Before baking the cookies, use a small cookie cutter to remove the centres out of half the cookie dough shapes in the star biscuits usborne pattern. Then spoon some jam into the centre of each solid cookie before placing a star-shaped cookie over top for an eye-catching jam-filled cookie that kids (and grown-ups) adore.
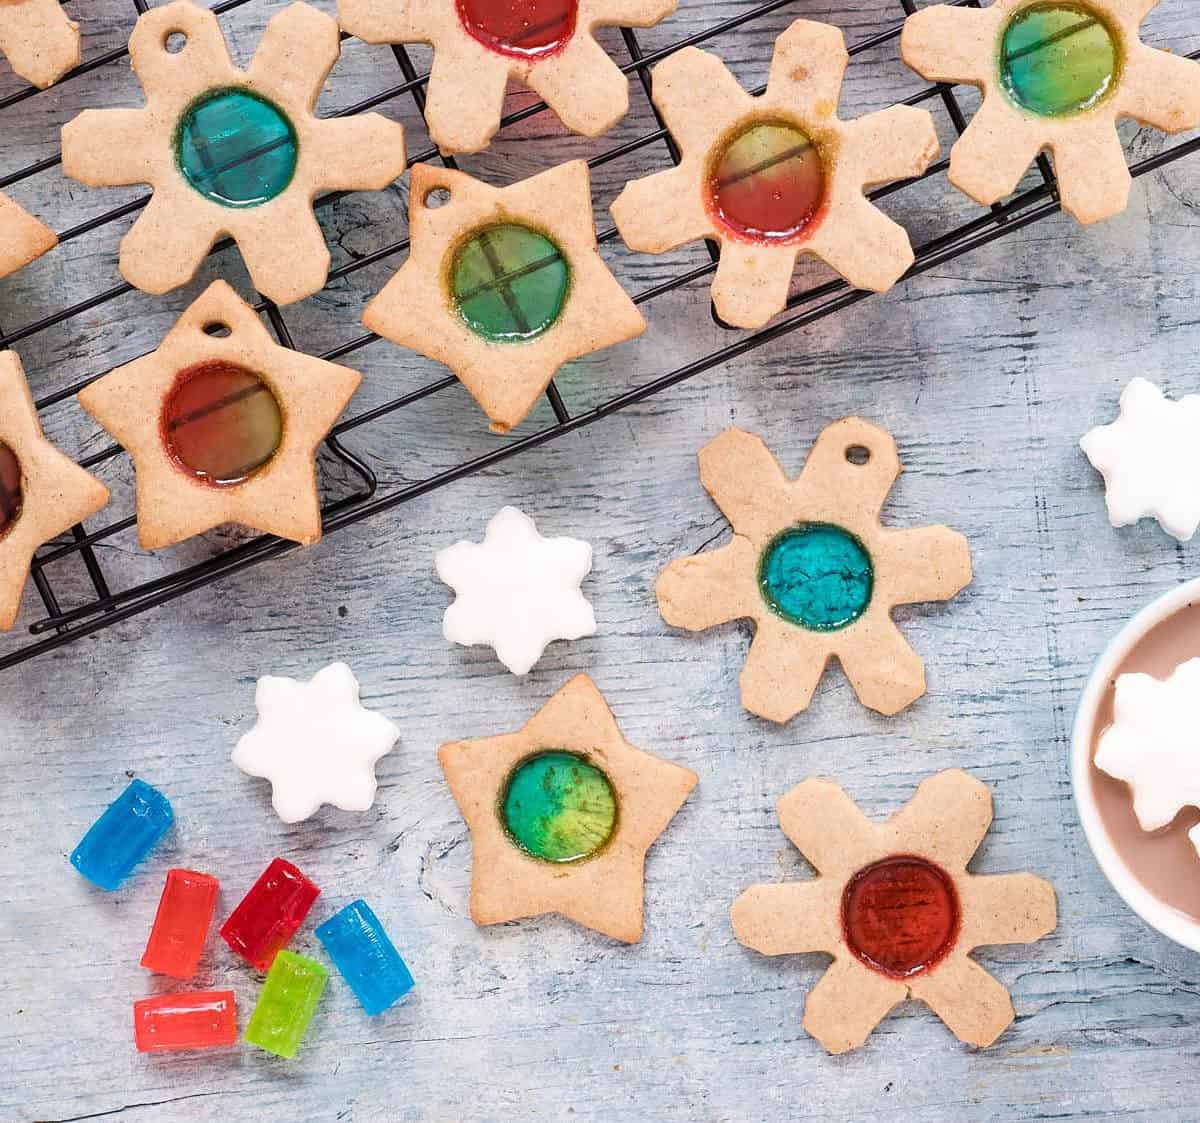
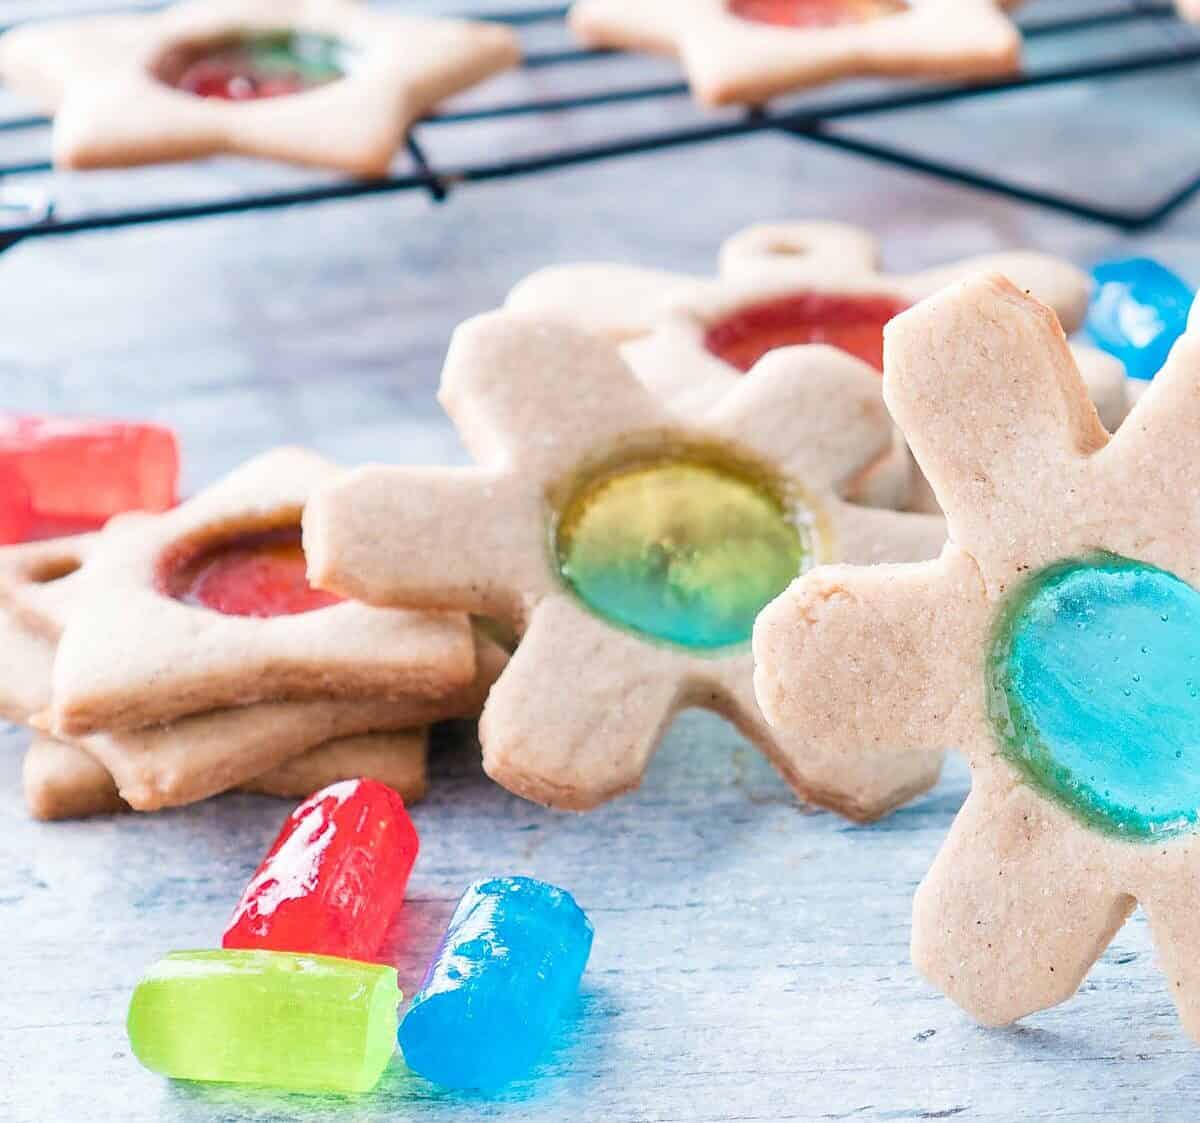
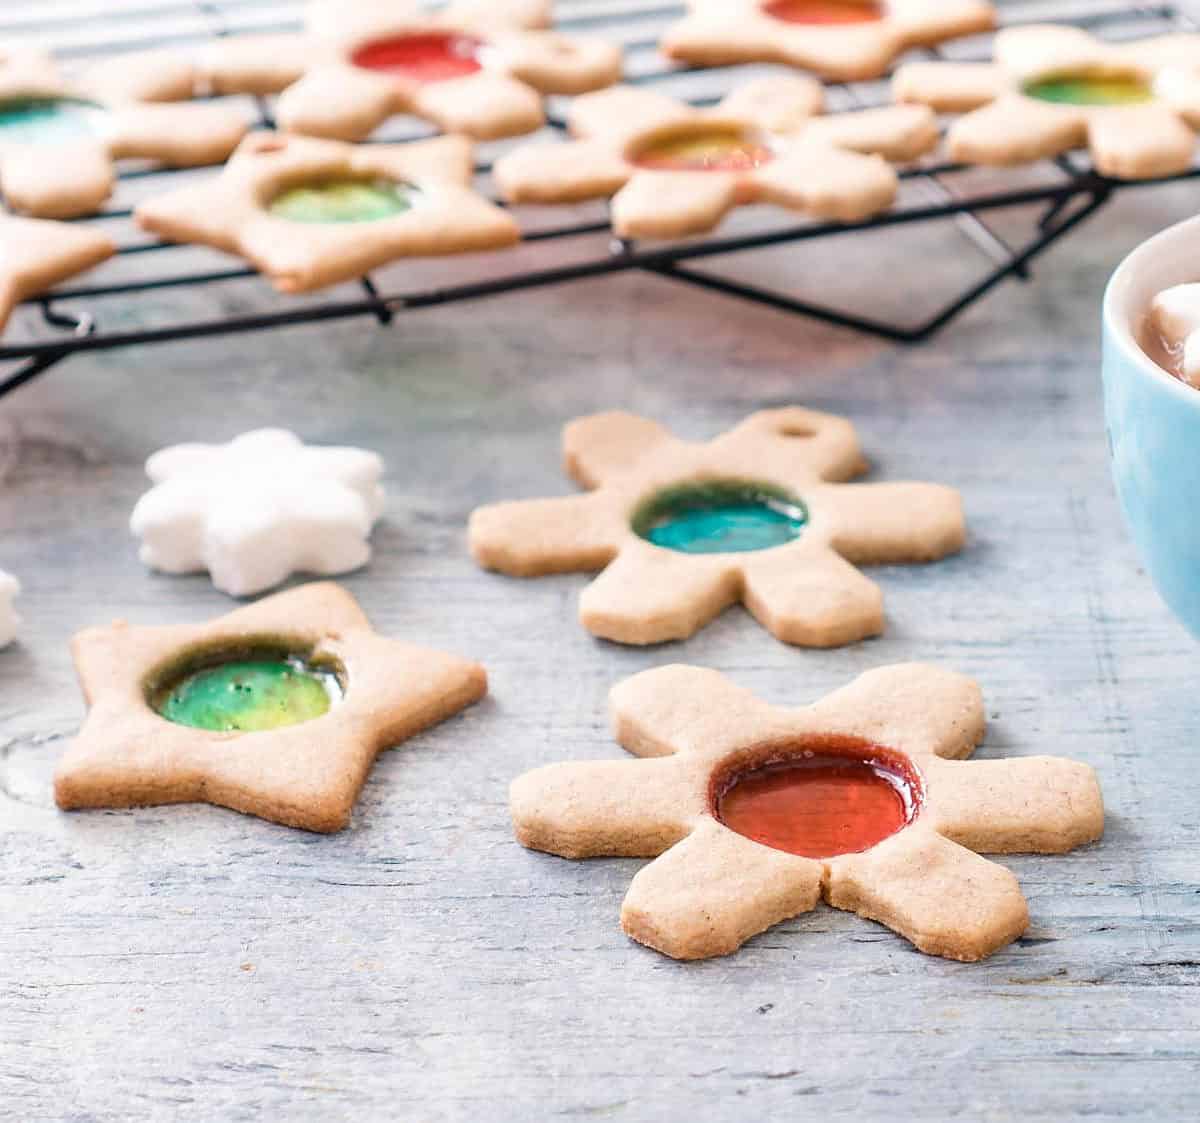
– Stained Glass Cookies: For an added crafty element melted Jolly Ranchers hard candy can enhance this brilliant stained glass effect. Arrange the candy pieces inside the cutouts before baking so they melt and fill in spaces as they bake.
These substitutes and variations are just a starting point – let your imagination run wild! It’s said that diversity is what makes life interesting, so go ahead and get adventurous with your cookies!
Serving and Pairing
Ah, the moment of truth! Your shining star cookies recipe is finally out of the oven and ready to be devoured. But before you sink your teeth into them, let’s talk about how best to serve and pair these little delights.
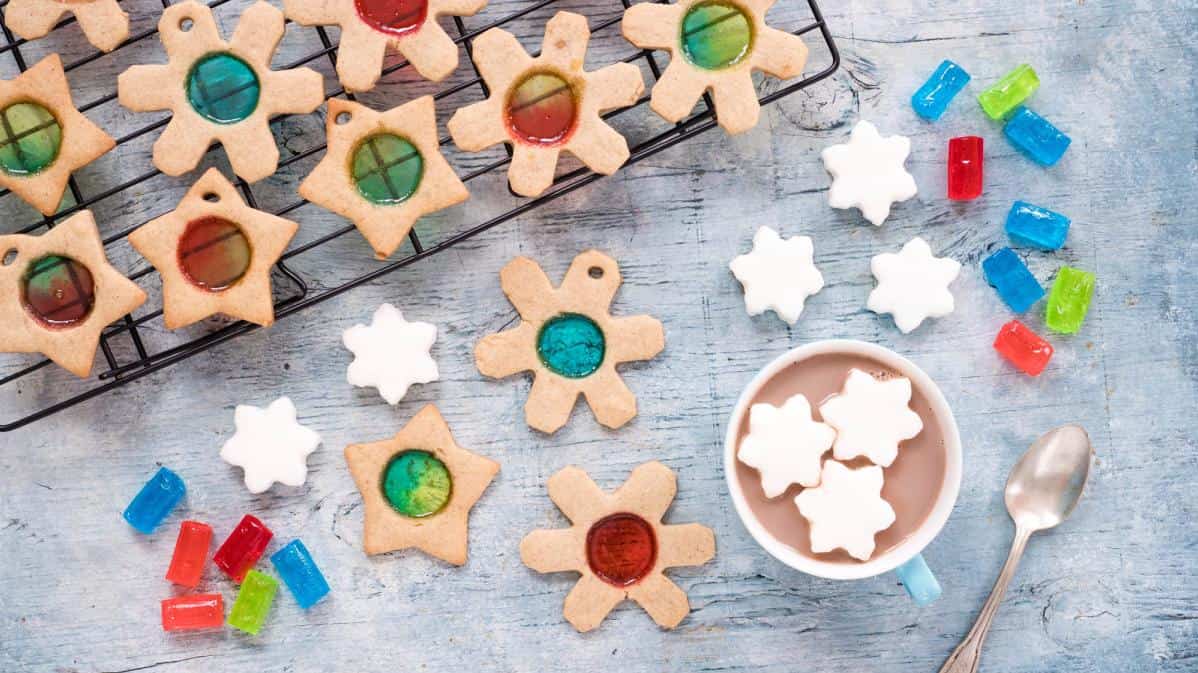
First things first, they’re perfect as a midday snack with a cup of coffee or tea. Their buttery richness is balanced by the allspice, giving them depth and fullness that can stand up to strong flavors – like a piping hot cup of coffee – without overpowering them.
If you’re feeling fancy, you can make sandwich cookies out of these star biscuits. Simply spread your favorite jam (I recommend raspberry) between two cookies, dust some edible glitter on top, and voilà! The jammy star biscuits are deliciously festive.
For those of us who love shortbread cookies, these stars make for the perfect substitute. They have a similar texture but are enhanced with the lovely spiciness that provides an added depth of flavor.
If we’re talking about serving on special occasions, royal icing can dress these up as part of any holiday spread. Dip them in melted Jolly Ranchers to create stained glass windows or simply sprinkle some gold stars on top and they’ll become the centerpiece of even the grandest party spread.
However you choose to serve them, one thing’s for sure: these shining star cookies will shine brightly whatever their surroundings may be.
Make-Ahead, Storing and Reheating
Now that your shining star cookies are baked and ready to be consumed, let’s talk about how you can store and reheat them.
If you’re planning to make a large batch of shining star cookies, you can definitely make them ahead of time for your convenience. The good news is, these cookies hold up well in storage. You can keep the baked cookies in an airtight container at room temperature for up to a week. Just make sure that the container is sealed tightly to prevent the cookies from getting stale.
If you want to extend their shelf life even further, you can refrigerate or freeze them. Place the cooled cookies in a freezer-friendly bag or container and keep them in the fridge for up to two weeks, or in the freezer for up to three months. When it’s time to serve, take out the container from the freezer and let it sit at room temperature for a few hours before unwrapping it. This will help the cookies to thaw and become soft again.
Reheating is easy-peasy as well. If you want your shining stars warm and soft again, simply pop them into a preheated oven at 350°F for five minutes or so. You don’t need to thaw them beforehand if they are frozen; just place them in the oven straight from the freezer. Another option is microwaving your cookie for ten seconds or until it’s warm enough for your liking.
Just remember that reheating can cause some of the decorations on your cookie to melt, especially those with candy toppings like Jolly Ranchers or edible glitter. To prevent this from happening, it’s best to decorate after reheating.
With these handy tips for storing and reheating your shining star cookies, you’ll always have scrumptious treats on hand whenever cravings strike!
Tips for Perfect Results
Creating the perfectly baked Shining Star Cookies is more than just following the recipe. There are a few tips and tricks that can help you achieve the ideal texture, color, and flavor in every batch. Let me share with you some of my recommendations for perfect results.
First and foremost, it is essential to use high-quality ingredients. To get that heavenly aroma and taste, opt for top-notch brown sugar, butter, and all-purpose flour. It may be tempting to save a few bucks by grabbing cheaper substitutes, but trust me; it’s worth it to splurge on quality.
Another tip is to ensure that your eggs and unsalted butter are at room temperature before you begin baking. The reason behind this is that at room temperature, they can mix more efficiently with other ingredients, resulting in an evenly blended and smooth dough.
When mixing your wet and dry ingredients, make sure not to overbeat the mixture as it will develop too much gluten resulting in tough cookies. Mix until just combined.
Using a top-quality star cookie cutter will make all the difference in attaining the ideal shape and size of your shining star cookies. A well-shaped cookie cutter will cut through clean edges effortlessly creating symmetrical stars which will give you an end result that looks impeccable!
One crucial aspect to keep in mind is to chill the dough before cutting out shapes. The dough needs at least an hour or two in the refrigerator before being used. This way, it will retain its shape while being cut out and still hold its shape during baking.
Lastly, do not forget that baking times may vary depending on your oven model and altitude levels in your area. It’s best to keep an eye on them through the oven’s glass door throughout the process. Once they turn golden brown around their edges and have puff up nicely around their centers take them out of the oven because overbaking them could result in dry or burnt cookies.
Follow these tips carefully, and you’ll surely end up with a batch of shining star cookies you can be proud of!
Bottom Line
If you’re looking for a Christmas cookie recipe that stands out, look no further than these Shining Star Cookies. With their festive design and scrumptious taste, they’re guaranteed to be a hit at any holiday gathering.
So grab your star cookie cutter and get baking – this recipe is easy to follow and produces consistently delicious results. And with the flexibility to switch up flavors and decorations, you can truly make these cookies your own.
Trust me, as a seasoned baker, these cookies are more than just a sweet treat. They have the power to bring people together and create memories that will last far beyond the holiday season.
So whether you’re baking for family, friends or just for yourself, be sure to add Shining Star Cookies to your recipe repertoire. May they brighten up your holiday season with each and every bite.

Shining Star Cookies Recipe
Ingredients
- 1 cup brown sugar
- 2/3 cup butter
- 1 small egg
- 2 1/2 cups all-purpose flour
- 2 teaspoons allspice
- 4 dozen small hard candies (Unwrapped)
Instructions
- Preheat your oven to 350°F.
- Put the sugar and butter into a large bowl. Stir them together with a wooden spoon, until the mixture is smooth.
- Break the egg into to a separate bowl. Use a fork to stir the egg hard, until the yolk and the white are mixed together well. Mix the beaten egg into the mixture in the bowl, a little at a time.
- Sift the flour and allspice through a sieve into the bowl. Mix everything together really well, using the wooden spoon.
- Use your hands to squeeze the mixture together to make a dough. Then, squeeze the dough into a large ball.
- Dust a clean work surface and rolling pin with a little flour. Don't use too much flour or the dough will get tough. Roll out the ball of dough until it is about 1/4 inch thick.
- Draw around a cookie sheet on parchment paper. Cut out the shape and put it on the baking sheet. Cut the stars from the dough using the large star cookie cutter. Place the stars on the parchment sheet.
- Make a hole in each star by pressing the drinking straw through the dough, near to the top of one of the points.
- use the small cookie cutter to cut a hole in the middle of each star. The hole should be only slightly bigger than the candy.
- Squeeze the scraps of dough into a ball. Roll out the dough again and cut out the rest of the stars. Place them on the parchment sheet and make holes and circles in them too.
- Put a candy into the middle of each star. It looks better if you use different colored hard candies. Put the cookie sheet on the middle shelf of the oven and bake the stars at 350°F for 12 minutes.
- Take the cookies out of the oven. Leave them on the baking sheets until they have cooled completely. Remove carefully. This is where you can eat them, or make them into ornaments by stringing a ribbon through each hole at the tip of the stars.
Your Own Notes
Nutrition
Recommended Recipes Just For You
None found

Steven is a chef by heritage, so it’s no wonder why baking is such a big part of who he is. To share his passion for all things sweet, he created cookiesncrepes.com. It’s the perfect platform to indulge in delicious treats, all with a sprinkle of his signature flare.