Get Cozy with our Delicious Snow Pie Recipe!
Are you looking for the perfect holiday dessert that will impress your guests and leave them wanting more? Look no further than Santa’s Snow Pie. This stunning and delicious pie is a showstopper that will steal the spotlight at any holiday gathering.
With its creamy filling, delicate snow-like topping, and irresistible peppermint flavor, Santa’s Snow Pie is sure to become a beloved favorite in your family’s holiday recipe collection.
But don’t be intimidated by its stunning appearance – this pie is easy to make with just a few simple ingredients. So let’s get started on making your perfect holiday dessert.
Why You’ll Love This Recipe
Are you looking for a dessert that is perfect for the upcoming holiday season? Look no further than Santa’s Snow Pie Recipe. This dessert is a unique twist on traditional pies and will leave your taste buds dancing with joy.
One of the reasons why you’ll love this recipe is its perfect balance of sweet and minty flavors. With the combination of peppermint extract and a smooth vanilla filling, every bite will encompass the essence of a winter wonderland. Plus, the crust is made with crushed chocolate cookies that add an extra layer of chocolate goodness.
Another reason why you’ll adore this recipe is that it’s easy to prepare. All it takes is just a few ingredients, including a premade graham cracker crust and some basic kitchen staples like cornstarch and egg whites, making it ideal for those who want to serve up something special but don’t have a lot of time to spare in the kitchen. With just a little bit of effort, this pie can be savored all throughout the holidays.
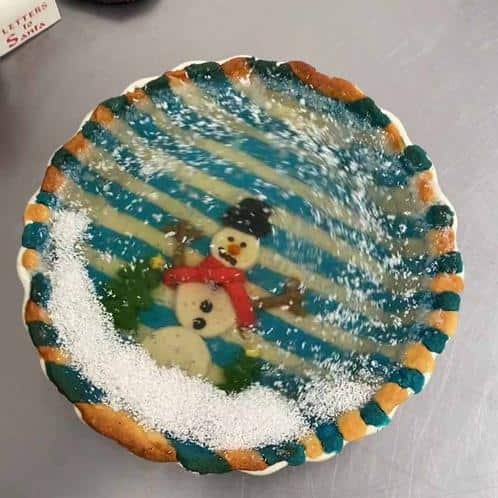
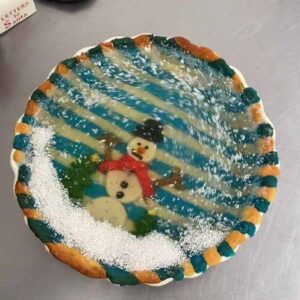
Moreover, this recipe guarantees picture-perfect results every time. The pie is finished off with an embellishment of dashing snow that makes it look like a perfect snow globe. It’s sure to catch everyone’s attention at your next holiday gathering or Christmas dinner!
In summary, Santa’s Snow Pie Recipe has everything you could ever want in a dessert – delicious flavor, simplicity in preparation, and an impressive appearance that’ll delight everyone at the party. So why not add Santa’s Snow Pie to your next charcuterie board along with other delectable goodies? This recipe deserves a place on your table this holiday season!
Ingredient List
Let’s take a look at the ingredients you’ll need to create this Santa’s Snow Pie Recipe.
Crust:
- 1 prepared graham cracker crust or chocolate crust(9-inch)
Filling:
- 2 cups boiling water
- 1 1/2 cups granulated sugar
- 1 1/2 tsp cornstarch
- 1/4 tsp salt
- 1 tsp pure vanilla extract
- 3 egg whites
- Dash of snow
Embellishments:
- Red and green food coloring
- Santa hat
These ingredients will help you prepare a fluffy and delicious pie perfect for the holiday season.
The Recipe How-To

Now that you have gathered all the necessary ingredients, let’s start creating the Santa’s Snow Pie! Follow the simple steps below:
Step 1: Heat the oven
Preheat your oven to 375°F (190°C).
Step 2: Combine cornstarch, sugar, and salt
In a large mixing bowl, combine cornstarch, granulated sugar, and salt. Mix them thoroughly.
Step 3: Mix with boiling water
Incorporate 2 cups of boiling water with the dry ingredients mixture. Add in a few drops of peppermint extract and continue to stir.
Step 4: Cook mixture
Pour the combined mixture into a saucepan over medium heat. Continue stirring until the mixture thickens or until it starts boiling again.
Step 5: Add egg whites
While constantly stirring, add in 2 egg whites into the saucepan.
Step 6: Cook mixture again
Continue cooking and stirring for about two minutes more, or until the sauce turns into white foam-like consistency. Remove it from heat and stir in half a dollop of butter.
Step 7: Pouring process
Pour it onto your prepared graham cracker crust. Let it cool at room temperature. Once it’s cold enough, put it inside your refrigerator for about an hour until set.
Step 8: Embellish with whipped cream and dashing snow!
Before serving, embellish with whipped cream and dashing snow made of powdered sugar!
Enjoy your Snow Pie creation in just an hour-long baking session!
Substitutions and Variations
The great thing about baking is that there is always room for creativity and experimentation! Here are some substitutions and variations to try for this Santa’s Snow Pie Recipe:
– Chocolate Crust: Instead of using a prepared graham cracker crust, try using a chocolate cookie crust for a more decadent flavor.
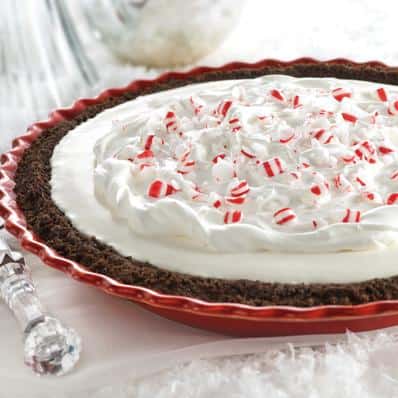
– Peppermint Pie: Keep the ingredients 1-1/2 cups granulated sugar, 1/4 cup cornstarch, 1/4 teaspoon salt, 3 cups boiling water, and 1 tablespoon vanilla extract the same. However, instead of egg whites in the filling, mix in crushed peppermint candies. Top the pie off with whipped cream and crushed candy canes for the perfect holiday treat.
– Pumpkin Pie Variation: Use your favorite pumpkin pie recipe jumbo jar as the base recipe. Then add two cups boiling water to one 30 oz. can of pumpkin pie filling. Mix the prepared sugar (1-1/2 cups), cornstarch (6 tablespoons) and salt (3/4 teaspoon) in a large saucepan; stir until smooth. Slowly stir boiling water into sugar mixture; stir constantly to prevent lumps from forming. Remove from heat once mixture has thickened. Mix in pumpkin puree and spices per your favorite recipe, then prepare as instructed above with the egg whites and dashing of snow.
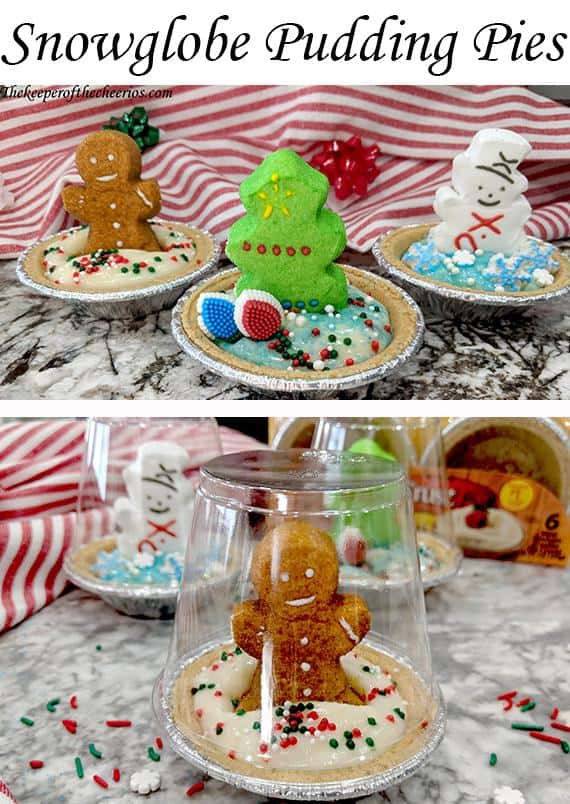
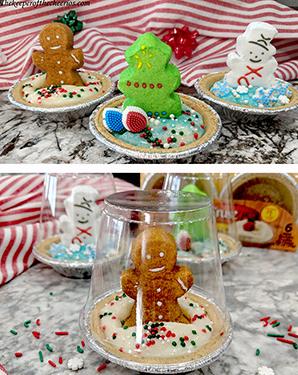
– Snow Globe Mini Pies: Use mini prepared graham cracker crusts instead of one large crust. Fill each pie crust with the filling mixture, then top with whipped cream swirled to resemble a snow globe.
– Cheesecake Variation: For a cheesecake twist, use a 9-inch springform pan instead of a pie dish and pre-bake the crust at 350 F for 10 minutes prior adding in the filling mixture. For an extra touch, you can also add on top designs like tiny santa hats cut out from strawberries or melted chocolate snowflakes.
These substitutions ensure that you can enjoy multiple versions of this delicious Santa Snow Pie recipe whether you are decorating a traditional Christmas cake ,charcuterie board or whipped up santa cakes or bake banana split this year!
Serving and Pairing
Once you’ve mastered the Santa’s Snow Pie recipe, it’s time to think about how to serve and pair this delightful dessert. This pie looks so impressive that you can easily serve it at a holiday feast, impressing your guests with your baking skills. The snow-white filling is topped with a dashing of snow embellishment, reminiscent of a magical snow globe, making it the perfect holiday center-piece for any dessert table.
When serving the pie, make sure to slice it thinly as it is quite rich and indulgent. A small slice on its own is perfect, but if you want to take things a step further pair the snow pie with some fresh whipped cream or vanilla ice cream to balance out the sweetness.
On the topic of pairing, this snow pie pairs perfectly with a cup of rich coffee or cocoa after a hearty meal. It’s also delicious accompanied by a creamy cheesecake or charcuterie board for an indulgent festive brunch. And if you’re looking for something more creative, try pairing it with other winter-themed treats like pumpkin pie, mince pies or even a bake banana split.
Whichever way you serve and pair this Santa’s Snow Pie recipe, it’s sure to make its mark as one of the most impressive Christmas desserts around!
Make-Ahead, Storing and Reheating
Santa’s Snow Pie is a perfect holiday dessert, but it requires a bit of preparation ahead of time. Luckily, this pie can be made in advance and stored until the big day.
To make ahead, simply prepare the pie as directed in the recipe, cover it tightly with plastic wrap or foil and place it in the refrigerator for up to 2 days. This can free up your time to focus on other Christmas activities.
If you have any leftovers, the pie can be stored in the refrigerator for up to 3 days. Make sure to cover it tightly with plastic wrap or foil so that it doesn’t dry out.
Reheating Santa’s Snow Pie is straight forward. For best results, reheat individual slices in the oven at 350°F for about 10-15 minutes or until heated through. Alternatively, you can microwave individual slices on high for 30 seconds to 1 minute until heated through.
Bear in mind that reheating may cause the meringue topping to shrink and deflate slightly but don’t worry, it will still taste delicious!
Santa’s Snow Pie looks stunning when fresh out of the oven, but its flavors develop even more when given time to set. The make-ahead option and storing tips help make this recipe more convenient and accommodating for any party planning or time constraints you may have during the holidays.
Tips for Perfect Results

To ensure that your Santa’s Snow Pie is the perfect addition to your holiday dessert table, here are some tips that can help you achieve the best results.
Firstly, make sure your pie crust is prepared according to package instructions or a homemade recipe. A chocolate crust would make for an interesting twist, or even a graham cracker crust with a hint of peppermint extract. If you want to make it easier on yourself, you can also use a prepared graham cracker crust.
When making the filling, be extra careful with the cornstarch. It can easily clump up and ruin the texture of the filling. So, make sure you mix the cornstarch with cold water until it’s smooth before adding it to your mixture of sugar, salt, and boiling water.
Another crucial step to achieving a perfect result is properly beating the egg whites until stiff peaks form. This should take about 5-6 minutes on medium speed. If the egg whites are not beaten enough, your pie will end up soupy after baking.
Next, when mixing in the egg whites with the hot filling mixture, do it gently and slowly so as not to deflate them. You want to maintain as much of their airiness as possible.
If you’re feeling adventurous and want to add embellishments to your snow pie, dashing snow across its surface will give a picturesque finish. You can do this by adding snowflakes made from purpose flour and water mixed into a swirl mug or by piping whipped cream in a circular motion on top of the pie.
Lastly, never underestimate the power of serving Santa’s Snow Pie alongside other holiday classics like fruit cake, mince pies or even charcuterie boards with various toppings like dried figs or dark chocolate shavings. Whether served alone or paired with other desserts, this Santa Snow Pie recipe will really put your Christmas table over the top.
Bottom Line
In conclusion, Santa’s Snow Pie recipe is the ultimate dessert for any holiday occasion. The combination of the light and fluffy snow-like filling with the crunchy chocolate crust makes for a delectable treat that will leave everyone in awe.
This recipe is easy to follow, with simple ingredients that can be found in any grocery store. The substitutions and variations section provides options for those with dietary restrictions or preferences, making this recipe accessible to all.
Not only is Santa’s Snow Pie delicious, but it also serves as an impressive centerpiece for any holiday feast. Its dashing snow embellishment will especially bring the magic of Christmas onto your plate.
The tips for perfect results and FAQ sections ensure that every pie will come out perfectly, allowing you to showcase your baking skills without any stress or hassle.
Overall, this recipe is a perfect addition to your repertoire of Christmas desserts. So go ahead and give it a try. After all, wouldn’t you rather have a slice of Santa’s Snow Pie on your table than a plain old mince pie?
Santa’s Snow Pie Recipe
Ingredients
- 1 1/2 cups boiling water
- 1 1/2 cups granulated sugar
- 1 teaspoon salt
- 1/2 cup cold water, mixed with
- 3 tablespoons cornstarch
- 2 egg whites
- 1 teaspoon vanilla extract
- 4 peppermint hard candies, crushed
- 1 prepared graham cracker crust
- 1 can whipped topping (aerosol)
Garnish
- chocolate shavings
Instructions
- In a saucepan with the boiling water slowly stir in the sugar and salt, cook until clear- set aside.
- With an electric mixer in a medium mixing bowl beat egg whites until stiff.
- Add sugar mixture to mixing bowl slowly, add vanilla and crushed candies blending well with mixer.
- Chill mixture about 1 hour.
- Pour into prepared crust.
- Top with whipped topping.
- Garnish with shaved chocolate.
Your Own Notes
Nutrition
Recommended Recipes Just For You
None found

Steven is a chef by heritage, so it’s no wonder why baking is such a big part of who he is. To share his passion for all things sweet, he created cookiesncrepes.com. It’s the perfect platform to indulge in delicious treats, all with a sprinkle of his signature flare.