Delicious and Easy Roshky Recipe for a Sweet Treat
Are you looking for a new cookie recipe to add to your holiday baking rotation? Look no further than my family’s beloved recipe for Roshky, traditional Slovak cookies that are sure to become a new favorite.
As a baker, I am always looking for ways to incorporate different cultural traditions into my desserts. These Roshky cookies are a perfect example of how food can be a cultural bridge, connecting us to our past and opening the door to new experiences.
But don’t let their Slovak heritage fool you – these cookies are universally loved for their buttery, tender texture and sweet, nutty filling. They are perfect for holiday parties or as a special treat just for yourself.
So roll up your sleeves and get ready to make some delicious Roshky cookies. With just a few simple ingredients and some love, you’ll have a batch of cookies that will transport you straight to the heart of Slovakia.
Why You’ll Love This Recipe

Are you ready to indulge in a delicious treat that will transport your taste buds straight to Slovakia? Look no further than this Roshky Slovak cookies recipe!
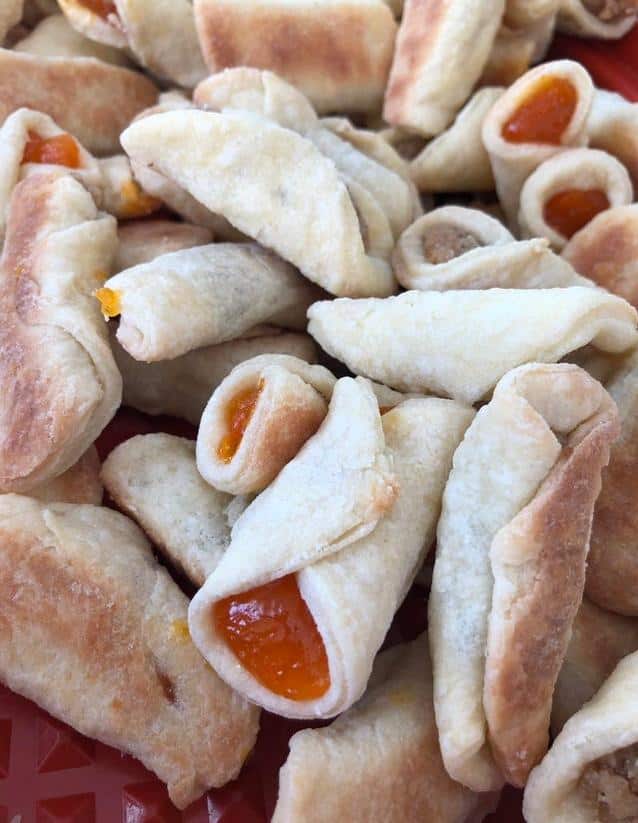
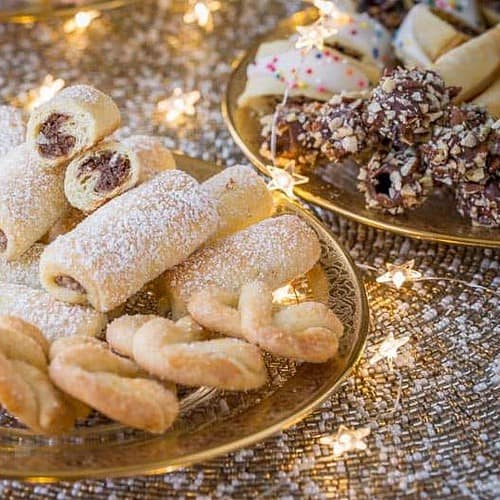
This delightful treat is a traditional Slovak cookie that is beloved by families for generations. These cookies are light, fluffy and filled with crushed walnuts, creating the perfect balance of sweetness and texture. This recipe uses high-quality ingredients that are guaranteed to make your Roshky cookies taste fantastic.
What makes this recipe even more special is its versatility. You can easily substitute the walnuts filling for other flavors such as apricot jam or cream cheese for a diverse range of flavors in just one batch! With some simple modifications, you can customize this classic dessert to your desired preference, making it perfect for any and all occasions.
But perhaps the best part about this recipe is how easy it is to make. The instructions are simple and straightforward, making it a breeze for even novice bakers to bake up these delicious treats. Plus, the dough freezes extremely well which means you can have fresh, hot cookies ready whenever your sweet tooth craves it.
In essence, why settle for store-bought or mass-produced desserts when you can whip up a batch of these delicious Roshky Slovak cookies in the comfort of your own kitchen? Whether you’re looking to share them with family or friends, or just want to indulge in a sweet treat by yourself, these cookies are sure to become a new favorite in your baking repertoire!
Ingredient List
Here are the ingredients we will need for this delicious Slovak cookies recipe:
- 2 lb (8 ounces) cream cheese, softened
- 2 lb (4 cups) unsalted butter, softened
- 2 1/2 cups cake flour
- 1/2 cup sugar
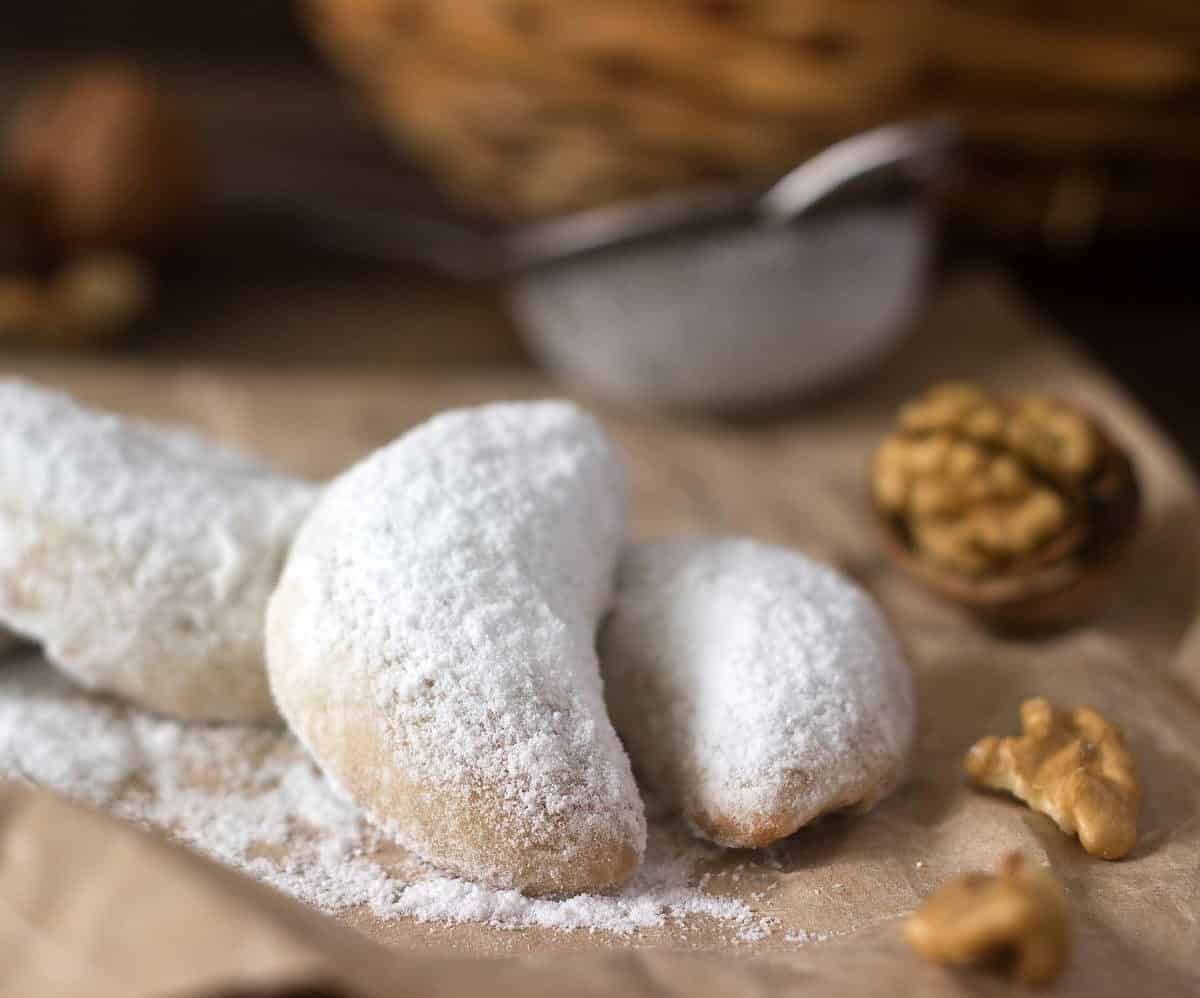
- 2 cups walnuts, ground
- 1/2 cup milk
- Confectioners’ sugar
These ingredients can easily be found at your local grocery store or specialized baking stores. While some may consider the amount of cream cheese and butter to be excessive, trust me when I say that they make these Roshky Slovak Cookies absolutely divine!
The Recipe How-To
Now, it’s time to make these delicious Roshky Slovak Cookies. Here are the steps you need to follow:
Step 1: Make the Dough
In a large mixing bowl, combine 1 ½ cups of cake flour, 1 cup sugar, 8 ounces of cream cheese and 2 sticks of unsalted butter (softened). Using an electric mixer or stand mixer, beat on medium speed until the ingredients are well combined and the mixture is smooth.
Step 2: Make the Filling
In a separate bowl, mix together 2 cups of ground walnuts, 1/2 cup sugar and 1/4 cup milk until evenly combined. Set aside.
Step 3: Assemble the Cookies
Preheat your oven to 375°F (190°C). Line your baking sheet with parchment paper. Take a small portion of dough (approx 1 tbsp) and shape it into a small ball using your hands. Flatten with your fingers and place a teaspoon of filling in the center. Pinch the dough around it to form a ball. Be sure that no filling can be seen. Repeat this process with remaining dough.
Step 4: Bake
Bake your cookies on the preheated oven for approximately 15-20 minutes, or until they are lightly golden brown.
Congratulations! You’ve just made Roshky Slovak Cookies from scratch! They’re perfect for serving at any type of celebration or gathering!
Note: The yield may vary depending on how large you make your cookies.
Substitutions and Variations

Just like any other recipe, you can switch some of the ingredients to create a new spin on the classic Slovak Roshky Cookies. One common substitution for the walnuts, for example, is pecans, or a combination of different nuts like almonds and hazelnuts.
If you don’t have cake flour in your pantry, AP flour will do. Just mix 1 cup of AP flour with 2 tablespoons of cornstarch, and voila – you got yourself a cake flour substitute. Some recipes even use all-purpose flour as it gives more texture to the cookies.
Cream cheese and unsalted butter can be substituted with regular salted butter. However, it may alter the flavor profile, so be mindful of this change. The cookies will still be delicious but a bit saltier.
If you want to reduce the calorie factor, try using low-fat cream cheese and unsalted butter to cut down on fat without compromising flavor.
For a vegan option, replace butter and cream cheese with plant-based substitutes that are available in most grocery stores.
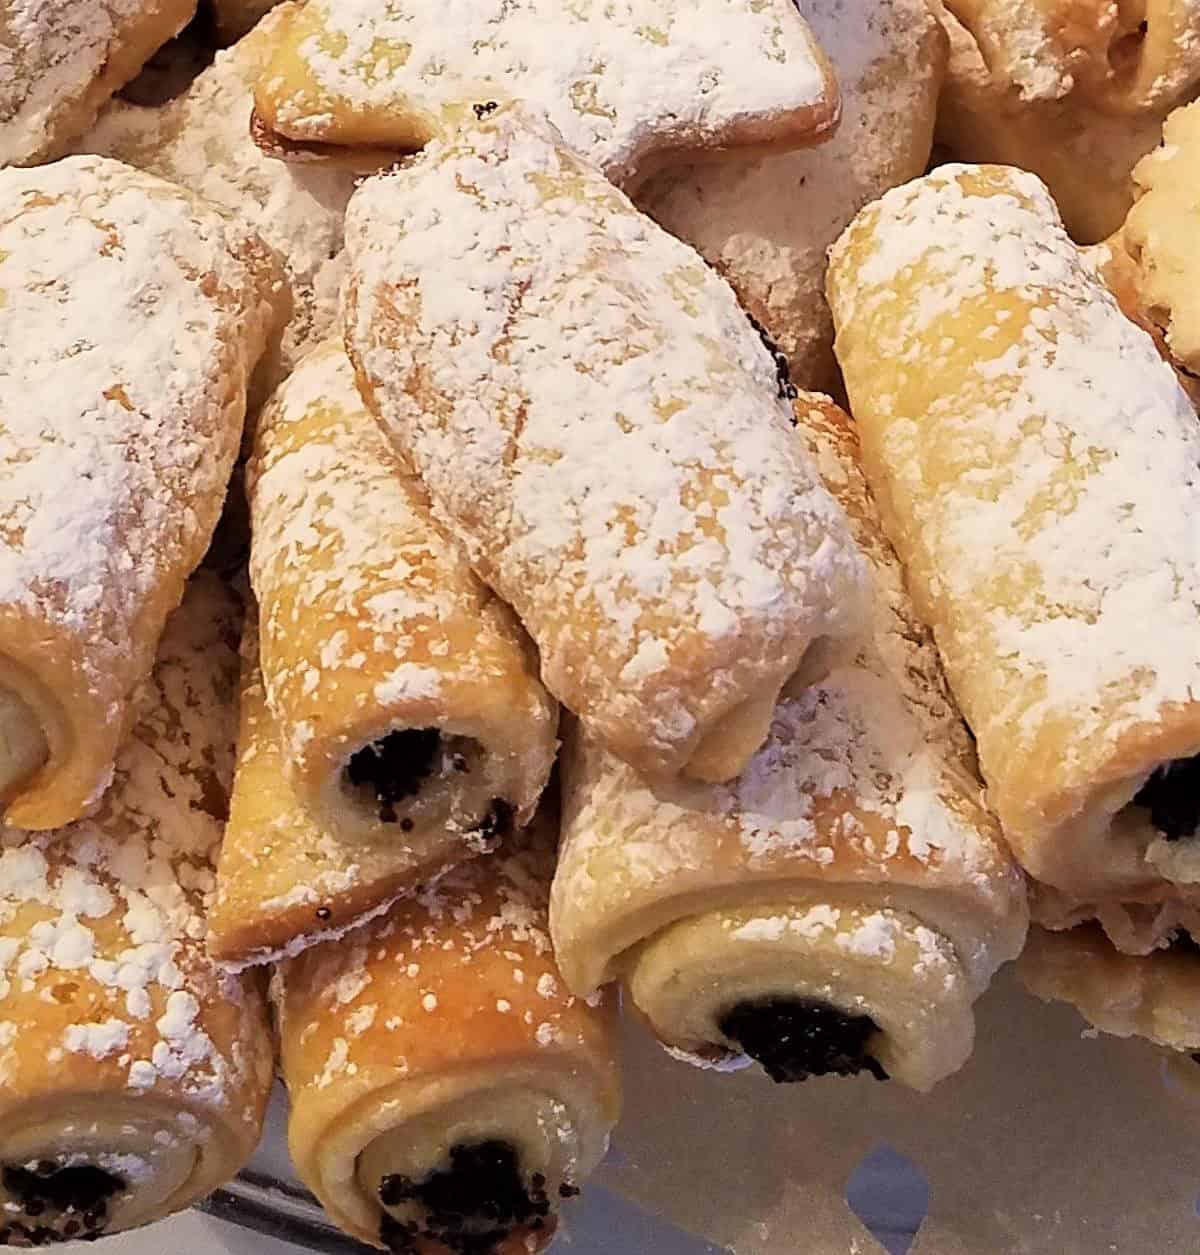
Finally, you can experiment with different fillings like homemade jams or Nutella spread for a more chocolatey touch. You can also add some cinnamon or cardamom to give it an extra kick.
Remember that these substitutions and variations are only meant to give you some ideas to play around with when it comes to roshky slovak cookies recipe. Don’t be afraid to try something new. Who knows? You might come up with your own version of this popular Slovak cookie!
Serving and Pairing
Now that your Roshky Slovak Cookies are baked and ready to enjoy, you’ll want to serve them up the right way. These delicious cookies are perfect for a midday snack, or even as a small treat after dinner.
One of my favorite ways to enjoy Roshky is with a hot cup of coffee, tea, or milk. The creamy filling mixed with the soft texture of the cookie pairs perfectly with a warm drink.
For those who prefer a more indulgent experience, try serving these cookies with a scoop of vanilla ice cream on top. The coolness and sweetness of the ice cream are a great complement to the richer flavors of the walnut and cream cheese filling.
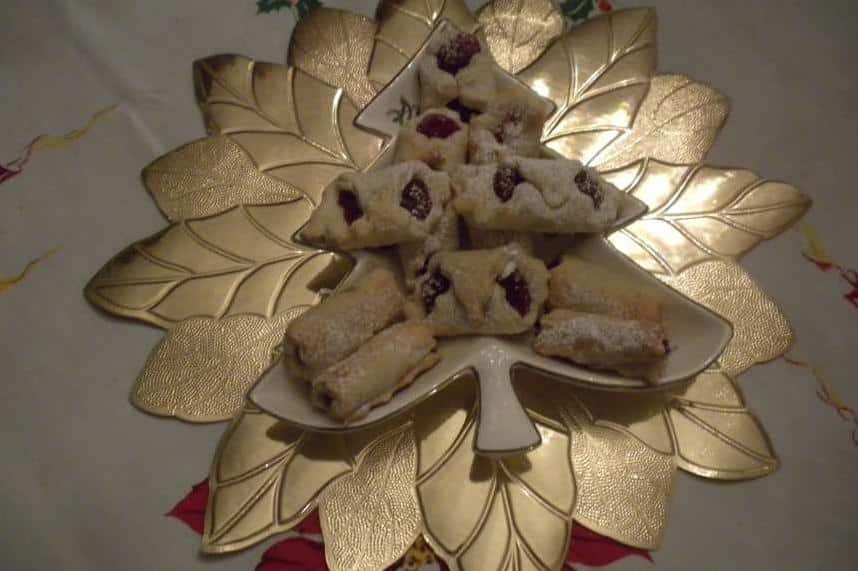
If you want to make your Roshky cookies even more festive, try serving them alongside other Slovak or Czech pastries like Kolacky or Kifliki. These desserts all share similar ingredients and techniques, so they pair perfectly together to provide your guests with an authentic taste of Eastern Europe.
Alternatively, if you’re in the mood for something savory, serve your Roshky cookies with a charcuterie board. The delicate sweetness of the cookies balances perfectly with salty cured meats and strong cheeses.
When sharing these delicious cookies with others, remember to dust them lightly with confectioners’ sugar for added presentation value. However you choose to serve them, I guarantee that everyone will love this traditional Slovak recipe!
Make-Ahead, Storing and Reheating
The delightful aroma wafting from a fresh batch of roshky is truly irresistible, but what if you’re not able to serve them right away? Don’t worry, these Slovak cookies are perfect for make-ahead preparation and can be stored and reheated with excellent results.
To make ahead, simply prepare the dough and fillings as described in the recipe, then cover in plastic wrap and refrigerate until you’re ready to bake. The dough can be refrigerated for up to two days, while the filling can be stored in an airtight container for up to one week.
When it’s time to bake, remove the dough and filling from the refrigerator and bring them to room temperature. Then follow the recipe instructions for shaping the cookies and bake as usual. These cookies will still come out tender and flaky with a delectable nutty filling.
If you have leftover cookies, they can be stored in an airtight container at room temperature for up to five days. To reheat, simply place them in a preheated oven at 350°F for 5-7 minutes until warmed through.
If you’re hosting a party or gathering, these cookies can also be frozen and reheated later. After baking, let the cookies cool completely before placing them in an airtight container or freezer bag. They can be frozen for up to a month. To reheat from frozen, preheat your oven to 350°F and place the frozen cookies on a baking sheet for 10-12 minutes until heated through.
With these easy make-ahead tips and reheating instructions, there’s no need to stress about serving fresh roshky every time. Enjoy these delicious cookies anytime by following these simple guidelines.
Tips for Perfect Results
Now, I am going to share with you some tips that will help you achieve perfect results with this Roshky (Slovak Cookies) recipe.
First and foremost, make sure you use quality ingredients. Higher quality ingredients will yield better flavor and texture in the final product. So, when selecting the walnuts, cake flour, butter, cream cheese and confectioners’ sugar for your recipe, choose only fresh high-quality ones.
Secondly, measure your ingredients carefully. Baking is a science that requires precise measurements. Use measuring cups and spoons instead of eyeballing amounts. Extra flour or sugar can alter the texture and taste of the cookies.
Another tip to take note of is the dough preparation. Ensure that all the ingredients are at room temperature before commencing with the dough preparation. If you’re in a hurry and don’t have time to bring softened butter to room temperature naturally, try cutting it into small pieces so it softens more evenly in roughly 20 minutes. When making the dough for Roshkies, you should mix until just combined. Overmixing could result in tough cookies.
Finally, when rolling the cookies, use parchment paper or a non-stick silicone mat between your work surface and the dough to avoid sticking.
Keep these tips in mind when making this recipe, and you’ll achieve perfect Roshky (Slovak Cookies) every time!
FAQ
Now that you have all of the information you need to make these delectable Roshky (Slovak Cookies), it’s time to address some frequently asked questions. I understand that baking can be an intricate process, so I want to make sure that you have all of your doubts cleared up before getting started. Below, I have answered some common queries that may arise while preparing this recipe. Keep reading to feel more confident about your baking capabilities and ensure perfect results!
What is Roshky?
In this recipe article, we’ll be making delicious crescent-shaped cookies that can be filled with either walnuts or fruits. These cookies are commonly known as Roszke or Rosky.
What is the best cookies in the world?
In this article, we will be sharing recipes from various countries that have their unique delicious cookies that will satisfy your sweet-tooth cravings. From the beautiful Scotland, we will be featuring a recipe for traditional Petticoat Tails cookies. Next up, we will be flying to Greece where you’ll drool over the Koulourakia, Roxakia, and Melomakarona. Finally, we will be visiting Algeria, where we’ll learn how to make the famous Makroud el louse cookies by Douzacake. So, join me on this journey and let’s get baking!
What do Danish butter cookies taste like?
I present to you a recipe for Festive Danish Butter Cookies – a delightful treat that boasts a light texture, simplicity, and a rich vanilla buttery taste that almost dissolves in your mouth.
How do you make Martha Stewart sugar cookies?
To make delightful holiday sugar cookies, you will need four cups of sifted all-purpose flour, and additional flour for the surface and to be added if needed. You will also need one teaspoon baking powder, half a teaspoon salt, eight ounces of unsalted butter that has been softened, two cups of sugar, two large eggs, and two teaspoons of pure vanilla extract. Additionally, you will need some royal icing to decorate your cookies.
Bottom Line
And there you have it – a tried and tested Roshky (Slovak Cookies) recipe that will surely be a crowd-pleaser! Don’t let the multiple steps intimidate you, because trust me, the end result is well worth it. The delicate cookie with the cream cheese filling makes for a satisfying bite that will leave you wanting more.
Plus, this recipe is incredibly versatile and can be tailored to your taste preferences. Swap out the walnuts for pecans or almonds, or mix in some fruit jam for an added burst of flavor.
In conclusion, I highly recommend giving this Roshky (Slovak Cookies) recipe a try. Impress your friends and family with these delicious treats during your next gathering or event. And who knows? You may just become known as the resident baker within your circle. Happy baking!
Roshky (Slovak Cookies) Recipe
Ingredients
- 1/2 lb butter
- 1/2 lb cream cheese
- 2 1/2 cups cake flour
- 1/2 lb walnuts, ground
- 1/2 cup sugar
- milk, or (for moistening)
- egg white, beaten (for moistening )
- confectioners' sugar (for rolling and for dusting)
Instructions
- Cream together thoroughly the butter and cream cheese.
- Blend in the flour.
- If mixture is sticky add a little more flour until the dough is easy to handle.
- Divide dough into four equal balls; flatten, then wrap each in waxed paper and chill thoroughly.
- To make filling, mix together walnuts and sugar, adding enough milk or beaten egg white to make a paste-like mixture.
- One at a time, roll out each chilled piece of dough (use confectioner's sugar for rolling as you would use flour in making pastry), until a little thinner than pie dough.
- Cut into 2-inch squares.
- Put 1/2 teaspoon filling in the middle of each square.
- Roll up. Seal ends. (Mrs. Mikosz does not say if you are to roll them end-to-end like a log or corner-to-corner. I remember seeing many corner-to-corner cookies so will try both and see how they turn out - please let me know what you do too).
- With a fork, dipped in confectioner's sugar, shape into cresents.
- Bake in a preheated 375F oven, on ungreased cookie sheets, for 20 minutes, or until golden. (dharmabean shared that 15 minutes was enough in her oven - see her review).
- Cool on rack.
- Sift confectioner's sugar over the tops.
Your Own Notes
Nutrition
Recommended Recipes Just For You
None found

Steven is a chef by heritage, so it’s no wonder why baking is such a big part of who he is. To share his passion for all things sweet, he created cookiesncrepes.com. It’s the perfect platform to indulge in delicious treats, all with a sprinkle of his signature flare.