Delicious and Easy Ambrosia Icebox Cake Recipe
When it comes to dessert, what could be better than a treat that is both delicious and easy to make? Enter the Ambrosia Icebox Cake – a dessert that will have you coming back for seconds (or thirds) in no time. This no-bake dessert is the perfect addition to any summer gathering, as it requires minimal effort and yields maximum taste.
But what exactly is an icebox cake, you may be wondering? Simply put, it’s a refrigerated dessert made by layering cookies or cake with whipped cream or pudding. The result is a sweet, creamy treat that can be customized with a variety of flavors and ingredients. And this Ambrosia Icebox Cake recipe takes the classic icebox cake to a whole new level by incorporating flavors inspired by the beloved ambrosia salad.
Not only is this recipe easy to make, but it’s also versatile. It can be made gluten-free by swapping out the ladyfingers for graham crackers, and you can customize the fruit toppings based on your preference or seasonal availability. So whether you’re looking for a new summer dessert idea or just want to impress your friends with your baking skills, this Ambrosia Icebox Cake recipe is sure to delight. Bon appétit!
Why You’ll Love This Recipe
What’s not to love about a dessert that’s easy to make and tastes like heaven in your mouth? The Ambrosia Icebox Cake Recipe is the perfect example of a dessert that will leave you wanting more.
First of all, this dessert is no-bake, which means you don’t have to worry about heating up the kitchen or using any complicated equipment. All you need are some simple ingredients and a few hours in the fridge, and you’ll have a delicious cake ready to go.
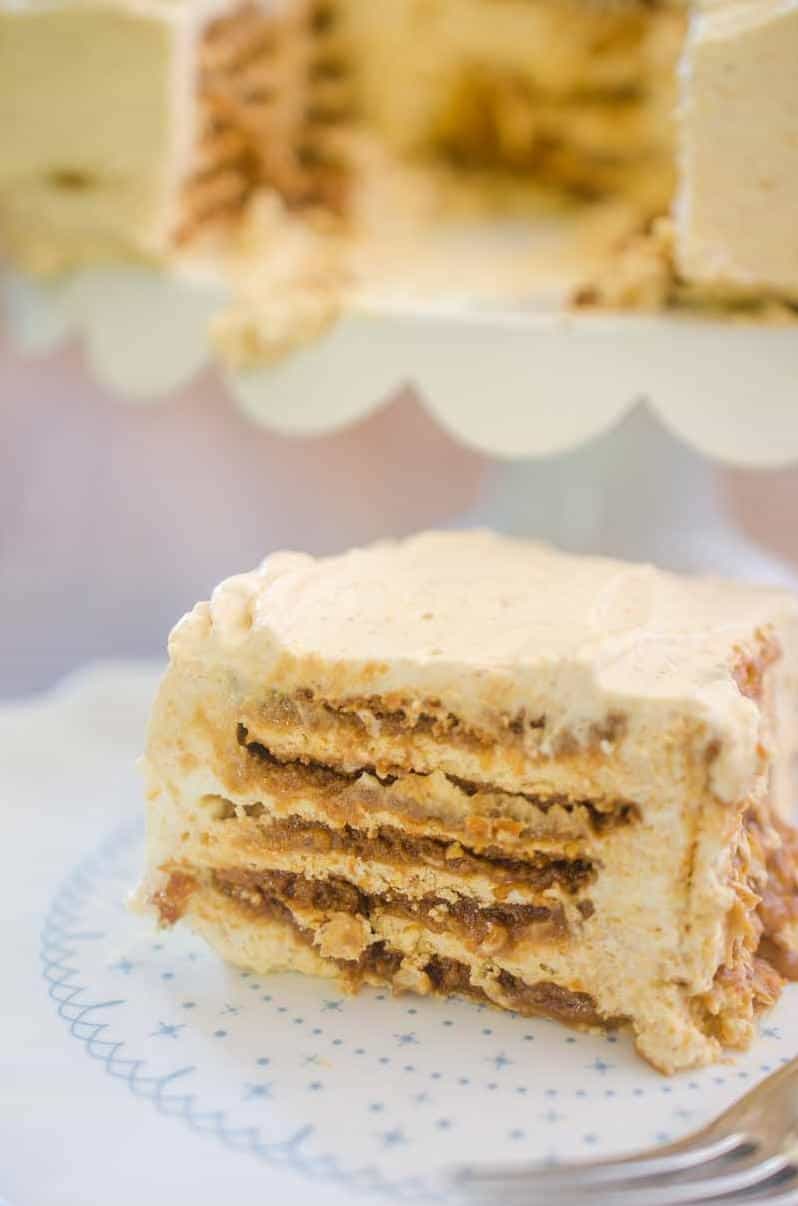
One of the key ingredients in this recipe is ladyfingers, which add a lovely texture and flavor that complements the creamy filling perfectly. The addition of sherry wine also gives the cake a subtle hint of sweetness that is irresistible.
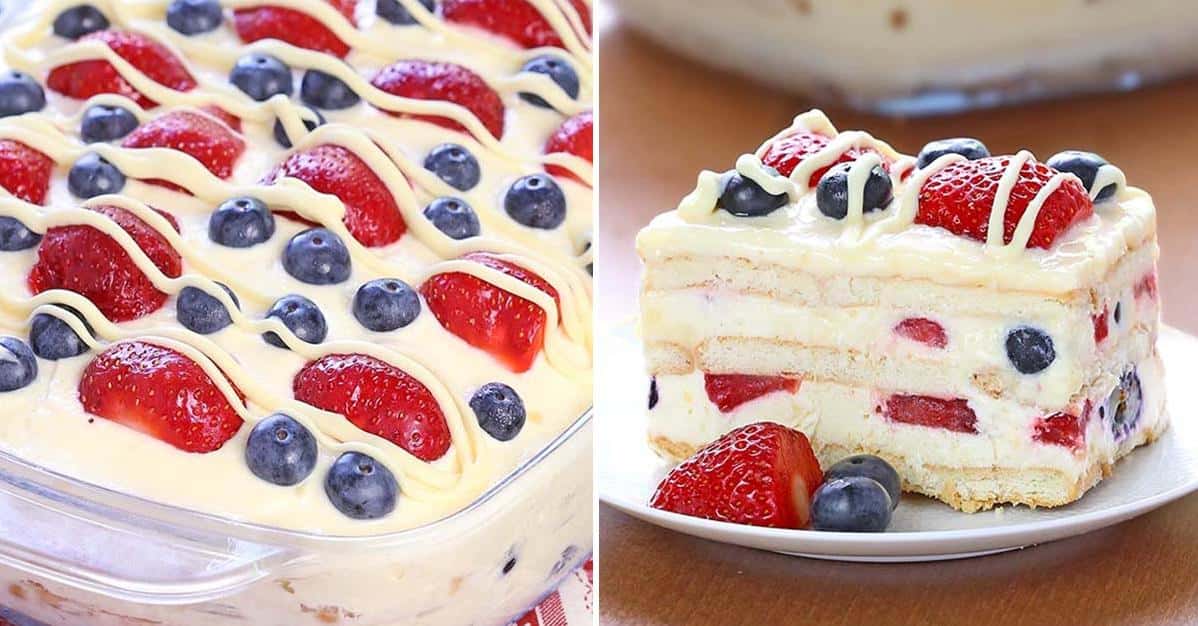
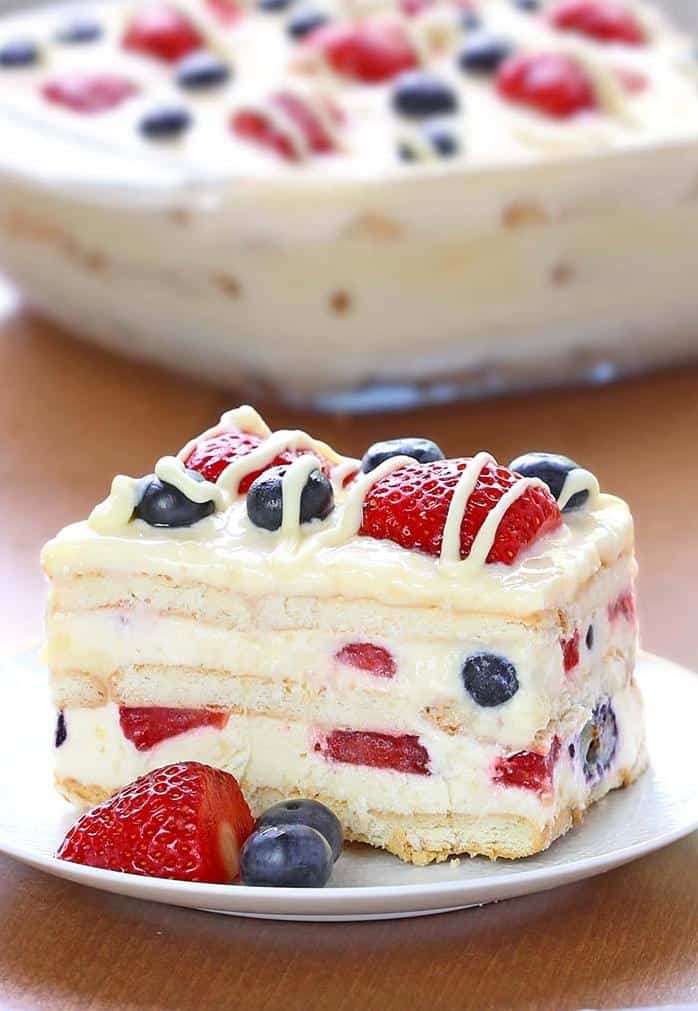
But perhaps the best thing about this recipe is its versatility. Not only can you use different flavors of pudding mix or whipped topping to switch things up, but you can also add in your favorite fruits to make it extra festive. Whether you’re looking for a pineapple icebox cake or want to try a summer berry version with strawberries and raspberries, the options are endless.
So if you’re looking for an easy dessert recipe that will impress your family and friends, look no further than the Ambrosia Icebox Cake Recipe. Trust me – once you try it, you’ll be hooked!
Ingredient List
To make this Ambrosia Icebox Cake, you will need the following ingredients:
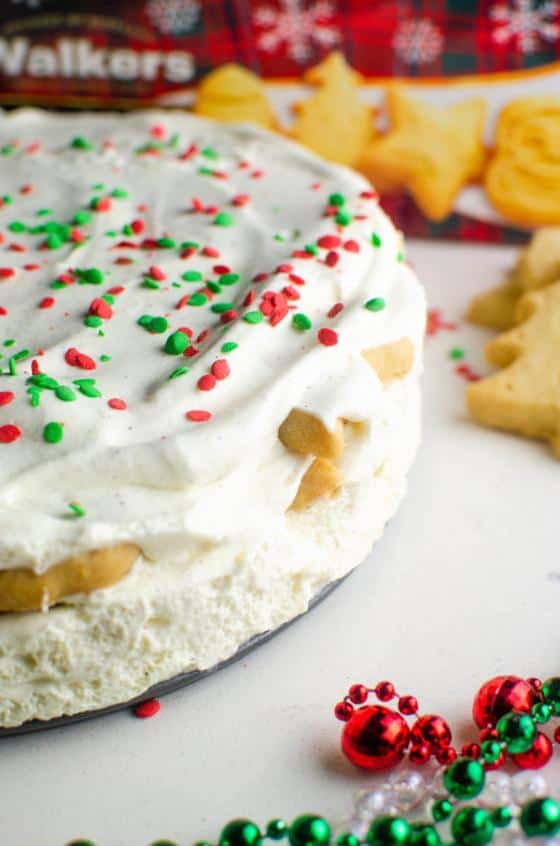
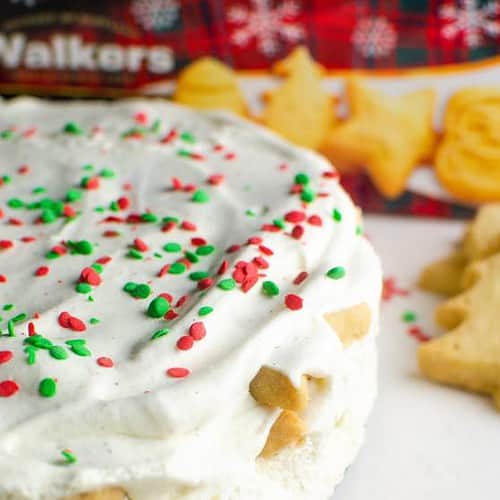
- 2 boxes of Walkers shortbread festive cookies (about 2 1/2 cups), crushed
- 1/2 cup unsalted butter, melted
- 1 can (20 ounces) mandarin orange segments, drained
- 1 can (8 ounces) crushed pineapple, drained
- 1 package (5.1 ounces) instant vanilla pudding mix
- 2 cups cold milk
- 1/4 cup pineapple juice
- 1/2 cup heavy cream
- 1/2 cup sour cream
- 1/2 cup sweetened flaked coconut
- 1/2 cup confectioners’ sugar
- 3 tablespoons cornstarch
- Pinch of fine salt
- 6 large eggs, separated and yolks at room temperature
- 3/4 cup sugar
- 2 tablespoons fresh lemon juice
- 1 tablespoon sherry wine (optional)
- 1 teaspoon vanilla extract
Note: You can substitute Walkers shortbread festive cookies with graham crackers, Nilla wafers or ladyfingers biscuits depending on what you have on hand.
The Recipe How-To
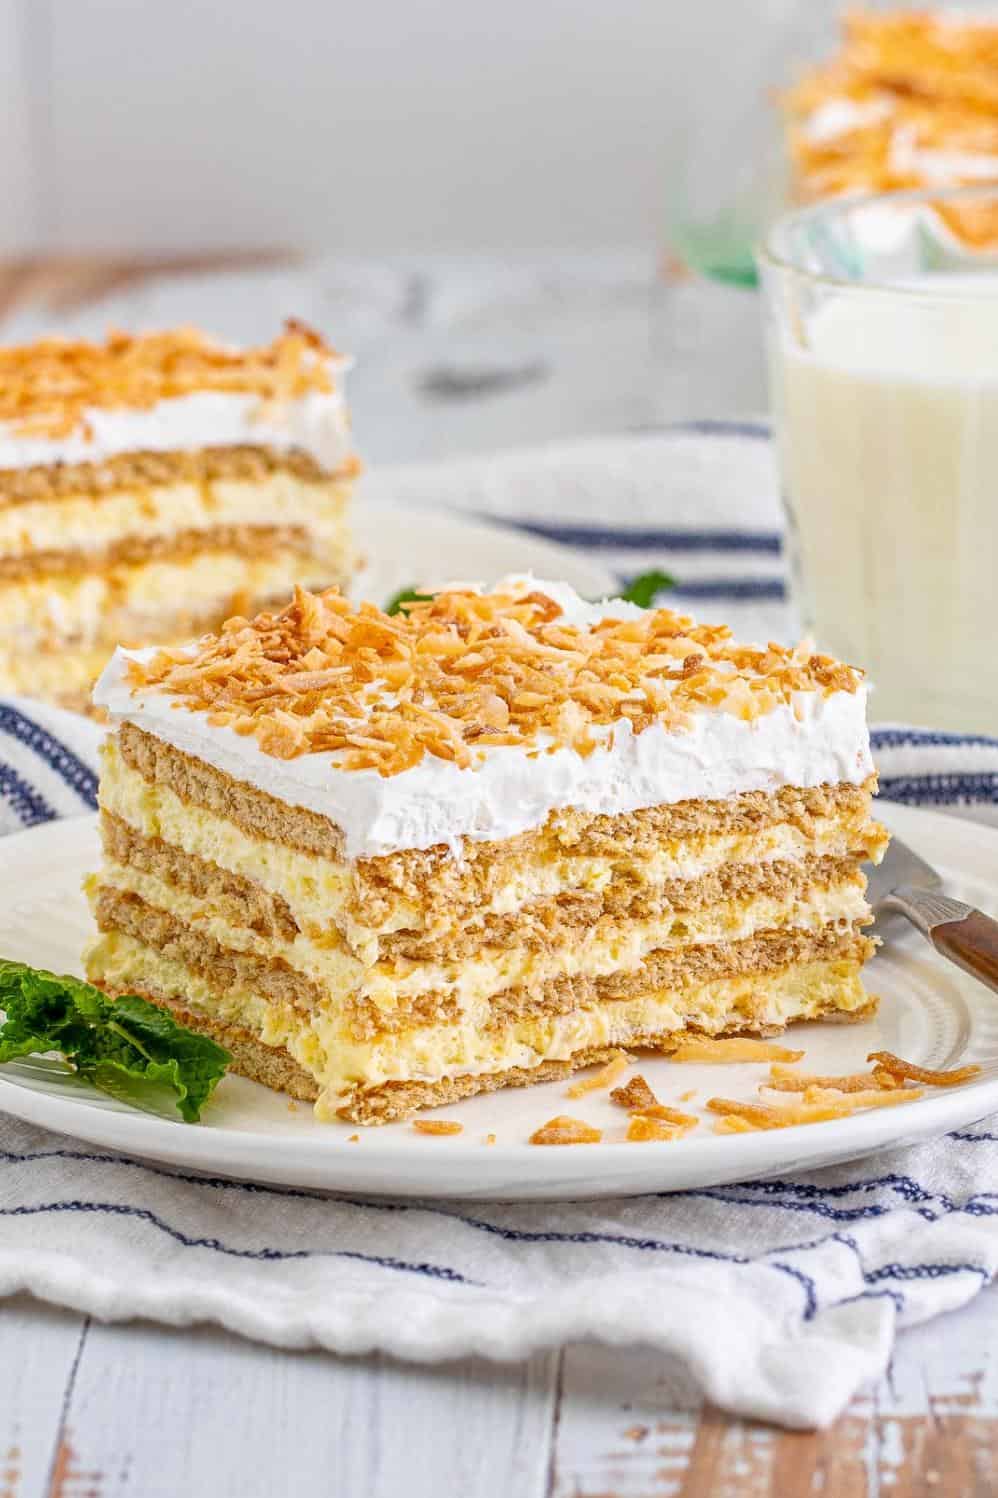
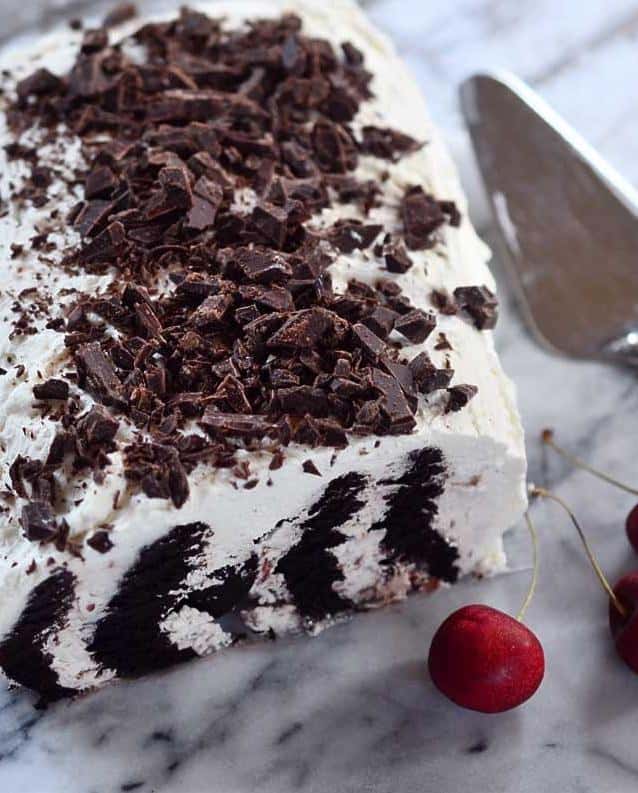
Now that we know the ingredients needed to make this ambrosia icebox cake, let’s dive into the actual recipe. This is a no-bake delightful dessert that consists of several layers of ladyfingers soaked in sherry wine, orange segments, and a coconut cream filling. You’ll want to start by gathering your ingredients and equipment before you begin.
Equipment Needed:
- 9-inch springform pan
- Hand mixer or stand mixer
- Large mixing bowls
- Measuring cups and spoons
Ingredients:
Here’s what you’ll need for the recipe:
- 1 package (7 oz) ladyfingers
- ½ cup sherry wine
- 1 tsp vanilla extract
- ¼ cup confectioners’ sugar
- 2 cans (10 oz each) mandarin orange segments, drained
- 1 can (8 oz) crushed pineapple with juice
- Pinch of fine salt
- 1 tbsp fresh lemon juice
- 2 tbsp cornstarch
- ⅓ cup sugar
- 2 large eggs, separated
- 1 cup sweetened flaked coconut flakes
Steps:
Step 1: Line The Pan
Line the bottom of a springform pan with parchment paper and set aside.
Step 2: Soak the Ladyfingers
In a shallow dish, combine the sherry wine and vanilla extract. Dip each ladyfinger into this mixture for about one second before placing them on the bottom of your prepared pan. Set aside until needed again.
Step 3: Create Coconut Filling
Using a hand mixer or stand mixer, beat together butter and confectioners’ sugar until light and fluffy. Add in drained oranges and crushed pineapple with juice along with a pinch of salt. In a small bowl, whisk together fresh lemon juice, cornstarch and sugar until it thickens up slightly. Beat egg whites until stiff peaks form in another small mixing bowl ⏤ it takes around one to two minutes using an electric mixer at medium speed. Fold beaten egg whites into pudding mixture then add coconut flakes.
Step 4: Begin Layering
Pour half of your coconut filling over the sponge fingers in your pan before covering this layer by adding another layer of dipped ladyfingers making sure they cover as much surface area as possible ⏤ you can break them down if necessary.Arrange mandarin oranges atop the layer then pour remaining coconut filling over it.
Top off your cake with remaining sponge fingers lightly dipped into sherry wine mixture.
Step 5: Refrigerate
Cover with plastic wrap then allow cake to chill for at least four hours or overnight inside the refrigerator.
After chilling, remove cake from pan by lifting it away from parchment paper using the springform mold’s release mechanism.
This Ambrosia Icebox Cake is so refreshing and easy to make, perfect for any occasion that calls for a sweet treat without
Substitutions and Variations
In the mood for a little experimentation? There are plenty of ways to mix and match the flavors in this ambrosia icebox cake recipe to make it your own. Here are a few ideas to get you started:
– Swap out the ladyfingers for graham crackers or walkers shortbread cookies for a different twist on the biscuit layer.
– Replace the sherry wine with pineapple juice or coconut water if you prefer a non-alcoholic version.
– Try using different fruits in the layers, such as fresh strawberries or raspberries instead of mandarin orange segments. You could also mix it up by using canned fruit cocktail or peaches.
– Add some extra texture and nutty flavor by stirring chopped nuts (like pecans, almonds, or macadamias) into the pudding or whipped cream layers.
– Turn this recipe into an eggnog icebox cake by swapping out the fruit and adding some nutmeg and rum extract to the pudding mix.
Whether you’re looking for an easy way to make this dessert gluten-free or just want to experiment with some new flavors, there’s no shortage of ways to customize this ambrosia icebox cake recipe. So grab your mixing bowl and let your imagination run wild!
Serving and Pairing
When it comes to serving the Ambrosia Icebox Cake, there are a wide variety of options available to you. While this cake is perfect as a standalone dessert, it can also be paired with a variety of different foods and drinks.
One great pairing for this dessert is a cup of hot tea or coffee. The sweetness of the cake pairs nicely with the bitter flavors of coffee and the tannins in tea. For those who prefer something colder, a tall glass of unsweetened iced tea or lemonade is a refreshing option.
If you want to elevate your dining experience, pair the Ambrosia Icebox Cake with a glass of dry sherry wine. This will bring out the sweetness in the dessert and complement its creamy texture perfectly.
For an even more festive occasion, consider serving this cake alongside some fresh berries or sliced fruit. The tartness of raspberries and strawberries complements the sweetness of the cake, balancing out its flavor profile nicely.
Finally, if you’re looking for a gluten-free pairing option, try serving this dessert with a scoop of dairy-free vanilla ice cream. The cool and creamy nature of the ice cream goes beautifully with the warm and fluffy cake, creating a perfect combination that everyone will love.
So go ahead and experiment with various pairings until you find the perfect combination that suits your taste buds – whether it be hot or cold beverages, fresh fruits or sweet wines- This Ambrosia Icebox Cake is versatile enough to go well with many different choices on your menu.
Make-Ahead, Storing and Reheating
As a busy baker, I always appreciate when dessert recipes can be made ahead of time. This Ambrosia Icebox Cake recipe is perfect for just that! After making this delicious cake, you can store it in the refrigerator for up to 3 days. To keep it fresh and moist, cover the cake with plastic wrap or aluminum foil before placing it in the fridge.
If you need to freeze the cake, wrap each slice tightly in plastic wrap or aluminum foil, then place them in a sealable freezer bag. You can keep the cake slices in your freezer for up to 1 month.
When it’s time to serve the Ambrosia Icebox Cake again, simply remove it from the fridge and let it sit at room temperature for about 20-30 minutes. This will allow the flavors to meld together again and give you that amazing taste that you love.
If you prefer a warm dessert, simply heat each slice in the microwave for about 15-20 seconds. This way, you’ll have a warm and delicious dessert that’s perfect for any occasion!
Overall, this Ambrosia Icebox Cake recipe is not only easy to make but also incredibly convenient for busy bakers like me. Whether you decide to store it in your fridge or freezer, you can always enjoy this yummy dessert whenever you want!
Tips for Perfect Results
Creating a perfect Ambrosia Icebox Cake is no easy feat, but with a few expert tips, you can become the talk of the town with your mind-blowing dessert. Here are some helpful tips that will guarantee you come out with an end result that’s nothing short of spectacular.
First, ensure to keep everything cold—the bowl, beater or whisk, and heavy cream—before you start making the whipped cream. This will give it a good head start and make it stable enough to be used as a frosting.
It’s important to also use very fine cornstarch when dusting your ladyfingers for the cake, as this fine powder will prevent them from sticking together and ruining the structure of your cake layers.
If you want to get the best results with your Ambrosia Icebox Cake recipe, try using fresh mandarin orange segments and freshly squeezed oranges rather than canned oranges. This simple change really makes a huge difference in terms of taste and texture.
Another way to spice things up is by using sherry wine or pineapple juice instead of coconut milk in the recipe, adding subtle yet complementary flavors to the cake layers that elevate it to new heights.
Finally, for those who need to follow a gluten-free diet or prefer gluten-free desserts in general, consider substituting graham crackers with gluten-free cookies or crackers like Walkers Shortbread Festive Shapes for a holiday twist.
So there you have it! With these few tips, you’ll be well on your way to baking your own delectable ambrosia icebox cake that would surely get everyone asking for seconds. Bon appétit!
Bottom Line
In conclusion, the ambrosia icebox cake recipe will be a great addition to your dessert recipe collection. This recipe is easy to prepare, requires no oven or baking skills, and it’s a delicious summer treat that you can enjoy all year round. With fresh oranges and mandarin segments, coconut flakes and whipped cream, this dessert will take you on a tropical journey just like you’re sunbathing on a paradise island.
You’ll find the cake’s sweetness level just right, thanks to the use of powdered sugar and confectioner’s sugar. If you have dietary concerns, substitutions are possible for gluten-free options or fruits only. When making this delicious cake recipe, don’t forget that shortcuts are acceptable – instead of ladyfingers, for example, you could use graham crackers or butter shortbread cookies.
So get into your cooking mood now and try out this recipe to show off your hostess skills with an Ambrosia Icebox Cake at the next family gathering or barbecue party. Be sure to let us know how it turns out – we can’t wait to hear about it! Bon appétit!
Ambrosia Icebox Cake Recipe
Ingredients
- 1 1/2 cups sweetened flaked coconut
- 1 1/2 cups pineapple juice
- 6 large eggs, at room temperature
- 4 large egg yolks, at room temperature
- 1 1/3 cups sugar
- 4 tablespoons cornstarch
- 4 tablespoons unsalted butter, cold
- 2 tablespoons fresh lemon juice
- 1 pinch fine salt
- 3 oranges (or 1cup orange juice)
- 2 (15 ounce) cans mandarin orange segments, chopped
- 2 cups whipping cream
- 2 tablespoons confectioners' sugar
- 1 1/2 teaspoons orange extract
- 1/2 teaspoon vanilla extract
- 4 teaspoons sherry wine (optional)
- 4 dozen ladyfingers (or Italian style dunking cookies such as Stella d'oro Margherite)
Instructions
- Toast the coconut: Preheat oven 375°F Spread coconut in a thin layer in baking sheet. Bake for about 10 to 15 minutes until coconut is lightly toasted. Halfway through, remove sheet from oven and toss coconut to mix using a spatula. This is to ensure even toasting. Watch very carefully as coconut can toast quickly towards the end. Set aside to cool.
- Make the pineapple curd: Bring 1 cup pineapple juice to a simmer in a medium saucepan over medium heat. Whisk the eggs, egg yolks and sugar together in a medium bowl. Sprinkle in the cornstarch and mix well. Very slowly, a few tablespoons at a time, pour hot juice into egg mixture whisking constantly. Do not go too fast or the eggs will scramble. Return mixture to pan over medium heat and cook, stirring constantly, until it boils and coats back of a spoon. Continue cooking about 1 more minute. Remove from heat, stir in butter, lemon juice, salt and the remaining ½ cup pineapple juice. Place mixture into a small bowl set over ice to cool, stirring often, or place a piece of plastic wrap directly onto surface of curd and refrigerate to cool to room temperature.
- Make the orange cream: While pineapple curd is cooling, open the cans of mandarin oranges and reserve 6 tablespoons of the juice or syrup. Chop the segments from one full can plus half of the other can, or use your hands to break them into thirds. Set aside. Reserve remaining orange segments for another use.
- If using fresh oranges, finely grate the zest from 1 orange and reserve. Juice the rest of the oranges and set the juice aside.
- Whip cream, 1 teaspoon of orange extract, vanilla extract and confectioners' sugar together until stiff peaks form. Fold chopped mandarin oranges into cream.
- In a small bowl, combine orange juice, orange zest, reserved liquid from mandarin oranges, ½ teaspoon orange extract and sherry.
- Close up a 9 inch springform pan which should be at least 2 inches high (preferably 3 inches, or you can use a 10 inch springform). Arrange ladyfingers around the bottom of the pan so that there is a full even layer. Break the ladyfingers if necessary to plug any holes. Using a pastry brush, lightly brush ladyfingers with the sherry mixture. Place a little less than 1/3 of the pineapple mixture in the pan and use an offset spatula to make an even layer. Place a little less than 1/3 of the orange cream in the pan and use an offset spatula to make an even layer. Sprinkle about 1/3 of the toasted coconut on top of the orange cream layer. Arrange another layer of ladyfingers and brush lightly with sherry mixture. Continue layering in order given, ending with toasted coconut. Depending on the height of your springform you might have some extra curd and cream. Cover springform with plastic wrap, then with aluminum foil and refrigerate at least 8 hours, preferably overnight.
- To serve, carefully run a thin knife around the edge of the springform and release the ring. Cut into slices.
Your Own Notes
Nutrition
Recommended Recipes Just For You
None found

Steven is a chef by heritage, so it’s no wonder why baking is such a big part of who he is. To share his passion for all things sweet, he created cookiesncrepes.com. It’s the perfect platform to indulge in delicious treats, all with a sprinkle of his signature flare.